Annual canarygrass (Phalaris canariensis)
Also known as: Сanary grass, Shortspike canarygrass
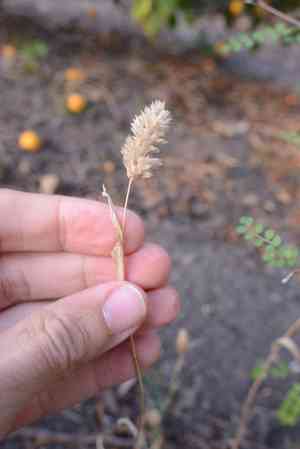
Annual canarygrass (*Phalaris canariensis*), originally from the Mediterranean, is commonly used as birdseed. In Mexico, it is traditionally used to prepare atole, a warm Mesoamerican drink. However, the seed hulls contain silica fibers, which can pose a health risk by potentially contributing to esophageal cancer.
In This Article
Attributes of Annual canarygrass
Lifespan
Annual
Plant Type
Grass
Plant Height
1.8 m
Spread
75 cm
Leaf Color
Green
Flower Size
1 cm to 2 cm
Flower Color
White Green
Images of Annual canarygrass

Quickly Identify Annual canarygrass
1
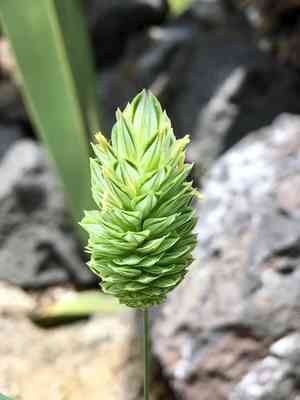
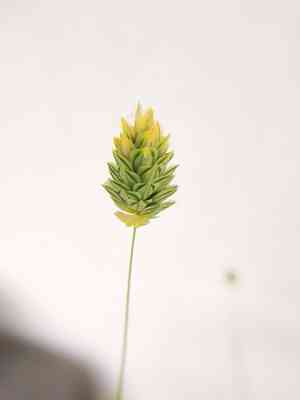
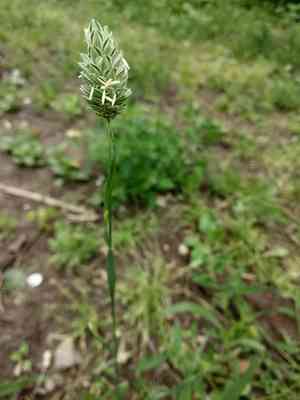
Canary grass can be identified by its erect, tufted growth, broad flat leaves, and distinctive oval flower heads that resemble small grains. It typically grows to a height of 30-100 cm.
Scientific Classification of Annual canarygrass
Phylum
Vascular plants
Class
Monocotyledons
Order
Poales
Family
Grass
Genus
Phalaris
Species
Annual canarygrass
Planting and Growing of Annual canarygrass
Care Difficulty
Easy
Watering Schedule
Every 4 days
Sunlight Requirements
Full sun
Sunshine Duration
6-10 hours
Ideal Temperature
65-75℉
Soil Type
Potting Mix, Peat Mix
Soil pH
6.5-7.5
Fertilizer Type
Balanced
Pruning Season
Spring, Summer
Pruning Area
Branches, Leaves
Pruning Frequency
2 times a year
Repotting Season
Spring
Pot Type
Plastic, Ceramic
 How to Water Annual canarygrass?
For Phalaris canariensis, watering should saturate the soil thoroughly. Water till excess drips out of the drainage holes, ensuring the roots are adequately moistened, promoting healthy growth.
What are the symptoms of an underwatered Annual canarygrass?
›
What should I do if my Annual canarygrass is not getting enough water?
›
What are the symptoms of an overwatered Annual canarygrass?
›
How to save an overwatered Annual canarygrass?
›
 What Are the Sunlight Requirements for Annual canarygrass?
Phalaris canariensis thrives best under full sun exposure, which means full daylight for at least 8 to 10 hours. Ideal light conditions contribute to efficient photosynthesis, robust growth, and high seed yield, ensuring the plant's vitality.
More About Sunlight Requirements Techniques→
What is the optimal light condition for Phalaris canariensis?
›
How can one achieve ideal lighting conditions?
›
What are the benefits of optimal lighting conditions?
›
 What Is the Ideal Temperature Range for Annual canarygrass?
The ideal temperature range for cultivating Phalaris canariensis is between 65°F and 75°F. Within this range, the plant is likely to experience optimal growth and vigor, as temperatures are warm enough to promote developmental processes without inducing heat stress. Providing these conditions will help ensure healthy germination, root development, and overall plant vitality.
 What Soil is Best for Annual canarygrass?
For optimal growth of Phalaris canariensis, ensure the soil allows for good drainage. Well-drained soil prevents waterlogging, which can lead to root rot, helping the plant to thrive. This plant benefits from soil rich in nutrients. High nutrient availability ensures robust growth, supporting strong stems and healthy foliage, crucial for its vibrant appearance. Maintaining consistent soil pH between 6.5 and 7.5 is crucial for this plant. A stable pH ensures proper nutrient uptake, leading to lush growth and resilience against diseases.
 How to Fertilize Annual canarygrass?
When fertilizing Phalaris canariensis, use about a quarter teaspoon of balanced liquid fertilizer per plant to ensure proper growth without overwhelming the roots with nutrients. Always dilute the fertilizer according to the manufacturer's instructions to avoid burning the plant.
 How to Prune Annual canarygrass?
Identify and remove any dead or diseased foliage first. This prevents the spread of disease and opens up the plant to more air circulation. Make clear, angled cuts close to the base of the affected area to encourage swift regrowth. Trim back slightly to maintain a tidy shape. Focus on removing excess growth that disrupts the plant’s natural form. Try to mimic the plant's natural growth patterns for the most aesthetically pleasing result. Trim back any overgrown areas to about a third of their length. This stimulates the plant to produce new shoots, making it fuller and more vibrant. It helps the plant dedicate energy to essential parts, thus increasing its growth rate and strength.
More About Pruning Techniques→
 How to Propagate Annual canarygrass plant?
1
Begin by filling seed trays with a moist, well-draining potting mix. Sow the seeds on the surface and lightly press them into the soil. Cover the seeds with a thin layer of the potting mix, ensuring they are not buried too deep.
2
Gently water the seeds using a fine mist to avoid dislodging them. Maintain consistent moisture in the soil, but avoid waterlogging, which can rot the seeds. Consider using a plastic cover to retain humidity.
3
Place the seed trays in a location with ample sunlight or under grow lights, maintaining a warm ambient temperature. Ensure the area is well-ventilated to reduce the risk of fungal diseases.
 How to Repot Annual canarygrass plant?
1
Phalaris canariensis should be repotted when it displays signs of outgrowing its current container, such as roots poking out of drainage holes or the soil drying out faster than usual. Ideally, repotting is done in early Spring or Summer when the plant is actively growing, ensuring a smoother transition with less stress.
2
Select a pot that is one size larger than the current one, with adequate drainage holes at the bottom. The larger pot allows the roots more space to grow, promoting healthier development. Ensure it's made of breathable material like terracotta, which helps regulate moisture and prevent root rot.
3
Opt for a well-draining, sandy soil mix enriched with organic matter, ensuring that excess water can easily escape, preventing waterlogging. This type of soil mimics the plant’s natural environment, aiding in nutrient absorption and reducing the risk of root diseases.


