How to Transplant Minor smartweed?
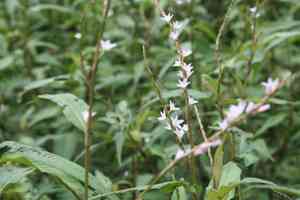
Minor smartweed flourishes when relocated from the revitalizing period of early spring through late spring, since the soil's warmth aids in root development. Place it in a brightly lit spot with soil that drains effectively. Limiting disruption guarantees the best possible growth.
What Preparations are Needed Before Transplanting Minor Smartweed?
What is the Ideal Time for Transplanting Minor Smartweed?
The prime period for relocating minor smartweed, an annual plant, spans from early to late spring. During this interval, soil temperatures are optimal, fostering robust root development and successful establishment. Transplanting at this time ensures healthier growth and enhanced resistance to pests and diseases.
How Much Space Should You Leave Between Minor Smartweed Plants?
When relocating minor smartweed, ensure a spacing of 18-24 inches (45-60 cm) between plants. This distance prevents competition and promotes adequate air circulation, which is vital for their well-being.
What is the Best Soil Mix for Minor Smartweed Transplanting?
For minor smartweed, utilize well-draining soil composed of loam and organic matter. Incorporating compost or a balanced base fertilizer, such as 10-10-10 (N-P-K), will supply essential nutrients and encourage vigorous growth.
Where Should You Relocate Your Minor Smartweed?
Select a sunny spot for transplanting minor smartweed. This plant thrives best in full sunlight, meaning it requires at least 6-8 hours of direct sun daily. Ample sunlight is crucial for strong growth.
What Equipments Should You Prepare Before Transplantation Minor Smartweed?
Gardening Gloves
To safeguard your hands while handling soil and plants.
Hand Trowel
For excavating small holes and manipulating soil.
Shovel or Spade
For digging larger holes and lifting plants from the ground.
Watering Can
To hydrate the plant before and after relocation.
Garden Fork
To loosen and aerate the soil surrounding the plant.
Pruning Shears
To trim any damaged roots or foliage.
How Do You Remove Minor Smartweed from the Soil?
How Do You Remove Minor Smartweed from the Soil?
From Ground: First, moisten the minor smartweed plant's soil. Then, excavate a wide trench around the plant using a shovel or spade, ensuring the root ball remains intact. Carefully work the spade beneath the root ball to lift the plant from its original spot.From Pot: Thoroughly water the plant. Gently tap the pot's sides to loosen the soil. Turn the pot sideways, and carefully slide the plant out, supporting the root ball with your hands. If necessary, gently separate the roots from the potting mix.From Seedling Tray: Water the seedling tray to soften the soil. Use a hand trowel or your fingers to lift each seedling, making sure to retain as much soil around the roots as possible. Handle seedlings by their leaves, not their delicate stems.
Step-by-Step Guide for Transplanting Minor Smartweed
Prep Hole
Dig a hole at your chosen site for minor smartweed, making it twice as wide and as deep as the plant's root ball.
Add Organic Matter
Improve the soil in the hole by mixing in compost or other organic material to support healthy root development.
Place Plant
Position the minor smartweed plant into the hole, ensuring the top of the root ball is level with the surrounding soil surface.
Fill Hole
Backfill around the plant with soil, gently pressing down to eliminate air pockets without over-compacting the soil.
Water Plant
Thoroughly water the minor smartweed plant to help settle the soil and remove any remaining air pockets.
How Do You Care For Minor Smartweed After Transplanting?
Watering
Keep the soil around the minor smartweed consistently moist, but not waterlogged, for the initial weeks post-transplant to aid in root establishment.
Mulching
Apply a layer of mulch around the plant to help retain moisture, suppress weeds, and regulate soil temperature.
Monitoring
Regularly inspect the minor smartweed plant for signs of stress, such as wilting or yellowing leaves, and take appropriate action if necessary.
Protection
If transplanting in an area with intense sun or strong winds, consider providing temporary shade or windbreaks until the plant is established.
Troubleshooting Common Issues with Minor Smartweed Transplantation.
When is the best time to transplant minor smartweed?
The optimal period for relocating minor smartweed is from early spring to late spring.
What spacing should I use when transplanting minor smartweed?
Space the plants 18-24 inches (45-60 cm) apart for ideal growth.
How do I prepare the soil for transplanting minor smartweed?
Ensure the soil is well-drained and enriched with compost before relocating minor smartweed.
How should I water minor smartweed after transplanting?
Water thoroughly immediately after transplanting and maintain consistent soil moisture until established.
What should I do if minor smartweed wilts after transplanting?
Ensure the plant receives sufficient water and is not exposed to direct, intense sunlight.
How deep should I plant minor smartweed?
Plant minor smartweed at the same depth it was growing in its original container.
What should I do if leaves turn yellow after transplanting minor smartweed?
Check soil moisture levels and avoid overwatering; amend soil with compost if necessary.
How do I avoid transplant shock when moving minor smartweed?
Transplant on a cool, cloudy day and minimize root disturbance.
Should I fertilize minor smartweed immediately after transplanting?
Wait a few weeks post-transplant before applying a balanced fertilizer.
How can I protect minor smartweed from pests after transplanting?
Monitor regularly and use organic insecticidal soap or neem oil if pests are observed.



