How to Propagate Minor smartweed?
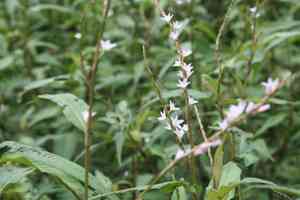
Minor smartweed flourishes in damp, adequately drained earth and receives either partial or complete sun exposure. Reproduction via seeding entails utilizing newly harvested seeds, which ought to be dispersed sparsely across the soil's top layer and gently compressed. Verify that the soil remains uniformly hydrated, yet prevent it from becoming waterlogged. Periodically inspect for infestations and ailments, which can be addressed using natural remedies. This technique fosters vigorous development and preserves genetic variation.
When Is the Optimal Time to Propagate Minor Smartweed?
Propagation Type
Sowing
Propagation Season
Spring
What Equipment Is Used for Minor Smartweed Propagation?
Seed Tray or Seedling Flat
Utilized for planting seeds in a regulated setting. It allows for proper spacing and soil depth essential for minor smartweed seeds to sprout and establish robust root systems.
Seed Starting Mix
A well-draining, sterile substrate helps prevent diseases and supplies the necessary nutrients and aeration for minor smartweed seedlings.
Mister or Spray Bottle
Ensures gentle and uniform hydration of the seeds and young plants, which is crucial to prevent soil displacement and encourage consistent germination of minor smartweed.
Humidity Dome
Placed over the seed tray to maintain high moisture levels required for the germination of minor smartweed and to provide a warm environment.
Heat Mat
Delivers warmth from below to seed trays, boosting the germination rate of minor smartweed seeds by keeping the soil at an ideal temperature.
Label Stakes or Plant Tags
Used to mark the planting date and the species (e.g., minor smartweed) in the seed trays to avoid confusion and monitor growth progress.
Small Trowel or Dibber
Useful for creating small holes or grooves in the seed starting mix to correctly position minor smartweed seeds at the appropriate depth.
Fine Mesh Sieve
Used for covering the sown seeds with a thin layer of soil or vermiculite, which is vital for the delicate seeds of minor smartweed.
Propagation Trays with Cells
Helps achieve consistent growth by allowing individual minor smartweed seedlings to develop without root entanglement, making transplanting easier and less stressful for the plants.
How to Propagate Minor Smartweed?
Propagation Type
Easy
How to Care for Your Newly Propagated Minor Smartweed?
How to Care for Your Newly Propagated Minor Smartweed?
Once the minor smartweed seedlings have developed a few sets of true leaves, thin out the weaker plants to allow room for healthy growth. Continue watering consistently, ensuring the soil remains moist but not waterlogged. Fertilize lightly with a balanced, water-soluble fertilizer every few weeks to support robust growth. Protect young plants from pests and provide partial shade to prevent scorching. Regularly check for and manage common issues such as fungal infections or insect infestations to keep minor smartweed healthy and flourishing.
Common Mistakes to Avoid When Propagating Minor Smartweed
Overwatering
Excess moisture can lead to root rot, hindering successful propagation and harming the plant's health.
Underwatering
Insufficient moisture can cause the cuttings to dry out and fail to develop roots.
Incorrect Soil
Using soil that doesn't drain well can lead to waterlogged conditions, while overly sandy soil can dry out too quickly.
Improper Lighting
Lack of adequate light can hinder the growth of new roots and shoots, while direct sunlight can scorch young plants.
Failure to Maintain Humidity
Insufficient humidity around young cuttings can cause them to desiccate and fail to thrive.
Using Weak or Diseased Cuttings
Cuttings taken from unhealthy plants are less likely to root and grow successfully.
Tips For Propagating Minor Smartweed
Moderate Watering
Water regularly but ensure the soil is well-draining to prevent root rot.
Selection of Healthy Cuttings
Choose strong, healthy stems for cuttings to increase the likelihood of successful propagation.
Appropriate Soil Mix
Use a well-balanced potting mix that retains moisture yet drains well, such as a mix of peat and perlite.
Controlled Lighting
Provide bright, indirect light to stimulate growth without causing stress or damage.
Maintaining Humidity
Keep cuttings in a humid environment, using a plastic cover or misting regularly to prevent desiccation.
Proper Cutting Technique
Make clean cuts just below a node and remove the lower leaves to encourage root development.



