How to Transplant Early paspalum?
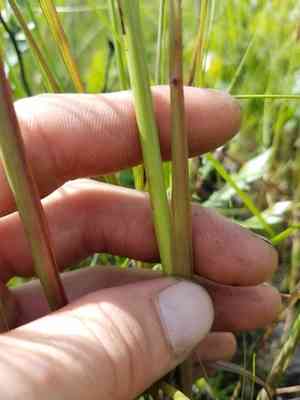
Early paspalum flourishes when relocated during the pleasant core of spring. Select a bright spot featuring damp, adequately draining earth. Guaranteeing these prerequisites can substantially enhance successful integration.
What Preparations are Needed Before Transplanting Early Paspalum?
What is the Ideal Time for Transplanting Early Paspalum?
The best period for relocating early paspalum is during the peak of spring and late spring. Moving them at this time takes advantage of mild temperatures and increased soil moisture, which aids root establishment. By selecting this timeframe, you promote better plant vigor and development, reducing transplant stress and maximizing successful adaptation to the new environment.
How Much Space Should You Leave Between Early Paspalum Plants?
When moving early paspalum, ensure each plant is spaced 18-24 inches (45-60 cm) apart. This provides ample room for their growth and flourishing.
What is the Best Soil Mix for Early Paspalum Transplanting?
Prepare the ground for early paspalum by using a well-draining mixture, ideally loamy or sandy. Enhance it with organic compost or a balanced base fertilizer to supply essential nutrients.
Where Should You Relocate Your Early Paspalum?
Select a site that receives full sunlight, at least 6-8 hours daily. This will help early paspalum grow healthily and robustly.
What Equipments Should You Prepare Before Transplantation Early Paspalum?
Gardening Gloves
To safeguard your hands while handling soil and plants.
Trowel
For excavating the plant from a container or seedling tray.
Shovel or Spade
For digging the new hole in the ground and extracting the plant from its original spot.
Garden Fork
To gently loosen the soil surrounding the plant.
Watering Can or Hose
To hydrate the plant before and after relocation.
Organic Mulch
To cover the soil around the plant post-transplant and retain moisture.
Stakes and Ties
To provide support for the plant, if needed, after transplanting.
How Do You Remove Early Paspalum from the Soil?
How Do You Remove Early Paspalum from the Soil?
From Ground: First, irrigate the early paspalum plant to moisten the soil. Then, dig a wide trench around the plant using a shovel or spade, ensuring the plant's root ball remains intact. Carefully work the spade beneath the root ball to lift the plant from its initial location.From Pot: Water the early paspalum plant thoroughly before extraction. Gently tilt the pot sideways and tap the base to dislodge the plant. Grasp the plant at its base and carefully pull it out, holding it by the root ball.From Seedling Tray: Water the seedlings well before removal. Use a trowel or your fingers to gently lift the seedlings, making sure to support the root ball to prevent damage.
Step-by-Step Guide for Transplanting Early Paspalum
Digging the Hole
Excavate a hole in the chosen spot that is twice as wide and as deep as the early paspalum's root ball.
Prep the Hole
Loosen the soil at the base of the hole and incorporate some compost to enrich it.
Placing the Plant
Position the early paspalum in the center of the hole, ensuring it stands upright and the top of the root ball is level with the surrounding soil.
Backfilling
Gently refill the hole with soil, pressing down lightly to eliminate air pockets. Be careful not to over-compact the soil.
Watering
Thoroughly water the plant after transplanting to help settle the soil around the root ball.
How Do You Care For Early Paspalum After Transplanting?
Watering
Keep the soil around the early paspalum consistently damp, but not waterlogged, for the initial weeks post-transplant to aid in strong root establishment.
Mulching
Apply a layer of organic mulch around the plant's base to retain moisture and regulate soil temperature.
Support
If the early paspalum requires support, install stakes and ties gently to help the plant remain upright until it establishes itself.
Monitoring
Observe the early paspalum closely for the first few weeks, checking for any indications of transplant shock such as wilting or yellowing leaves and adjusting care as necessary.
Troubleshooting Common Issues with Early Paspalum Transplantation.
When is the ideal time to transplant early paspalum?
Mid to late spring is optimal for relocating early paspalum to ensure prime growth and development.
How should I prepare the soil for transplanting early paspalum?
Loosen the soil to a depth of 10-12 inches (25-30 cm) and mix in compost for nutrients.
How far apart should early paspalum plants be spaced?
Space early paspalum plants 18-24 inches (46-61 cm) apart to allow ample room for growth.
What should I look for when choosing a spot to transplant early paspalum?
Select a sunny location with well-drained soil to ensure the healthy growth of early paspalum.
How do I avoid transplant shock in early paspalum?
Water thoroughly before and after transplanting, and transplant on a calm, cloudy day.
Whatâs the right depth for transplanting early paspalum?
Plant early paspalum at the same depth it was growing in its original container to avoid stress.
How do I ensure proper watering after transplanting early paspalum?
Keep the soil consistently moist but not waterlogged, especially during the first few weeks.
Should I fertilize early paspalum immediately after transplanting?
Wait a few weeks before fertilizing early paspalum to allow the roots to establish in the new soil.
What common pests should I watch out for after transplanting early paspalum?
Look out for aphids and caterpillars, and use organic insecticides if necessary to protect early paspalum.
Why are my newly transplanted early paspalum plants wilting?
Wilting can be due to transplant shock, improper watering, or too much sun; adjust care accordingly.



