How to Transplant Broadleaf panicum?
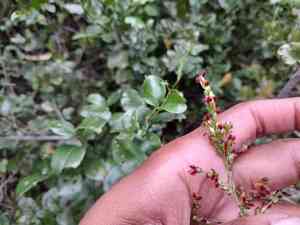
The optimal period for transplanting broadleaf panicum spans from the conclusion of spring to mid-summer, as the elevated temperatures facilitate root development. Choose a location bathed in sunlight with soil that drains effectively; moderate irrigation after the move assists in its adjustment.
What Preparations are Needed Before Transplanting Broadleaf Panicum?
What is the Ideal Time for Transplanting Broadleaf Panicum?
The optimal period for relocating broadleaf panicum spans from late spring through mid-summer. This timeframe provides broadleaf panicum with sufficient warmth and consistent growth patterns, fostering an excellent environment for root establishment. Transplanting during this sweet spot promotes robust health and strong development, enabling broadleaf panicum to thrive in its new location, supported by warm soil and extended daylight hours.
How Much Space Should You Leave Between Broadleaf Panicum Plants?
When preparing to rehome broadleaf panicum, ensure each plant has adequate room. Aim for a sunny location and space them 24-36 inches (61-91 cm) apart. This spacing allows each plant to flourish without competing with its neighbors!
What is the Best Soil Mix for Broadleaf Panicum Transplanting?
For broadleaf panicum, prepare a well-draining soil bed. Begin with a loamy base and enrich it with compost or a balanced, slow-release fertilizer. This will supply broadleaf panicum with the necessary nutrients for immediate vigorous growth!
Where Should You Relocate Your Broadleaf Panicum?
Choose a sunny spot for broadleaf panicum, as it thrives in full sunlight. A location receiving at least 6 hours of direct sun daily will ensure your broadleaf panicum has the energy it needs to grow strong and full!
What Equipments Should You Prepare Before Transplantation Broadleaf Panicum?
Gardening Gloves
To safeguard your hands while handling soil and plants.
Spade or Shovel
For excavating broadleaf panicum and preparing the new planting site.
Garden Fork
To loosen the soil around broadleaf panicum when extracting it from the ground.
Watering Can or Hose
To hydrate broadleaf panicum prior to and following transplantation.
Pruners or Scissors
For trimming damaged roots or foliage before the transplant process.
Wheelbarrow or Garden Cart
To move broadleaf panicum and soil to and from the new planting area.
Soil Amendment
Such as compost, to enrich the new planting site (if required).
Mulch
To help maintain soil moisture after the transplant.
Plant Labels or Markers
To identify broadleaf panicum in its new spot, if necessary.
How Do You Remove Broadleaf Panicum from the Soil?
How Do You Remove Broadleaf Panicum from the Soil?
From Ground: First, water broadleaf panicum to moisten the soil. Use a garden fork to gently loosen the soil surrounding the plant. Next, dig a wide trench around broadleaf panicum with a shovel or spade, ensuring it's wide enough to avoid root damage. Carefully slide the spade beneath the root ball to lift broadleaf panicum from its original position.From Pot: Water broadleaf panicum in its container to make the soil more pliable. Tilt the pot sideways and gently tap its sides to loosen the root ball. Hold the plant's base and carefully ease it out, supporting the root ball to prevent it from breaking apart.From Seedling Tray: Lightly water the seedlings to dampen the soil. Use pruners to cut individual sections if the tray isn't pre-divided. Carefully remove broadleaf panicum from the tray by supporting the stem's base and roots, taking care not to harm the delicate root system.
Step-by-Step Guide for Transplanting Broadleaf Panicum
Preparation of New Site
Choose the new location considering ease of maintenance and spacing from other plants. Prepare the hole, making it twice as wide as the root ball and of equal depth.
Root Ball Care
Gently inspect broadleaf panicum's root ball, trimming any damaged or circling roots to encourage healthy development.
Transplanting
Position broadleaf panicum in the center of the prepared hole. The top of the root ball should be level with the surrounding ground. Backfill around the root ball with soil, pressing down gently to remove air pockets.
Stabilizing the broadleaf panicum
After backfilling, create a soil ridge around the hole's circumference to form a basin, which will help direct water to the plant's roots.
Watering
Water broadleaf panicum thoroughly after planting until the surrounding soil is moistened. This will help settle the soil around the roots.
How Do You Care For Broadleaf Panicum After Transplanting?
Regular Watering
Water broadleaf panicum deeply and consistently for the initial few weeks, until the plant is established. Monitor soil moisture to ensure it remains adequately moist, but avoid overwatering.
Mulching
Apply a layer of mulch around the base of broadleaf panicum to help retain moisture, regulate soil temperature, and reduce weed growth.
Observation for Pests or Diseases
Keep a close watch on your broadleaf panicum for any signs of pests or diseases, and take prompt action if issues arise.
Gentle Fertilization
Consider applying a mild fertilizer after a few weeks to provide extra nutrients and support growth, unless sufficient nutrients were already added via soil amendments.
Support (if needed)
Provide support structures for broadleaf panicum if it is a tall variety or susceptible to wind damage. Use stakes and ties loosely enough to allow some movement, yet firm enough to support the plant.
Troubleshooting Common Issues with Broadleaf Panicum Transplantation.
When is the best time of year to transplant broadleaf panicum?
Transplant broadleaf panicum during its peak growth period, from late spring to mid-summer, to encourage robust root development.
How much space does broadleaf panicum need when transplanting?
Allow broadleaf panicum ample room to thrive by spacing transplants 24-36 inches (61-91 cm) apart.
What soil conditions favor broadleaf panicum during transplantation?
Aim for well-draining, fertile soil with a pH of 5.5 to 7.0 for optimal results when transplanting broadleaf panicum.
How do I prepare broadleaf panicum for transplant?
Before transplanting, gently loosen broadleaf panicum's root ball to encourage outward growth into the new soil.
How deep should I plant broadleaf panicum when transplanting?
Plant broadleaf panicum at its original growing depth, typically with the crown at soil level.
Why are my transplanted broadleaf panicum wilting?
Wilting post-transplant is common; ensure adequate water and protection from intense sun while broadleaf panicum acclimates to its new spot.
Can I fertilize broadleaf panicum right after transplanting?
Wait a few weeks before fertilizing to allow broadleaf panicum to establish roots. Then use a balanced, slow-release fertilizer.
Should I water broadleaf panicum immediately after transplanting?
Yes! Water broadleaf panicum thoroughly to settle the soil around the roots and eliminate air pockets.
What should I do if my transplanted broadleaf panicum isn't growing?
Be patient; broadleaf panicum may experience transplant shock. Maintain consistent watering and await signs of new growth after a few weeks.
How can I protect newly transplanted broadleaf panicum from pests?
Monitor your broadleaf panicum for early signs of pests and promptly apply appropriate treatments recommended for broadleaf panicum.



