How to Transplant Floating arum?
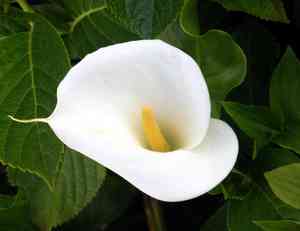
The ideal period for transplanting floating arum extends from the latter part of spring into early summer, facilitating robust development. Place it in an aquatic environment with partial shade, underscoring its preference for moist root systems and a cool substrate.
What Preparations are Needed Before Transplanting Floating Arum?
What is the Ideal Time for Transplanting Floating Arum?
Moving floating arum as winter's cold recedes and warmth returns, typically from late spring to early summer, is optimal. This period allows the soil to warm, promoting root development, while avoiding excessive heat that could stress the plant. This timing ensures the plant has ample opportunity to establish itself and benefit from the entire growing season. Additionally, this season is characterized by abundant natural growth, making it the most suitable choice for your plants!
How Much Space Should You Leave Between Floating Arum Plants?
Excellent! Let's begin with the placement of floating arum during transplantation. Ideally, you should maintain a distance of approximately 2-3 feet (60-90 cm) between each plant. This spacing will provide floating arum with sufficient room to grow without competing for resources.
What is the Best Soil Mix for Floating Arum Transplanting?
Regarding soil, floating arum prefers a damp, nutrient-rich soil type. To prepare, incorporate a generous amount of compost or organic material to establish a fertile base. Apply a slow-release fertilizer to aid floating arum in settling and developing robustly.
Where Should You Relocate Your Floating Arum?
Now, concerning the location... Floating arum thrives best with partial to full sun exposure. This means you should select a spot that receives direct sunlight but also experiences some shaded periods throughout the day. Sunlight makes floating arum happy!
What Equipments Should You Prepare Before Transplantation Floating Arum?
Gardening Gloves
To safeguard your hands while handling soil and the floating arum plant.
Gardening Shovel or Spade
These implements will assist you in excavating the necessary hole and safely extracting the floating arum plant from its original spot.
Garden Pruning Shears
For trimming roots if required.
A Wheelbarrow
To transport the floating arum plant to its new site.
Organic Matter (Compost/Sphagnum Moss)
To blend into the planting hole to help retain soil moisture and supply nutrients.
How Do You Remove Floating Arum from the Soil?
How Do You Remove Floating Arum from the Soil?
From Ground: Start by hydrating the floating arum plant to moisten the soil, which will facilitate easier removal without harming its root system. Next, use your garden shovel or spade to dig a substantial trench around the plant, ensuring the root ball remains intact. Gently work the spade beneath the root ball to lift the plant from the ground.From Pot: If it's a potted floating arum plant, begin by carefully tilting the pot onto its side. Lightly tap all around the pot's perimeter to help loosen the soil before sliding the plant out. Keep the root ball undisturbed.From a Seedling Tray: If the floating arum plant is a seedling, dampen the soil before transplanting to loosen it. Then, carefully lift the seedling using a small shovel or even a dinner fork, taking care not to damage the roots.
Step-by-Step Guide for Transplanting Floating Arum
Prep the Hole
Excavate a hole twice the width of the root ball and of an equivalent depth. For optimal growth of the floating arum plant, the root ball should not be positioned deeper than its original placement.
Add Organic Matter
Incorporate organic material such as compost or sphagnum moss into the hole to assist the plant in establishing itself in its new environment.
Insert the Plant
Place the floating arum plant in the center of the hole, ensuring it stands upright. Spread the roots out within the hole.
Backfill the Hole
Refill the hole with soil, leaving the top of the root ball slightly above ground level. Gently press the soil around the plant's base.
Water Thoroughly
Water the plant extensively to settle the soil around the roots. Ensure water does not accumulate on the surface.
How Do You Care For Floating Arum After Transplanting?
Water Requirements
Ensure the soil around the floating arum remains consistently moist for the initial few weeks post-transplant. Avoid excessive watering to prevent root rot.
Monitoring Growth
Observe the floating arum plant's development; anticipate some transplant shock, indicated by wilting and yellowing leaves. However, with proper care, the plant should recover.
Pruning
Dead or decaying leaves can be trimmed to enable the floating arum plant to direct its energy towards new growth.
Protection
It's also important to note that floating arum plants prefer warm climates and can be susceptible to severe frost. If you reside in a frost-prone region, consider covering the plant with a breathable fabric on particularly cold days.
Troubleshooting Common Issues with Floating Arum Transplantation.
When is the ideal season to transplant floating arum?
The perfect time to transplant floating arum is during late summer to early fall (S3-S4). It offers optimal conditions for root development.
What should be the ideal spacing when transplanting floating arum?
When transplanting floating arum, ensure you space them 2-3 feet (around 60-90 cm) apart. This ensures good air circulation and optimal growth.
What size of pot or container is best for transplanting floating arum?
Choose a container that is wide and deep enough to comfortably accommodate the root system of floating arum, ideally 12-16 inches (30-40 cm) in diameter.
How much water does floating arum need after transplanting?
Floating arum prefers staying moist. After transplanting, keep the soil consistently damp until you notice new growth - a sign the plant has established.
What type of soil is best for transplanting floating arum?
Floating arum thrives best in rich, well-draining soil. If your soil packs tightly or drains poorly, improve it with organic matter like compost.
How much sunlight does floating arum need after transplanting?
Floating arum enjoys full sun to partial shade. After transplanting, make sure the plant receives at least 6 hours of sunlight per day.
Why are my transplanted floating arum leaves turning brown?
Brown leaves might be due to underwatering, sunburn, or shock from transplanting. Keep the soil moist and the plant in a suitable sunny location.
Should I fertilize floating arum immediately after transplanting?
Avoid fertilizing floating arum immediately after transplanting as it could stress the plant. Wait until you see new growth before introducing a balanced fertilizer.
Can I prune floating arum when transplanting?
During transplanting, remove any dead or damaged leaves, but avoid excessive pruning. The plant needs a good amount of foliage to recover from the transplant.
How to care for floating arum immediately after transplanting?
Supreme care involves maintaining consistent soil moisture, providing adequate sunlight, and monitoring new growth. Shield the transplanted floating arum from extreme weather conditions.



