How to Transplant Coastal Pricklypear?
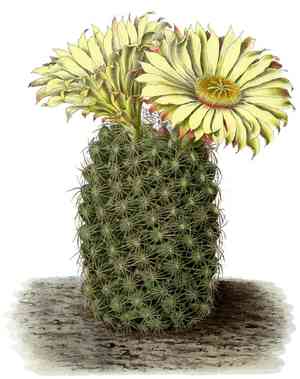
The optimal period for relocating coastal Pricklypear is when conditions are most favorable for its integration—from early to mid-spring, when temperate weather aids in root development. Place coastal Pricklypear in a bright spot with soil that drains effectively. A gentle caution: exercise prudence during handling to prevent contact with spines!
What Preparations are Needed Before Transplanting Coastal Pricklypear?
What is the Ideal Time for Transplanting Coastal Pricklypear?
The perfect time for relocating coastal Pricklypear is during the transition from early to mid-spring. This period allows coastal Pricklypear to establish its root system prior to the summer heat, promoting optimal development. Moving coastal Pricklypear at this time enhances its resilience for the upcoming warm season, ensuring a smooth adjustment to thrive in your garden. Opting for this season benefits the plant with mild temperatures and increased moisture, which encourages root growth. Combining favorable weather with this crucial transplanting window sets coastal Pricklypear on a path to robust health.
How Much Space Should You Leave Between Coastal Pricklypear Plants?
Let's provide our coastal Pricklypear ample room to expand and flourish! When transplanting, remember to maintain a separation of approximately 3-5 feet (0.9-1.5 meters) between each specimen. This helps them achieve their full growth potential.
What is the Best Soil Mix for Coastal Pricklypear Transplanting?
For our coastal Pricklypear, well-draining soil is essential. I suggest a sandy or rocky soil type. Before transplanting, enrich the soil with a slow-release base fertilizer. This will create an ideal environment for our plant to thrive!
Where Should You Relocate Your Coastal Pricklypear?
The coastal Pricklypear thrives in sunlight! Select a spot where the plant can receive full sun exposure for at least 6 hours daily. This is vital for a happy, healthy coastal Pricklypear. Remember, more sun is always better!
What Equipments Should You Prepare Before Transplantation Coastal Pricklypear?
Gardening Gloves
To safeguard your hands when handling the spiny coastal Pricklypear plant.
Gardening Shovel
To excavate the planting hole for your coastal Pricklypear plant and extract it from its original spot.
Pruning Shears
These will be utilized to trim any damaged parts or excessive growth from the plant.
Wheelbarrow or Tarp
For transporting the plant without causing harm, especially if it's large.
Watering Can or Hose
To hydrate the coastal Pricklypear plant during the various phases of the transplanting process.
How Do You Remove Coastal Pricklypear from the Soil?
How Do You Remove Coastal Pricklypear from the Soil?
From Ground: First, put on your gardening gloves and gently brush off any loose soil from the coastal Pricklypear plant. Using your gardening shovel, dig a wide trench around it, ensuring the root ball remains intact. Slide the shovel beneath the root ball and carefully lift the plant from the ground.From Pot: If your coastal Pricklypear plant is in a container, place your hand on the soil surface with the plant stem between your fingers. Gradually invert the pot while supporting the plant and allow it to slide out. Be careful not to harm the root ball during this process.From Seedling Tray: For smaller plants, apply gentle pressure to the bottom of the cell while holding the coastal Pricklypear plant by its leaves. It should then pop out, ready for transfer into the ground.
Step-by-Step Guide for Transplanting Coastal Pricklypear
Preparation
Fill your wheelbarrow or tarp with ample water to hydrate the roots of your coastal Pricklypear plant before transplanting.
Digging
Excavate a hole that is equally deep but twice as wide as the coastal Pricklypear plant's root ball.
Placement
Position your coastal Pricklypear plant into the hole, ensuring it is perfectly upright, and spread its roots within the hole.
Backfilling
Refill the hole with soil, gently compacting it around the base of the coastal Pricklypear plant.
Watering
Water the coastal Pricklypear plant thoroughly immediately after planting and continue to do so regularly in the weeks following transplanting.
How Do You Care For Coastal Pricklypear After Transplanting?
Monitoring
Closely observe the development of your coastal Pricklypear plant. It may take some time to adapt to its new environment and show signs of growth.
Pruning
Use your pruning shears to remove any parts of the plant that are struggling or dying due to transplant shock. This will allow your plant to direct energy towards new growth.
Watering
Water the coastal Pricklypear plant consistently, but be cautious not to overwater. Excessive water can lead to root rot. To prevent this, let the topsoil of the coastal Pricklypear plant dry out between waterings.
Pest/Disease Control
Regularly inspect your coastal Pricklypear plant for pests and indications of disease. If anything unusual is noticed, consider consulting an expert or employing appropriate plant disease management techniques.
Troubleshooting Common Issues with Coastal Pricklypear Transplantation.
When is the right season to transplant coastal Pricklypear?
The ideal moment to replant coastal Pricklypear is during the S1-S2 seasons. This provides the plant with sufficient time to establish its roots before encountering harsh weather conditions.
What's the space requirement between each coastal Pricklypear?
To ensure adequate growth room, maintain an approximate distance of about 3-5 feet (0.9-1.5 meters) between each transplanted coastal Pricklypear.
How can I prepare the new location for coastal Pricklypear transplanting?
Choose a sunny spot, ensure the soil drains well, and enrich it with organic matter, if necessary. Dig a hole twice as wide and as deep as the root ball of coastal Pricklypear.
How should I handle coastal Pricklypear during the transplant?
Wear protective gloves to avoid the spines and handle coastal Pricklypear carefully by the root ball, not the stem or cactus pads, to minimize damage.
How can I ensure the survival of coastal Pricklypear after transplanting?
Water it lightly immediately after transplanting. From then on, water it weekly. However, reduce watering during winter months to prevent rotting.
What if coastal Pricklypear shows signs of wilt after transplant?
Coastal Pricklypear can experience transplant shock, which is temporary. Keep the plant in indirect light, maintain proper watering, and it should recover within a few weeks.
What is the ideal depth at which coastal Pricklypear should be planted?
Plant coastal Pricklypear at the same depth it was previously growing. Too deep can smother the plant, and too shallow might expose the roots.
What should I do if the leaves of coastal Pricklypear turn yellow?
Yellow leaves could indicate waterlogged soil. Ensure the soil has good drainage. Reduce frequency of watering in winter and during rainy season.
How should I nourish coastal Pricklypear after transplanting?
You don't need to feed coastal Pricklypear immediately after transplanting. Once it's established, feed it with a low-nitrogen fertilizer in early Spring.
Should I prune coastal Pricklypear after transplanting?
Pruning coastal Pricklypear isn't strictly necessary post-transplant. However, if damaged or diseased sections exist, prune them off to reduce stress on the plant.



