How to Transplant Nivenia levynsiae?
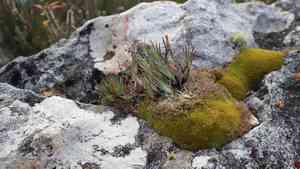
Nivenia levynsiae flourishes most effectively when relocated from late spring to early summer, benefiting from mild temperatures and steady hydration. Select a bright, adequately drained spot for peak development. Verify that the soil pH is mildly acidic to neutral for the most robust transplant.
What Preparations are Needed Before Transplanting Nivenia Levynsiae?
What is the Ideal Time for Transplanting Nivenia Levynsiae?
Nivenia levynsiae should ideally be moved in late spring to early summer. During this period, the soil is warm, which promotes root development. Additionally, the plant experiences less heat stress compared to mid-summer. Relocating at this time encourages better growth and blooming, ensuring a healthy start in its new spot.
How Much Space Should You Leave Between Nivenia Levynsiae Plants?
Nivenia levynsiae should be spaced 12-18 inches (30-45 cm) apart to allow for proper development and air circulation. This will ensure each plant has ample room to flourish without overcrowding.
What is the Best Soil Mix for Nivenia Levynsiae Transplanting?
Prepare well-draining soil mixed with organic material like compost. A balanced base fertilizer, such as a 10-10-10 (N-P-K) ratio, should be incorporated to provide essential nutrients for nivenia levynsiae.
Where Should You Relocate Your Nivenia Levynsiae?
Nivenia levynsiae thrives best in full sunlight. Choose a location that receives at least 6-8 hours of direct sun daily for optimal growth and flowering.
What Equipments Should You Prepare Before Transplantation Nivenia Levynsiae?
Gardening Gloves
To protect your hands while working with the soil and plant material.
Trowel or Shovel
For excavating holes and trenches.
Spade
To assist with lifting the plant from its original position.
Watering Can or Hose
For keeping the soil hydrated during the transplanting process.
Compost or Mulch
To enhance soil quality and help retain moisture.
Stake and Twine
For providing support to the newly transplanted nivenia levynsiae plant.
How Do You Remove Nivenia Levynsiae from the Soil?
How Do You Remove Nivenia Levynsiae from the Soil?
From Ground: First, hydrate the nivenia levynsiae plant to moisten the soil. Then, dig a wide trench around the plant using a shovel or spade, ensuring the plant's root ball remains intact. Carefully work the spade under the root ball to lift the plant from its original location.From Pot: Water the nivenia levynsiae plant thoroughly before removal. Gently tap the sides of the pot to loosen the soil. Hold the base of the plant and carefully slide it out, keeping the root ball intact.From Seedling Tray: Water the nivenia levynsiae seedlings to make extraction easier. Use a small trowel or your fingers to lift the seedlings by holding onto one of the leaves (not the stem) and gently lift from the tray.
Step-by-Step Guide for Transplanting Nivenia Levynsiae
Site Preparation
Prepare the chosen location by ensuring it's well-drained and has the appropriate soil type. Remove any weeds or debris from the area.
Digging the Hole
Excavate a hole that's twice as wide and the same depth as the root ball of the nivenia levynsiae plant.
Planting
Place the nivenia levynsiae plant into the hole, ensuring it's at the same depth as it was in its previous spot. Fill the hole with soil, gently pressing it down to eliminate air pockets.
Watering
Water the newly transplanted nivenia levynsiae plant thoroughly to help settle the soil around the roots.
Adding Mulch
Apply a layer of compost or mulch around the base of the plant to help retain moisture and prevent weeds.
Staking
If necessary, provide support to the nivenia levynsiae plant by inserting a stake into the ground and tying the plant gently with twine.
How Do You Care For Nivenia Levynsiae After Transplanting?
Watering
Keep the soil around the nivenia levynsiae consistently moist, but not waterlogged, for the first few weeks after transplanting to help establish strong roots.
Monitoring
Keep an eye on the nivenia levynsiae plant for any signs of stress, such as wilting or yellowing leaves, and adjust care as needed.
Fertilizing
After a few weeks, you can begin to use a balanced fertilizer to encourage growth.
Weeding
Regularly remove any weeds that appear around the nivenia levynsiae plant to reduce competition for nutrients and water.
Troubleshooting Common Issues with Nivenia Levynsiae Transplantation.
When is the best time to transplant nivenia levynsiae?
The optimal time to relocate nivenia levynsiae is in late spring through mid-summer.
How much space should I leave between nivenia levynsiae plants?
Ensure plants are spaced 12-18 inches (30-45 cm) apart for ideal growth.
What should soil preparation involve before transplanting nivenia levynsiae?
Loosen the soil to a depth of 12 inches (30 cm) and mix in organic compost.
How deep should I plant nivenia levynsiae during transplanting?
Plant nivenia levynsiae at the same depth it was growing previously to avoid stress.
What should I do immediately after transplanting nivenia levynsiae?
Water thoroughly right after transplanting to help the roots establish in the new soil.
How should I handle nivenia levynsiae's roots during transplanting?
Be gentle with the roots to avoid damage; minimal disturbance ensures healthier re-establishment.
What kinds of soil conditions does nivenia levynsiae prefer?
Nivenia levynsiae thrives in well-drained, slightly acidic to neutral soil with good organic matter.
How should I care for nivenia levynsiae after transplanting in hot weather?
Provide shade during the hottest part of the day and ensure consistent watering.
What should I do if nivenia levynsiae shows signs of stress after transplanting?
Water more frequently, but avoid waterlogging. Add a layer of mulch to retain moisture.
Can I fertilize nivenia levynsiae immediately after transplanting?
Wait a few weeks before fertilizing to give the plant time to settle into its new home.



