How to Transplant Mat muhly?
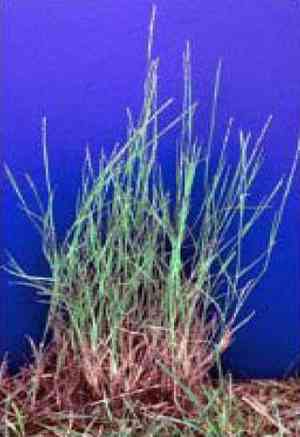
Mat muhly flourishes most effectively when relocated during the invigorating period of early to mid-spring. This schedule enables the plant to develop its root system prior to the summer season. Select a bright, adequately drained location to foster peak development and minimize the stress of transplantation.
Necessary Preparations Before Relocating Mat Muhly?
Optimal Timing for Mat Muhly Relocation?
The most suitable time for moving mat muhly is from early to mid-spring. This timeframe allows the plant to establish its root system prior to the intense summer heat, promoting vigorous development. Transplanting during this period maximizes survival rates and healthy growth due to ideal soil temperature and moisture conditions.
Recommended Spacing Between Mat Muhly Plants?
When relocating mat muhly, ensure plants are spaced approximately 12-18 inches (30-45 cm) apart. This spacing provides ample room for each plant to grow and expand comfortably without overcrowding.
Best Soil Blend for Mat Muhly Relocation?
Mat muhly prefers soil that drains well, so aim for a sandy or loamy type. Prior to planting, enrich the soil with a balanced base fertilizer to give your new plants a healthy start.
Ideal New Location for Your Mat Muhly?
Select a sunny spot for relocating mat muhly. This plant thrives in full sun, meaning it requires at least 6 hours of direct sunlight daily for optimal growth and health.
Equipment to Prepare Before Mat Muhly Relocation?
Gardening Gloves
To safeguard your hands while handling soil and plants.
Small Shovel or Spade
For digging around and lifting the plant from its original spot.
Trowel
To assist in creating a suitably sized hole in the ground for replanting.
Watering Can or Hose
For moistening the soil before extraction and hydrating the plant after relocation.
Mulch
To help retain moisture around the plant's base following transplantation.
Wheelbarrow (optional)
To move the plant if its root ball is particularly large or heavy.
How to Extract Mat Muhly from the Soil?
How to Extract Mat Muhly from the Soil?
From Ground: First, hydrate the mat muhly plant to moisten the soil. Next, excavate a wide trench around the plant using a shovel or spade, ensuring the plant's root ball remains intact. Carefully work the spade beneath the root ball to lift the plant from its initial position.From Pot: Water the mat muhly plant a few hours before removal to make the soil easier to manage. Tilt the pot and gently tap its sides to loosen the soil. Carefully slide the plant out, supporting the root ball with your hands.From Seedling Tray: Water the mat muhly plant before removal. Use a small trowel or your fingers to gently lift the seedling out, ensuring the root ball stays intact. Handle the seedling by its leaves to prevent stem damage.
Step-by-Step Guide for Relocating Mat Muhly
Location Selection
Choose a spot with adequate sunlight and room for your mat muhly plant to reach its mature size.
Soil Preparation
Loosen the soil in the new planting area and amend it with compost if necessary.
Dig a Planting Hole
Use a trowel to excavate a hole that is twice as wide and as deep as the mat muhly plant's root ball.
Relocate the Plant
Place the mat muhly plant into the hole, ensuring the top of the root ball is level with the surrounding soil. Backfill the hole with the excavated soil, gently firming it around the roots.
Thorough Watering
Water the mat muhly plant deeply immediately after relocation to settle the soil around its roots.
Apply Mulch
Spread a layer of mulch around the base of the mat muhly plant to conserve moisture and regulate soil temperature.
Post-Relocation Care for Mat Muhly?
Watering
Keep the soil around the mat muhly consistently moist, but not waterlogged, for the initial weeks after relocation to aid in root establishment.
Monitoring
Regularly inspect the mat muhly plant for signs of distress such as wilting or yellowing foliage, and adjust care as needed.
Weeding
Keep the area surrounding the mat muhly free of weeds, which can compete for nutrients and water.
Mulch Upkeep
Maintain the mulch layer to retain moisture and prevent weeds from growing around the base of the mat muhly plant.
Addressing Common Issues with Mat Muhly Relocation.
When is the best time to relocate mat muhly?
Early to mid-spring is the ideal period for relocating mat muhly for optimal growth.
How far apart should I space the mat muhly plants?
Space mat muhly plants 12-18 inches (30-45 cm) apart to ensure proper growth and room to spread.
What type of soil should I use for relocating mat muhly?
Use well-draining soil with some organic matter to create a healthy environment for mat muhly.
How much sunlight does mat muhly require after relocating?
Mat muhly thrives in full sunlight, requiring at least six hours of direct light daily.
Should I water mat muhly immediately after relocating?
Yes, water mat muhly thoroughly right after relocating to help establish root contact with the soil.
How should I handle mat muhly's roots during relocating?
Handle mat muhlyâs roots gently, avoiding excessive disturbance to prevent transplant shock.
What should I do if mat muhly shows signs of transplant shock?
Keep mat muhly well-watered, provide partial shade, and be patient; mat muhly will likely recover over time.
How deep should I dig the hole for mat muhly during relocating?
Dig a hole deep enough to accommodate mat muhly's root ball, approximately twice the root's diameter.
Can I fertilize mat muhly immediately after relocating?
Wait a few weeks after relocating mat muhly before fertilizing to avoid stressing the plant.
How can I protect mat muhly from pests after relocating?
Regularly inspect mat muhly for pests and use organic pesticides or natural predators if necessary.



