How to Transplant Little nipple cactus?
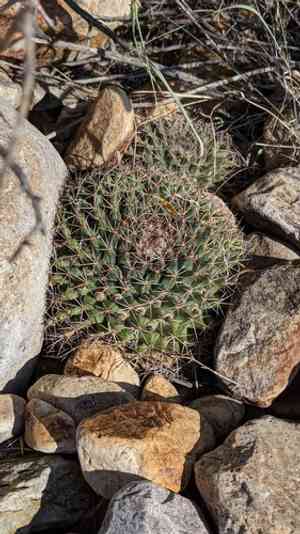
Little nipple cactus is best relocated during the early to mid-spring period, ensuring it gets sufficient light exposure. Positioning it in a bright, well-draining location is crucial for its successful establishment. Exercise care to prevent harm to its root system.
What Preparations are Needed Before Transplanting Little Nipple Cactus?
What is the Ideal Time for Transplanting Little Nipple Cactus?
The best period for relocating little nipple cactus is from early to mid-spring. During this time, the plant can establish its root system prior to the intense summer heat, leading to improved growth and hardiness. Moving it in spring ensures little nipple cactus benefits from milder temperatures and increased rainfall, providing a stable setting for successful adaptation.
How Much Space Should You Leave Between Little Nipple Cactus Plants?
When moving little nipple cactus, position each plant 18-24 inches (45-60 cm) apart. This provides ample room for development and ensures proper air circulation, reducing disease risk. Correct spacing can also enhance your garden's visual appeal.
What is the Best Soil Mix for Little Nipple Cactus Transplanting?
For little nipple cactus, utilize a soil that drains well, such as a cactus or succulent blend. You can also incorporate coarse sand or perlite to boost drainage. Mix in a general-purpose granular fertilizer at the base to provide the plant with a nutrient boost during relocation.
Where Should You Relocate Your Little Nipple Cactus?
Select a sunny spot for planting little nipple cactus. These cacti thrive in full sun, so a location receiving at least 6 hours of direct sunlight daily is perfect. This promotes healthy development and a vibrant look.
What Equipments Should You Prepare Before Transplantation Little Nipple Cactus?
Gardening Gloves
To safeguard your hands while handling soil and the plant.
Trowel
To excavate small holes in the soil where the little nipple cactus will be placed.
Shovel
To dig around the plant and create a new planting site.
Watering Can
To hydrate the plant before and after its relocation.
Root Ball Support (optional)
To keep the root mass intact during the move.
How Do You Remove Little Nipple Cactus from the Soil?
How Do You Remove Little Nipple Cactus from the Soil?
From Ground: First, moisten the little nipple cactus to damp the soil. Then, dig a wide trench around the plant using a shovel, ensuring the plant's root ball remains whole. Carefully work the shovel beneath the root ball to lift the plant from its original spot.From Pot: Gently tilt the pot on its side to ease the little nipple cactus out. You might need to tap the pot's bottom to loosen the root ball. Once loose, carefully lift the plant, ensuring the root ball and soil stay together.From Seedling Tray: Water the seedling tray thoroughly before removal. Using a trowel or your hands, gently loosen the soil around the little nipple cactus seedling. Carefully lift the plant from the tray, supporting the root ball and soil.
Step-by-Step Guide for Transplanting Little Nipple Cactus
Site Preparation
Choose a sunny area in your garden. Dig a hole twice as wide and deep as the little nipple cactus's root ball.
Soil Preparation
Ensure the planting hole is filled with well-draining soil. Avoid heavy clay or overly sandy soils without modifications.
Plant Placement
Carefully position the little nipple cactus into the hole, making sure it sits at the same depth it was growing previously.
Backfilling
Gently refill the hole with the excavated soil, lightly pressing down to remove air pockets.
Watering
Thoroughly water the area around the little nipple cactus to help settle the soil and reduce transplant shock.
Mulching (Optional)
Apply a thin layer of mulch around the plant to help retain moisture and suppress weeds.
How Do You Care For Little Nipple Cactus After Transplanting?
Watering
Water the little nipple cactus sparingly, allowing the soil to dry out slightly between watering sessions.
Protection
Shield the little nipple cactus from harsh weather conditions using a cover or shade cloth during its initial adjustment period.
Monitoring
Observe the little nipple cactus for signs of transplant shock, such as browning or wilting, and adjust care as needed.
Troubleshooting Common Issues with Little Nipple Cactus Transplantation.
When is the best time to transplant little nipple cactus?
The ideal time to relocate little nipple cactus is early to mid-spring, ensuring optimal growth conditions.
What spacing should I use for little nipple cactus?
Plant little nipple cactus 18-24 inches (45-60 cm) apart to allow sufficient room for growth and airflow.
How should I prepare the new location for transplanting little nipple cactus?
Choose a well-draining soil mix and ensure the new spot receives ample sunlight and good drainage.
What tools are necessary for transplanting little nipple cactus?
Use gloves, a trowel, and a container with drainage holes for safely relocating little nipple cactus.
How do I safely remove little nipple cactus from its original location?
Gently loosen the soil around little nipple cactus with a trowel, and carefully lift the plant, avoiding root damage.
How deep should I plant little nipple cactus in its new location?
Place little nipple cactus at the same depth it was growing before, ensuring roots are well-covered.
Should I water little nipple cactus immediately after transplanting?
Yes, water little nipple cactus lightly to settle the soil around the roots and ensure moisture consistency.
What should I do if little nipple cactus appears stressed after transplanting?
Provide temporary shade and ensure the soil remains lightly moist, avoiding overwatering.
How can I prevent root rot when transplanting little nipple cactus?
Ensure the new location has excellent drainage and avoid overly moist soil conditions.
Can I use fertilizers after transplanting little nipple cactus?
Wait a few weeks after relocating before applying a balanced cactus fertilizer to encourage new growth.



