How to Transplant Oval-leaf staggerbush?
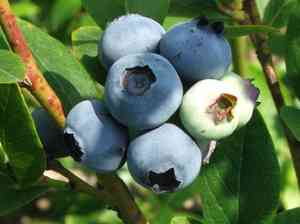
The optimal period for relocating oval-leaf staggerbush extends from the onset of early spring through the mild temperatures of late spring, fostering vigorous development. Select a site abundant in acidic earth, protected from strong gusts. Sustaining adequate soil hydration after transplantation greatly improves adaptation.
What Preparations are Needed Before Transplanting Oval-leaf Staggerbush?
What is the Ideal Time for Transplanting Oval-leaf Staggerbush?
For oval-leaf staggerbush, the arrival of warmer days as winter recedes, typically from early spring's awakening until late spring's gentle unfolding, offers the perfect transplanting window. This period provides mild temperatures and favorable soil conditions, ensuring an excellent start. Moving oval-leaf staggerbush now allows roots to establish robustly before summer's full intensity, promoting vigorous growth and better adaptation to its new environment. Embrace this timeframe to fully appreciate oval-leaf staggerbush in your garden.
How Much Space Should You Leave Between Oval-leaf Staggerbush Plants?
Let's find a spacious new home for your oval-leaf staggerbush! Aim for a generous spread of about 4-6 feet apart (that's 1.2-1.8 meters), so each one has ample room to thrive and enhance your garden.
What is the Best Soil Mix for Oval-leaf Staggerbush Transplanting?
For happy oval-leaf staggerbush, prepare a well-draining soil blend with a touch of magicâorganic compost! Incorporate a balanced, slow-release fertilizer to give them a gentle boost into their new comfortable spot.
Where Should You Relocate Your Oval-leaf Staggerbush?
Choose a bright location where the sun loves to linger for your oval-leaf staggerbush; partial sunlight is their preference. A spot with soft morning rays or dappled afternoon light will make their new beginning truly special.
What Equipments Should You Prepare Before Transplantation Oval-leaf Staggerbush?
Gardening Gloves
To safeguard your hands while handling soil and plants.
Shovel or Spade
To excavate the plant and prepare the new planting site.
Garden Fork
To loosen the soil around the plant's root ball if necessary.
Watering Can or Hose
To hydrate the plant before and after relocation.
Wheelbarrow
For moving the plant and soil.
Pruning Shears
For trimming any damaged roots or foliage.
Mulch
To help maintain soil moisture after transplanting.
Measuring Tape
To determine the appropriate depth and width for the planting hole.
How Do You Remove Oval-leaf Staggerbush from the Soil?
How Do You Remove Oval-leaf Staggerbush from the Soil?
From Ground: First, water the oval-leaf staggerbush plant to moisten the soil. This facilitates plant removal and helps protect the roots during the process. Using a shovel or spade, dig a wide trench around the plant, aiming to keep the root ball intact. Start a few inches from the base to avoid cutting through roots. Gently work the shovel beneath the root ball to lift the plant from its spot.From Pot: Water the oval-leaf staggerbush to moisten the root ball, making removal easier. Turn the pot sideways and gently tap the sides and bottom to loosen the plant. Support the plant by its base and carefully slide it out of the pot, taking care not to harm the roots.From Seedling Tray: Water the seedlings gently in preparation for transplanting. Use a spoon or a specialized dibber tool to carefully extract each seedling from the tray, ensuring not to damage the delicate roots. Handle seedlings by their leaves rather than stems to prevent injury.
Step-by-Step Guide for Transplanting Oval-leaf Staggerbush
Preparation
Water the oval-leaf staggerbush thoroughly before transplanting to ensure soil adheres to the roots and to minimize transplant shock.
Digging the Hole
Excavate a hole in the chosen location that is twice as wide and equally as deep as the plant's root ball. This extra space encourages root spread.
Plant Inspection
Examine the oval-leaf staggerbush's roots. Trim away any broken or damaged roots with your pruning shears to promote new growth.
Placing the Plant
Carefully position the oval-leaf staggerbush in the center of the hole. The top of the root ball should be level with the surrounding ground to allow for proper root expansion and water absorption.
Filling the Hole
Backfill the hole with soil, gently compacting it around the root ball. Ensure there are no air pockets, which can dry out the roots.
Watering
Water the oval-leaf staggerbush generously immediately after transplanting to settle the soil and hydrate the roots.
Mulching
Apply a layer of mulch around the base of the oval-leaf staggerbush to conserve moisture and regulate soil temperature. Avoid piling mulch against the plant's stem to prevent rot.
Support
If the oval-leaf staggerbush is tall or top-heavy, insert a stake beside it and loosely tie the plant to it for support until it establishes strong roots.
Monitoring
Keep an eye on the oval-leaf staggerbush over the next few days to ensure it's adapting well to its new location and to check for any signs of distress.
How Do You Care For Oval-leaf Staggerbush After Transplanting?
Observation
Regularly inspect the oval-leaf staggerbush for signs of stress, such as wilting or discolored leaves, and take corrective action if needed.
Watering
Maintain consistent soil moisture around the oval-leaf staggerbush without over-watering. Check the soil moisture level by touching the soil before watering.
Protection
Shield the oval-leaf staggerbush from strong winds or extreme temperatures for a few weeks after transplanting to prevent additional stress.
Adjustments
Loosen any ties that may bind the oval-leaf staggerbush too tightly as it grows and adjust stakes if necessary to provide continued support.
Troubleshooting Common Issues with Oval-leaf Staggerbush Transplantation.
Why is my oval-leaf staggerbush not thriving after transplant?
Ensure it was transplanted during optimal relocation times, typically early to late spring. Also, verify the root ball was intact and not excessively disturbed.
How much space does oval-leaf staggerbush require when transplanting?
For optimal growth, position oval-leaf staggerbushs approximately 4-6 feet (1.2-1.8 meters) apart to provide ample room for expansion.
What should I do if the leaves of oval-leaf staggerbush wilt post-transplant?
Wilting may indicate water stress. Water your oval-leaf staggerbush thoroughly after transplanting and maintain consistent moisture while it establishes.
How deep should I plant the oval-leaf staggerbush during transplantation?
The hole should be twice as wide as the root ball and the same depth, ensuring the top of the root ball is level with the ground.
Can I transplant oval-leaf staggerbush in the summer?
It's best transplanted when dormant, from early to late spring to avoid heat stress and ensure root establishment.
Why does my oval-leaf staggerbush have stunted growth after transplanting?
Stunted growth could be due to poorly drained soil, damage to roots during transplanting, or nutrient deficiency. Test soil, and gently examine roots.
What kind of sunlight does oval-leaf staggerbush need after transplanting?
Position oval-leaf staggerbush in a location where it will receive filtered sunlight or partial shade, especially in hotter climates, to prevent sun scorch.
How to protect newly transplanted oval-leaf staggerbush from frost?
Apply a layer of mulch around the base to insulate roots. In extreme cold, cover the plant with burlap or frost cloth overnight.
Is it necessary to prune oval-leaf staggerbush when transplanting?
Light pruning can help oval-leaf staggerbush focus energy on root development. Trim away damaged or excessively long branches.
How often should I water oval-leaf staggerbush after transplanting?
Water every couple of days, adjusting based on weather conditions. Keep the soil moist but not waterlogged to encourage steady growth.



