How to Transplant Yellowseed false pimpernel?
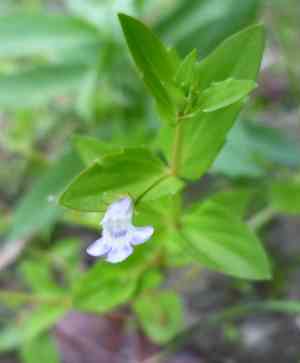
For yellowseed false pimpernel, the ideal time for relocation is from late spring through early summer. Select locations that offer abundant illumination and humidity. If necessary, incorporate organic matter to enhance vitality and ensure careful handling to prevent damage to the root system.
What Preparations are Needed Before Transplanting Yellowseed False Pimpernel?
What is the Ideal Time for Transplanting Yellowseed False Pimpernel?
The best period for moving yellowseed false pimpernel is from late spring to early summer. During this time, moderate temperatures and gentle sunlight provide an ideal environment for yellowseed false pimpernel to establish its root system. Transplanting yellowseed false pimpernel as days lengthen aligns with its natural growth cycle, promoting robust development. Choosing this timeframe ensures optimal soil conditions, warm enough for root growth without the intensity of midsummer heat.
How Much Space Should You Leave Between Yellowseed False Pimpernel Plants?
When preparing to transplant your yellowseed false pimpernel, aim to provide ample room for each plant to thrive. A spacing of 4-6 inches (10-15 cm) between individual plants is suitable. This spacing ensures they have sufficient area to grow without competing for essential nutrients and sunlight.
What is the Best Soil Mix for Yellowseed False Pimpernel Transplanting?
For your yellowseed false pimpernel, select a welcoming garden spot. Opt for well-draining soil, as these plants appreciate moisture but dislike waterlogged conditions. Prior to planting, enrich the soil with a balanced, slow-release fertilizer to provide sustenance as your plants become established.
Where Should You Relocate Your Yellowseed False Pimpernel?
When selecting a sunny location for your yellowseed false pimpernel, seek an area that receives abundant light. These plants enjoy basking in the sun but will also benefit from some shade during the hottest part of the day. A partially shaded spot would be perfectly suitable!
What Equipments Should You Prepare Before Transplantation Yellowseed False Pimpernel?
Gardening Gloves
To safeguard your hands while handling soil and plants.
Trowel
For digging and moving the yellowseed false pimpernel's root ball.
Spade or Shovel
To use for excavating the yellowseed false pimpernel without harming its root system.
Watering Can or Hose with a Gentle Sprayer
To hydrate the yellowseed false pimpernel before and after its relocation.
Pruning Shears
To trim any dead or damaged plant parts prior to transplanting.
Wheelbarrow or Plant Caddy
For transporting the yellowseed false pimpernel or soil if needed.
Measuring Tape
To ensure correct spacing between transplanted yellowseed false pimpernel plants.
How Do You Remove Yellowseed False Pimpernel from the Soil?
How Do You Remove Yellowseed False Pimpernel from the Soil?
From Ground: First, moisten the yellowseed false pimpernel's soil to make it easier to work with. Use a spade or shovel to dig a wide trench around the yellowseed false pimpernel, being careful not to harm the root ball. Gently loosen and lift the yellowseed false pimpernel from the ground.From Pot: Begin by watering the soil to facilitate the root ball's easy removal. Tilt the pot sideways and gently tap or squeeze it to dislodge the yellowseed false pimpernel. Carefully guide the plant into your hand or onto a soft surface.From Seedling Tray: Water the tray to ensure the soil and roots remain cohesive. Use a trowel or your fingers to gently push the yellowseed false pimpernel from beneath the tray while supporting the plant's base and leaves. Carefully extract the plant, keeping the root ball intact.
Step-by-Step Guide for Transplanting Yellowseed False Pimpernel
Preparation
Ensure the new site is already prepared. Wear gardening gloves for hand protection and gather all necessary tools before beginning.
Removal
Follow the 'removal process' to extract the yellowseed false pimpernel from its current spot, depending on whether it's in the ground, a pot, or a seedling tray.
Transportation
Carefully move the yellowseed false pimpernel to its new location. If the plant is heavy or awkward, use a wheelbarrow or plant caddy.
Placement
Dig a hole at the new site that is twice as wide and as deep as the root ball. Center the yellowseed false pimpernel in the hole and adjust its depth so the top of the root ball is level with the surrounding soil.
Filling
Backfill around the root ball with soil, gently pressing down to eliminate air pockets without overly compacting it.
Watering
Thoroughly water the yellowseed false pimpernel after transplanting to settle the soil and hydrate the roots. Use a gentle sprayer to avoid disturbing the soil or damaging the plant.
Support
If the yellowseed false pimpernel is tall or top-heavy, provide staking or other support to keep it upright and prevent wind damage while its roots establish.
How Do You Care For Yellowseed False Pimpernel After Transplanting?
Monitoring
Inspect the yellowseed false pimpernel daily for the initial couple of weeks, looking for signs of stress like wilting or discoloration, and address any issues promptly.
Watering
Maintain consistent moisture in the soil around the yellowseed false pimpernel for the first few weeks to aid root establishment. Avoid overwatering to prevent soggy conditions.
Support Adjustment
Observe and modify any staking or supports as the yellowseed false pimpernel grows and settles into its new environment.
Troubleshooting Common Issues with Yellowseed False Pimpernel Transplantation.
What's the best time to transplant yellowseed false pimpernel?
The ideal window is during late spring to early summer, ensuring a smooth transition for yellowseed false pimpernel.
How much space do yellowseed false pimpernel transplants need?
Aim for ample room, ideally 4-6 inches (10-15 cm), to allow your yellowseed false pimpernel to thrive.
Why are my yellowseed false pimpernel transplants wilting after planting?
Wilting may be due to transplant shock. Ensure careful handling and sufficient water to help yellowseed false pimpernel recover.
How do I prepare the soil for transplanting yellowseed false pimpernel?
Cultivate the soil to a fine texture and enrich it with compost for the best environment for your yellowseed false pimpernel.
How deep should I plant yellowseed false pimpernel seedlings?
The root ball should rest firmly in the soil, at its previous depth, to encourage steady growth.
Can I transplant yellowseed false pimpernel on a hot day?
Transplant during cooler parts of the day or on overcast days to minimize stress for the yellowseed false pimpernel.
How to water yellowseed false pimpernel after transplanting?
Keep the soil uniformly moist, not saturated, to promote new roots without waterlogging yellowseed false pimpernel.
Should I fertilize yellowseed false pimpernel after transplanting?
Wait until yellowseed false pimpernel shows signs of new growth before applying any fertilizer to prevent root burn.
What if my yellowseed false pimpernel is not growing post-transplant?
Ensure proper watering, check for root-bound issues, and be patient as yellowseed false pimpernel recovers from the move.
How to protect newly transplanted yellowseed false pimpernel from pests?
Regularly check for pests, use appropriate treatments, and maintain healthy growth as a defense for yellowseed false pimpernel.



