How to Transplant Island pitchersage?
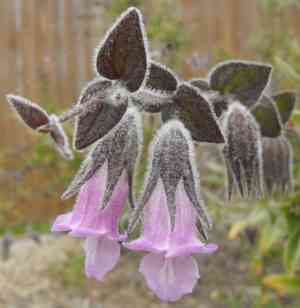
The peak of summer heat provides an ideal period for island pitchersage to root more readily. Select a sunny location with sufficient drainage to guarantee robust development. Careful handling promotes successful relocation.
What Preparations are Needed Before Transplanting Island Pitchersage?
What is the Ideal Time for Transplanting Island Pitchersage?
Moving island pitchersage during summer's warmth promotes root establishment due to optimal temperatures, ensuring a strong foundation for development.
How Much Space Should You Leave Between Island Pitchersage Plants?
To allow your island pitchersage ample room to develop, consider spacing them 6-8 feet (1.8-2.4 meters) apart. This distance enables them to spread and reach their full potential while maintaining good air circulation. They will quickly fill the area!
What is the Best Soil Mix for Island Pitchersage Transplanting?
Your island pitchersage prefers well-draining soil, ideally sandy or loamy. Before relocation, enrich your soil with a generous amount of organic compost. This not only improves soil structure but also supplies essential nutrients for the plant's growth.
Where Should You Relocate Your Island Pitchersage?
Regarding placement, consider situating your island pitchersage where it can receive full sun exposure. They require significant sunlight for healthy growth. A south-facing border or container would be excellent for this. Happy planning!
What Equipments Should You Prepare Before Transplantation Island Pitchersage?
Gardening Gloves
To safeguard your hands while working with the soil and handling the island pitchersage plant.
Hand Pruners
For trimming or cutting any damaged roots or leaves prior to transplanting.
Shovel or Garden Trowel
Used for excavating the hole in the garden, and extracting the plant from its original spot (if applicable).
Watering Can
To hydrate the island pitchersage plant before and after its relocation.
Organic Mulch
To assist the soil in retaining its moisture following the transplanting process.
Measuring Tape
To verify the transplant hole is sufficiently deep for the island pitchersage plant's root system.
How Do You Remove Island Pitchersage from the Soil?
How Do You Remove Island Pitchersage from the Soil?
From Ground: Start by watering the island pitchersage plant to moisten the soil, making excavation easier. Then, use a shovel or garden trowel to dig around the plant, approximately a foot from the stem. You are creating a trench to loosen the soil and facilitate lifting the plant without harming its root system. Proceed carefully to prevent the root ball from disintegrating.From Pot: Begin by thoroughly watering the island pitchersage plant, allowing excess water to drain. Turn the plant sideways, holding it gently by the stems, and tap the bottom of its container until the plant slides out. Remember not to pull the plant by the stems to avoid damage.From Seedling Tray: Lightly water the island pitchersage seedlings to make loosening the soil simpler. Gently hold the base of the stem and carefully ease the seedling out, striving to remove as much of the roots as possible.
Step-by-Step Guide for Transplanting Island Pitchersage
Preparation
First and foremost, put on your gardening gloves. Prepare the new planting area according to the requirements of the island pitchersage plant.
Digging Hole
Use your shovel or trowel to excavate a hole that is twice as wide and the same depth as the root ball of the island pitchersage plant. Measure the hole with the measuring tape to ensure it is the correct size.
Placing the Plant
Position the island pitchersage plant in the hole, ensuring it sits at the appropriate depth, which should be the same depth it was growing in its previous location.
Filling the hole
Gently backfill the hole, firming the soil around the base of the island pitchersage plant. Water it thoroughly immediately after.
Mulching
Apply a layer of organic mulch around the plant's base, keeping it a few inches away from the stem to prevent rot.
How Do You Care For Island Pitchersage After Transplanting?
Watering
Initially, water the island pitchersage plant thoroughly, then keep the soil slightly moist but not waterlogged for the subsequent weeks. This will reliably establish a watering schedule based on your plant's needs.
Pruning
If your island pitchersage plant appears stressed after transplanting, trimming some of the upper growth can balance the top with the root system. Make cuts quickly and cleanly to avoid exacerbating the stress.
Monitoring
Closely observe your island pitchersage plant for several weeks post-transplant. Watch for signs of shock, such as wilting, yellowing, or dropped leaves, and address them promptly.
Frost Protection
For transplants done in late fall, consider providing extra protection against frost. A layer of straw or mulch can achieve this.
Troubleshooting Common Issues with Island Pitchersage Transplantation.
What's the ideal season for transplanting island pitchersage?
The optimal period to relocate island pitchersage is during the late summer to early fall season.
How far apart should island pitchersage be planted?
To flourish, island pitchersage requires ample room to grow. Space new plants 6-8 feet (1.8-2.4 meters) apart.
What should I do if the island pitchersage isn't growing after transplantation?
Ensure island pitchersage is planted in well-drained soil. If conditions seem appropriate but growth remains stunted, consult a local plant expert.
How do I prevent damage when digging up island pitchersage for transplantation?
Carefully dig around and beneath the root-ball to avoid damaging roots. Excavating a wide, shallow hole ensures roots remain undisturbed during the process.
Should I trim island pitchersage before transplantation?
Yes, cutting back about one-third of the plant helps reduce moisture loss and provides island pitchersage with a surge of new energy after transplanting.
How much water does island pitchersage need right after transplantation?
Water island pitchersage immediately after transplanting. Keep the soil moist but not saturated. Overwatering could impede successful transplantation.
What kind of soil is best for transplanting island pitchersage?
Island pitchersage thrives in well-drained soil. Before planting, turn over the soil and incorporate organic compost for an added nutrient boost.
Can island pitchersage survive transplantation throughout the year?
While island pitchersage is a resilient perennial, transplantation success is higher from late summer to early fall. Avoid transplanting during extreme temperatures for optimal results.
Should I use fertilizer while transplanting island pitchersage?
While compost-enriched soil can supply all necessary nutrients, you may use a slow-release general-purpose fertilizer during transplantation for an additional nutrient boost.
How to care for island pitchersage after transplanting?
Keep the soil moist, provide abundant sunlight, and maintain the recommended 6-8 feet (1.8-2.4 meters) spacing between plants. Monitor growth and adjust care according to the needs of island pitchersage.



