How to Transplant Kencur?
For kencur, the ideal period for relocation is from the onset of spring's mild temperatures until the beginning of summer's heat. Select a location offering filtered sunlight and fertile ground, making sure to regularly transplant for vigorous development. Gentle handling of the root system is highly beneficial!
What Preparations are Needed Before Transplanting Kencur?
What is the Ideal Time for Transplanting Kencur?
Relocating kencur during the rejuvenating period, typically from early to late spring, is perfect for leveraging the mild climate. Moving kencur at this time capitalizes on the benefits of enriched post-winter soil and increasing daylight, providing the plant the best chance to root firmly and thrive in its new location. This allows kencur to establish itself during its prime growth phase, ensuring robustness before summer's intense heat. Engage in this careful transplanting ritual, and you will see kencur flourish, making your garden a welcoming haven for this beloved perennial.
How Much Space Should You Leave Between Kencur Plants?
When getting ready to move your kencur, ensure each plant has ample room to thrive. Aim for a separation of 6-12 inches (15-30 cm) between them. This guarantees that your kencur has sufficient space to develop and that air circulation around each plant is optimal.
What is the Best Soil Mix for Kencur Transplanting?
For your kencur, select a soil that drains well and is abundant in organic material. Prepare your soil by incorporating a balanced, slow-release fertilizer that will nourish your kencur as it settles in. A gentle blend of compost can further enrich the soil base.
Where Should You Relocate Your Kencur?
Find a location for your kencur where it can receive partial shade. While it appreciates light, kencur flourishes best with some protection from the strong midday sun. An area that gets filtered sunlight throughout the day is perfect for your new plants.
What Equipments Should You Prepare Before Transplantation Kencur?
Gardening Gloves
To safeguard your hands while handling soil and plants.
Shovel or Spade
For excavating the plant from the ground and preparing its new planting site.
Hand Trowel
For smaller digging tasks, especially useful when working with containers or seedling trays.
Watering Can or Hose
To hydrate the plant before and after its relocation.
Wheelbarrow or Garden Cart
To move the kencur and soil if necessary.
Pruning Shears
To trim any damaged roots or leaves before transplanting.
Organic Mulch
To help maintain soil moisture and regulate temperature around the new planting area.
How Do You Remove Kencur from the Soil?
How Do You Remove Kencur from the Soil?
From Ground: First, moisten the kencur plant's soil with water. Then, dig a wide circle around the plant using a shovel or spade, ensuring to go deep enough to encompass most of the root ball. Carefully work around the plant to loosen the soil and gently lift it out, preserving as much of the root system as possible.From Pot: Begin by watering the kencur in its current container to reduce transplant stress. Turn the pot on its side and gently tap to loosen the soil. Grasp the plant's base, or its strongest stem, and carefully ease it out of the pot, taking care not to pull too hard and harm the plant.From Seedling Tray: Lightly water the seedlings before transplanting. Gently push the soil from underneath or use a tool to lift the seedling out without harming its delicate root system. Hold the seedling by its leaves rather than its stem to avoid crushing it.
Step-by-Step Guide for Transplanting Kencur
Preparation
Gather all necessary tools and equipment. Ensure you have chosen the new planting location according to the previous guidelines.
Plant Removal
Follow the removal procedure appropriate for your situation—ground, pot, or seedling tray. Be gentle and try to keep the root ball as intact as possible.
Hole Digging
Excavate a hole in the new spot that is twice the width of the kencur's root ball and equally deep. This provides ample space for the roots to spread.
Planting
Position the kencur in the center of the new hole. Adjust the plant so the top of the root ball is level with the surrounding soil surface. Backfill around the root ball with soil, gently tamping down to eliminate air pockets.
Watering
Water the kencur thoroughly immediately after planting to help settle the soil around its roots. This also provides essential hydration for the plant to begin establishing itself in its new location.
Mulching
Apply a layer of organic mulch around the base of the kencur, keeping it away from the stem to prevent rot. The mulch will help maintain soil moisture and temperature.
How Do You Care For Kencur After Transplanting?
Monitoring
Regularly observe the kencur for indications of stress, such as wilting or discolored leaves, and adjust care as necessary.
Watering Frequency
Water the kencur deeply and consistently for the initial few weeks as it establishes. Gradually reduce watering as the plant becomes settled.
Pruning
Trim away any dead or damaged leaves or stems to encourage new growth and help the kencur direct its energy into developing strong roots.
Support
If the kencur is top-heavy or leggy, consider staking it or providing other support to prevent damage from winds or heavy rains until it is strong enough to support itself.
Troubleshooting Common Issues with Kencur Transplantation.
When's the best time to transplant kencur?
Transplant kencur when the weather warms, typically from early to late spring for optimal root establishment.
What's the ideal spacing for kencur plants?
Space kencur plants about 6-12 inches (15-30 cm) apart to ensure they have room to grow.
Why are my kencur's leaves wilting post-transplant?
Wilting could be from transplant shock. Ensure gentle handling, proper watering, and no direct sun for a few days.
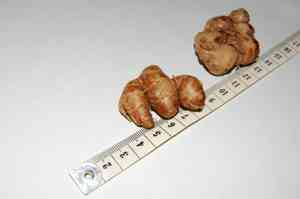
How deep should I plant kencur's rhizomes?
Plant kencur's rhizomes so the top is just below the soil surface, around 2 inches (5 cm) deep.
Can I transplant kencur on a hot, sunny day?
Avoid transplanting kencur in full sun. Choose a cloudy day or evening to minimize stress and water loss.
How much water does kencur need after transplanting?
Water kencur thoroughly after transplanting to settle the soil around roots, then keep soil consistently moist.
Should I fertilize kencur right after transplanting?
Hold off fertilizing immediately. Wait until kencur shows new growth before applying a balanced fertilizer.
What kind of soil suits kencur best for transplanting?
Use well-draining, fertile soil rich in organic matter to promote healthy growth in kencur.
Why isn't my kencur growing after transplanting?
Stunted growth may occur if roots were damaged or if the soil temperature is not warm enough for kencur.
How can I protect kencur from pests after transplanting?
Keep an eye out for common pests and treat with appropriate organic insecticides, avoiding chemicals that can harm kencur.


