How to Propagate Kencur?
Kencur is generally multiplied by dividing its rhizomes. Individuals aiming to grow this botanical specimen need to meticulously split the rhizomes, making certain that every piece possesses a minimum of one sprouting eye for effective development. Following separation, the rhizomes must be embedded in soil that drains efficiently and retains sufficient dampness, shielded from harsh solar exposure. Given that kencur is a tropical perennial, it flourishes in environments that are both warm and moist, and the substrate ought to be abundant in organic compounds to foster its progression. Meticulous management throughout the multiplication procedure guarantees the highest probability of cultivating robust new specimens.
Optimal Period for Kencur Propagation
Propagation Method
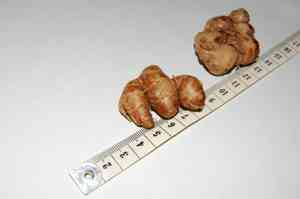
Utilize The Tubers
Propagation Period
Spring
Tools Required for Kencur Propagation
Sharp Knife or Scalpel
Crucial for making clean cuts on kencur tubers. A keen edge ensures a precise incision, minimizing harm to the tuber, which lowers infection risk and promotes healthier development.
Sterilizing Agent (e.g., Isopropyl Alcohol)
Used to sanitize cutting implements before and after each use. This prevents disease transmission between plants, vital for maintaining the health and viability of kencur's tubers.
Rooting Hormone Powder
Applied to the freshly cut surface of kencur's tuber to stimulate root development and enhance propagation success. This hormone encourages root formation at the cut site, essential for establishing a new plant.
Planting Pots with Drainage Holes
Used for planting the separated tubers of kencur. Pots with proper drainage are essential to prevent waterlogging, which can cause rot and negatively impact tuber health and growth.
Well-draining Soil Mix
Ideal medium for planting kencur's tubers. A blend of perlite, sand, and organic matter provides the necessary drainage and nutrient balance, aiding in the growth of new roots and shoots after propagation.
Watering Can with Fine Rose
Ensures gentle irrigation of kencur, which prevents soil displacement around newly planted tubers and provides even hydration crucial for root development.
Post-Propagation Care for Kencur
Post-Propagation Care for Kencur
Following propagation, maintain consistently moist, well-drained soil for your kencur. Shield young plants from extreme temperatures; they thrive in a warm, humid environment with partial shade. Fertilize sparingly with a balanced, slow-release fertilizer every few months to support robust growth. Monitor for pests like aphids and address them promptly if observed. As plants mature, they will require less frequent watering, but ensuring the soil doesn't completely dry out is vital.
Common Errors to Avoid When Propagating Kencur
Overwatering
Excess moisture can lead to root rot in kencur, which is detrimental as the plant thrives in well-drained conditions. Saturated soil can hinder root development and increase susceptibility to diseases.
Deep Planting
Planting kencur rhizomes too deeply can prevent them from sprouting. Kencur requires shallow planting to allow for adequate light exposure and air circulation, critical for the initiation of growth.
Using Old or Diseased Rhizomes
Propagating kencur with old or diseased rhizomes can result in poor germination rates and spread diseases to new plants. This negatively affects the overall health and vigor of kencur.
Ignoring Pest Management
Neglecting the presence of pests during propagation of kencur can lead to infestations that compromise plant health and propagation success. Pests can damage young shoots and roots, hindering growth.
Advice for Propagating Kencur
Utilize Healthy Rhizomes
Selecting firm and disease-free rhizomes ensures healthy growth and higher success rates in propagation. It is crucial for starting kencur propagation with the best possible material.
Appropriate Soil Mix
Utilize a well-draining soil mix with adequate organic matter to support moisture retention without causing waterlogging. This promotes effective root growth and overall health of kencur.
Adequate Spacing
Provide sufficient space between planted rhizomes to ensure good air flow and reduce competition for nutrients. This is important for the optimal growth and development of kencur.
Moderate Watering
Maintain a balance in watering practices; keep the soil moist but not waterlogged. Proper moisture levels are necessary to support the growth of kencur without risk of fungal diseases.


