How to Transplant Utah Juniper?
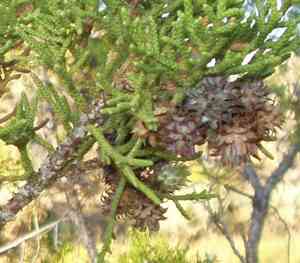
To introduce the resilient Utah Juniper into your landscape, perform transplantation during the invigorating period of early to mid-spring. Select a location bathed in sunlight with excellent drainage, and if necessary, amend the soil to replicate its natural, robust environment. A helpful suggestion: confirm root development prior to the arrival of summer.
Necessary Preparations Before Relocating Utah Juniper?
When is the Best Time to Move Utah Juniper?
The optimal period for relocating utah Juniper falls within early to mid-spring. This seasonal transition provides moderate temperatures and sufficient time for growth before the summer heat. Moving utah Juniper during this window promotes root establishment in cooler soil, reducing transplant shock and fostering healthier development. Embrace this timeframe for a smooth transition and a flourishing utah Juniper. A favorable start this season ensures a more vibrant utah Juniper for years ahead.
What Distance Should Be Maintained Between Utah Juniper Plants?
When planning to establish utah Juniper, ensure each plant is spaced approximately 10-15 feet (3-4.5 meters) apart. This will provide them with adequate room for proper development.
What is the Ideal Soil Mixture for Utah Juniper Relocation?
Utah Juniper thrives in sandy or gritty, well-draining soil. Prior to planting, incorporate some organic compost into the soil as a foundational fertilizer to supply essential nutrients.
Where Should You Replant Your Utah Juniper?
Select a site for utah Juniper that receives full sun exposure. These plants love to absorb sunlight, so confirm they are not shaded by structures or larger trees.
What Tools Should You Prepare Before Relocating Utah Juniper?
Shovel or Garden Spade
For excavating the soil and extracting the plant from its original spot.
Gardening Gloves
To safeguard your hands from any sharp elements within the soil.
Gardening Fork
To loosen the soil surrounding the roots, facilitating easier plant removal.
Wheelbarrow
Ideal for transporting the plant to its new position in the garden.
Watering Can
Crucial for hydrating the plant during the relocation process.
Mulch
To aid in moisture retention and minimize weed competition after relocation.
How Do You Extract Utah Juniper from the Soil?
How Do You Extract Utah Juniper from the Soil?
From Ground: Start by watering the utah Juniper plant to moisten the soil. This makes digging and removing the plant easier. Using a gardening spade, dig a circular trench around the plant. The trench should be wider than the plant's spread to ensure most of the root ball remains intact. Once the circular trench is dug, gently work the spade or shovel beneath the root ball to lift the plant.From Pot: Before moving the utah Juniper from its pot, water the plant to moisten the soil. The water will also help the plant slide out of the pot more easily. Hold the plant at its base and gently invert the pot to ease the plant out. Avoid pulling the plant by its stem.From Seedling Tray: Gently hold the utah Juniper by its leaves, not the stem, and push the base of the seedling plug with a dibble stick. The seedling should slide out of the cell. This method prevents any unnecessary damage to the plant during extraction.
Detailed Guide for Relocating Utah Juniper
Assess The Plant
Examine the root ball of utah Juniper for any damaged or diseased roots. Trim off any unhealthy sections to prevent disease spread to the new location.
Ready The Plant
Submerge the root ball in water for a few minutes before relocating. This helps prevent shock to the roots during the move.
Excavate A Hole
Using a shovel or spade, dig a hole that is twice as wide and the same depth as the utah Juniper's root ball in the new spot.
Position
Place the utah Juniper into the excavated hole. Ensure the top of the root ball is level with the ground surface.
Backfill
Refill the hole in layers, firmly compacting each layer before adding the next.
Hydrate
Thoroughly water the plant to help settle the soil around the root ball and eliminate any air pockets.
Mulch
Apply a generous layer of mulch around the base of the utah Juniper, leaving a gap around the stem to prevent rot.
How Do You Care For Utah Juniper After Relocation?
Watering
The utah Juniper will require consistent watering during the initial weeks following relocation. Keep the soil moderately moist but avoid waterlogging. Once established, utah Juniper is quite drought tolerant.
Pruning
After relocation, remove any dead or dying branches to redirect energy towards root development. However, extensive pruning is not advised immediately after relocation as it can add stress to the plant.
Winter Care
During the first winter after relocation, extra care may be necessary to shield the plant from cold, dry winds, and sunscald.
Monitoring
Closely observe your utah Juniper throughout the first year. Look for signs of relocation shock such as wilting or yellowing leaves. If these symptoms appear, prompt diagnosis and resolution are crucial.
Addressing Common Issues with Utah Juniper Relocation.
What is the optimal time to relocate utah Juniper?
The best time to relocate utah Juniper is generally during the early seasons (S1-S2). This provides ideal conditions for root establishment and growth.
How much space is needed between each utah Juniper when relocating?
When it comes to relocating utah Juniper, it's best to allow a generous distance between each one. Ideally, plant them 10-15 feet (3-4.5 meters) apart.
Why are the leaves of my relocated utah Juniper turning yellow?
Yellowing leaves might indicate overwatering or inadequate drainage. Ensure your utah Juniper's roots are not sitting in saturated soil. If necessary, enhance the soil's drainage capabilities.
What could be the reason my utah Juniper isn't growing after relocation?
Relocated plants can take time to establish, especially utah Juniper. Also, insufficient sunlight, improper watering, or unsuitable soil may hinder growth. Adjust conditions as needed.
Do I need to prune utah Juniper before relocating?
Yes, a good prune of utah Juniper before relocation can stimulate new growth as it adapts to its new spot. Remove dead or diseased branches to improve its health.
What type of soil is best for relocating utah Juniper?
Utah Juniper prefers soil that drains well and isn't excessively fertile. If your garden's natural soil meets these criteria, no amendments should be required.
How deep should I dig the hole for relocating utah Juniper?
The hole for your utah Juniper should be twice as wide as the root ball and its depth should match that of the root ball.
Is it normal for utah Juniper to lose some leaves after relocating?
Yes, it's common for utah Juniper and other relocated plants to shed some leaves due to transplant shock. They should recover with proper care, however!
How often should I water utah Juniper after relocating?
You should water utah Juniper generously immediately after relocating. Afterward, water when the topsoil feels dry to the touch, avoiding both insufficient and excessive watering.
What should I do if my relocated utah Juniper is wilting?
Wilting could be due to transplant shock, overwatering, or extreme weather. Ensure utah Juniper's needs are met regarding soil, hydration, and sunlight. If symptoms persist, consult a local horticulturist.



