How to Transplant Bayonet rush?
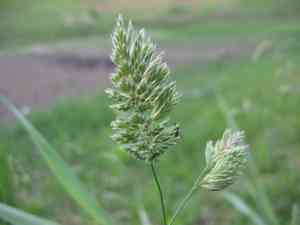
Bayonet rush flourishes when relocated from early spring until the end of spring, benefiting from ideal growing circumstances. This enduring plant favors damp, sun-drenched environments. For successful establishment, choose spots with effective water runoff and ample solar exposure.
What Preparations are Needed Before Transplanting Bayonet Rush?
What is the Ideal Time for Transplanting Bayonet Rush?
The best time to move bayonet rush is from early to late spring. This period allows the perennial enough time to establish its root system before the intense heat of summer. Transplanting during this season promotes strong development, increased resilience, and better adaptation, leading to a flourishing and healthy plant.
How Much Space Should You Leave Between Bayonet Rush Plants?
When transplanting bayonet rush, ensure each plant is positioned 12-18 inches (30-45 cm) apart. This spacing provides ample room for growth and facilitates proper air circulation, which is crucial for plant vitality.
What is the Best Soil Mix for Bayonet Rush Transplanting?
Prepare the soil for bayonet rush by ensuring it drains well and is rich in organic material. A blend of loamy soil with added compost works best. A balanced starter fertilizer can be incorporated into the soil base to supply essential nutrients for the young plants.
Where Should You Relocate Your Bayonet Rush?
Select a location with full sun to partial shade for transplanting bayonet rush. These plants flourish in direct sunlight but can also endure some shade. Aim for a spot that receives at least 4-6 hours of direct sunlight daily to support vigorous growth.
What Equipments Should You Prepare Before Transplantation Bayonet Rush?
Gardening Gloves
To safeguard your hands while handling soil and plants.
Shovel or Spade
For digging and lifting the plant from its initial spot.
Trowel
For excavating the new hole and adjusting soil around the roots.
Watering Can
To hydrate the plant before and after moving it.
Bucket or Container
To hold the plant and soil, if necessary, during relocation.
Mulch
To help maintain soil moisture after the transplant.
How Do You Remove Bayonet Rush from the Soil?
How Do You Remove Bayonet Rush from the Soil?
From Ground: First, water the bayonet rush plant to moisten the soil. Next, dig a wide trench around the plant using a shovel or spade, making sure the plant's root ball stays intact. Carefully work the spade beneath the root ball to lift the plant from its original position.From Pot: Lightly water the bayonet rush plant to make the soil easier to manage. Gently tap the sides of the pot to loosen the soil and roots. Carefully invert the pot and support the plant as it slides out, ensuring the root ball remains whole.From Seedling Tray: Water the seedlings to ensure the soil is damp. Use a small tool like a trowel to gently lift the seedlings from the tray, being careful to keep the roots and some soil around them undisturbed.
Step-by-Step Guide for Transplanting Bayonet Rush
Prepare the New Site
Choose a location with adequate sunlight and room for your bayonet rush plant to reach its full size. Dig a hole that is twice the width of the root ball and the same depth as its initial planting.
Amend the Soil
If needed, enrich the soil with compost or other organic material to enhance drainage and nutrient content. Mix the compost thoroughly with the existing soil.
Removal and Transport
Extract the bayonet rush plant from its original spot using the methods described. Place the plant in a bucket or container if necessary to move it to the new site.
Placing the Plant
Position the bayonet rush plant in the center of the hole, ensuring it is at the same depth as it was previously. Gently spread the roots within the hole.
Backfill the Hole
Refill the hole with soil, gently pressing it around the roots to eliminate air pockets. Be careful not to harm the roots during this process.
Water Thoroughly
Water the plant immediately after planting to help settle the soil around the roots and remove any remaining air pockets.
Apply Mulch
Spread a layer of mulch around the base of the plant, being careful not to pile it too close to the stem. This will help retain moisture and regulate soil temperature.
How Do You Care For Bayonet Rush After Transplanting?
Watering
Keep the soil around the bayonet rush consistently moist, but not waterlogged, for the initial weeks after transplanting to aid in establishing strong roots.
Monitoring
Regularly inspect the plant for indications of stress or pest problems. If the leaves appear wilted or discolored, it may require more water or adjustments in care.
Mulching
Maintain the mulch layer to preserve soil moisture and suppress weed growth, replenishing as needed.
Pruning
Remove any damaged or dead leaves to encourage healthy development and direct the plant's energy towards root establishment.
Troubleshooting Common Issues with Bayonet Rush Transplantation.
When is the ideal time to transplant bayonet rush?
The optimal period is from early spring to late spring for best growth and establishment.
How much spacing should I leave between transplanted bayonet rush plants?
Ensure each bayonet rush plant is spaced 12-18 inches (30-45 cm) apart for ample growth room.
How should I prepare the soil before transplanting bayonet rush?
Loosen the soil and mix in organic compost to provide nutrients and improve drainage.
How deep should the hole be for transplanting bayonet rush?
Dig a hole just deep enough to cover the root ball completely, usually 6-8 inches (15-20 cm).
How can I minimize transplant shock for bayonet rush?
Water the plant thoroughly before and after transplanting, and avoid disturbing the roots excessively.
What watering schedule is best after transplanting bayonet rush?
Water bayonet rush deeply immediately after transplanting, then keep the soil consistently moist but not soggy.
Should I mulch around bayonet rush after transplanting?
Yes, applying a 2-3 inch (5-7.5 cm) layer of mulch helps retain soil moisture and reduce weed competition.
What kind of fertilizer should I use when transplanting bayonet rush?
A balanced, slow-release fertilizer is ideal for providing long-term nutrients to bayonet rush after transplanting.
How to handle bayonet rush's roots during transplanting to ensure success?
Be gentle with the roots, keeping them intact as much as possible to prevent damage and stress.
What is the recommended sunlight requirement for bayonet rush after transplanting?
Bayonet rush thrives best in full sun but can tolerate part shade, ensuring it receives at least 6 hours of sunlight daily.



