How to Prune Bayonet rush?
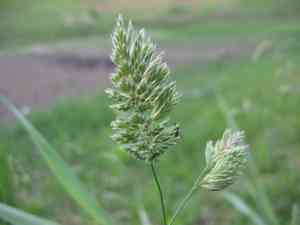
Juncus ensifolius, a moisture-loving botanical specimen, is distinguished by its pointed, upright stalks. Trim Juncus ensifolius during the latter part of winter or early spring to eliminate deceased or compromised stems, fostering more robust development. Sever the stalks at their foundation, taking care to avoid injuring nascent growths. Reducing the density of mature stems enhances air circulation and light exposure, thereby boosting the plant's general well-being. Consistent trimming stimulates energetic growth and deters excessive density, rendering Juncus ensifolius both more aesthetically pleasing and resilient.
Advantages of Trimming Bayonet Rush
Advantages of Trimming Bayonet Rush
Bayonet rush thrives with trimming, promoting robust growth and an ideal form. Regular trimming eliminates dead or damaged sections, fostering healthier development, and ensures the plant stays manageable, both visually appealing and resistant to pests.
Optimal Period for Trimming Bayonet Rush
Optimal Period for Trimming Bayonet Rush
Trimming bayonet rush in late winter and early spring is best due to its growth cycle. Pruning at these times avoids the active growth phase, reducing plant stress and minimizing disease risk. Also, since bayonet rush may start new growth in spring, pruning just before this period encourages healthier, more vigorous new growth.
Required Tools for Trimming Bayonet Rush
Bypass Pruners
Perfect for making clean cuts on thin, green stems without crushing them.
Hedge Shears
Useful for trimming larger areas of bayonet rush to maintain a uniform look.
Long-handled Loppers
Can be used for cutting thicker stems or reaching difficult spots within dense bayonet rush clusters.
Pruning Knife
Helpful for detailed work or making precise cuts near the base.
How to Trim Bayonet Rush
Examine
Carefully inspect bayonet rush to find diseased and withered leaves. Ensure correct identification to avoid unnecessary cutting.
Tool preparation
Use sanitized pruning shears to prevent disease spread. Clean tools with a solution of one part bleach to nine parts water.
Cut diseased parts
Remove diseased leaves first, cutting them at the base where they connect to the main stem. Ensure no diseased parts remain to prevent further infection.
Remove withered leaves
Next, target the withered leaves, cutting them close to the plant's base. Make sure to remove all withered foliage.
Proper disposal
Gather and dispose of the removed leaves in a sealed bag. Do not compost as this might spread diseases.
Common Trimming Errors with Bayonet Rush
Incorrect Technique
A frequent error is using improper pruning tools or methods. This can harm the plant, causing jagged cuts that don't heal well.
Excessive Trimming
Another common mistake is cutting back too much of the plant at once. This can stress bayonet rush, potentially hindering its growth and reducing its ability to flower.
Poor Sanitization
Failing to clean pruning tools before use can lead to disease transmission. Unsanitized tools can introduce pathogens to the plant, severely impacting its health.
Inappropriate Cutting Angle
Some gardeners mistakenly cut stems at the wrong angle. Cuts should be made at a 45-degree angle to ensure proper healing and prevent water from collecting on the cut surface.
General Trimming Advice for Bayonet Rush
Utilize Sharp Tools
Always use sharp, clean pruning shears for precise cuts. This minimizes damage to bayonet rush and promotes faster healing.
Regular Light Trimming
Instead of waiting for issues, perform regular light trimming to maintain the plant's shape and remove any dead or damaged stems. This proactive approach helps maintain the plant's health and vigor.
Target Dead and Diseased Stems
Prioritize removing dead, diseased, or damaged stems. This not only improves the appearance of bayonet rush but also reduces the risk of disease spreading throughout the plant.
Maintain Optimal Plant Height
Monitor the height of bayonet rush, especially if it's used in landscaping. Regular trimming can help maintain the desired height and shape, ensuring it remains an attractive garden feature.



