How to Transplant Rock mousetail?
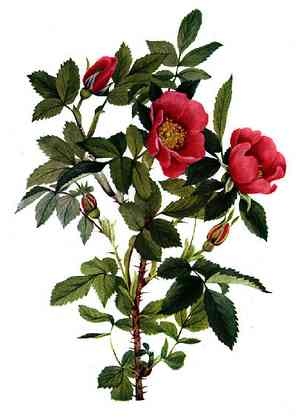
The ideal period for transplanting rock mousetail spans from the beginning to the end of spring, facilitating superior root development. Select a bright, adequately drained spot to ensure a smooth relocation. Refrain from moving the plant during harsh weather to avert undue strain.
What Preparations are Needed Before Transplanting Rock Mousetail?
What is the Ideal Time for Transplanting Rock Mousetail?
The prime season for relocating rock mousetail spans from early to late spring, a timeframe that encourages robust root development prior to summer's heat. Moving plants during this period boosts growth, minimizes transplant shock, and capitalizes on optimal soil moisture. These elements collectively aid the plant's successful adaptation and vigorous progress.
How Much Space Should You Leave Between Rock Mousetail Plants?
To provide ample room for your rock mousetail to flourish, position each transplant 12-18 inches (30-45 cm) apart. This spacing guarantees sufficient air circulation and growing area for healthy, vibrant specimens.
What is the Best Soil Mix for Rock Mousetail Transplanting?
For optimal outcomes, plant your rock mousetail in soil that drains well, ideally sandy or loamy. Enrich the soil with a phosphorus-rich base fertilizer to support root growth. Incorporating a layer of compost can also supply additional nutrients.
Where Should You Relocate Your Rock Mousetail?
Place your rock mousetail in an area that receives full sunlight for a minimum of 6-8 hours daily. This plant thrives in bright conditions, which promotes vigorous growth and abundant flowering.
What Equipments Should You Prepare Before Transplantation Rock Mousetail?
Gardening Gloves
To safeguard your hands while handling soil and plants.
Shovel or Spade
For excavating around the plant and its new ground location.
Garden Trowel
Useful for more precise tasks near the roots.
Watering Can or Hose
To hydrate the plant both before and after its relocation.
Pruning Shears
For trimming any damaged roots or foliage.
How Do You Remove Rock Mousetail from the Soil?
How Do You Remove Rock Mousetail from the Soil?
From Ground: First, moisten the rock mousetail plant to dampen the soil. Next, dig a wide trench around the plant using a shovel or spade, ensuring the plant's root ball remains intact. Carefully work the spade beneath the root ball to lift the plant from its original spot.From Pot: Thoroughly water the rock mousetail plant. Gently turn the pot on its side, tapping the bottom to loosen the plant. Carefully slide the plant out, holding it by the stem's base and the root ball.From Seedling Tray: Water the rock mousetail seedlings before removal. Use a garden trowel or your fingers to gently lift each seedling from the tray, making sure to gather all roots. Be careful not to harm the delicate root systems.
Step-by-Step Guide for Transplanting Rock Mousetail
Prepare the New Site
Dig a hole in the ground that is slightly larger than the root ball of your rock mousetail plant.
Water the Hole
Fill the hole with water and allow it to drain to ensure the planting site is moist.
Place the Plant
Position the rock mousetail plant in the hole so that the top of the root ball is level with the ground surface.
Fill the Hole
Gently fill the hole around the root ball with soil, pressing lightly to remove air pockets but without compacting the soil too much.
Water Again
Water the plant thoroughly after transplanting to help settle the soil and support the roots.
How Do You Care For Rock Mousetail After Transplanting?
Watering
Keep the soil around the rock mousetail consistently moist, but not waterlogged, for the initial few weeks post-transplant to aid in strong root establishment.
Mulching
Apply a layer of mulch around the plant's base to retain moisture and regulate soil temperature.
Monitoring
Observe the plant for signs of stress (such as wilting or yellowing leaves) and promptly address any issues by adjusting watering or providing shade.
Troubleshooting Common Issues with Rock Mousetail Transplantation.
When is the best time to transplant rock mousetail?
The optimal period for relocating rock mousetail is early to late spring for peak growth.
How far apart should I space rock mousetail when transplanting?
Maintain a distance of 12-18 inches (30-45 cm) between each rock mousetail for healthy development.
What soil conditions are ideal for transplanting rock mousetail?
Rock mousetail thrives best in well-draining, sandy, or gritty soil with a neutral pH.
How do I prepare the soil for transplanting rock mousetail?
Loosen the soil to a depth of 10 inches (25 cm) and ensure it drains effectively.
Should I water rock mousetail immediately after transplanting?
Yes, water rock mousetail thoroughly right after transplanting to help establish its roots.
How much sunlight does rock mousetail need?
Rock mousetail requires full sun, at least 6-8 hours of direct sunlight daily, for optimal growth.
What should I do if rock mousetail shows signs of transplant shock?
Keep the soil consistently moist but not waterlogged and provide partial shade if necessary.
Is mulching necessary for rock mousetail after transplanting?
Applying mulch around rock mousetail helps retain moisture and suppress weeds but keep it 2 inches (5 cm) away from stems.
How can I ensure proper root growth when transplanting rock mousetail?
Gently untangle matted roots, and place the plant at the same depth it was growing previously.
When should I fertilize rock mousetail post-transplant?
Wait about 4-6 weeks after transplanting before applying a balanced, slow-release fertilizer.



