How to Transplant Dyer's woad?
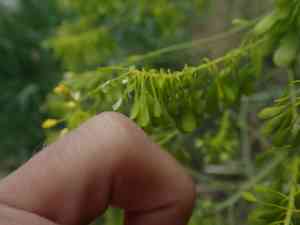
For Isatis tinctoria, the ideal period for relocation is from the latter part of spring through mid-summer, facilitating a seamless establishment. Choose a brightly lit spot with soil that drains effectively, allowing ample room for robust development. Handle the procedure delicately to safeguard the root system.
What Preparations are Needed Before Transplanting Dyer's Woad?
What is the Ideal Time for Transplanting Dyer's Woad?
The optimal period for relocating dyer's woad is as spring transitions into summer. This timing allows roots to establish effectively in warm, yet consistent soil conditions. Moving dyer's woad during this flourishing phase leverages the season's nurturing warmth, enhancing its potential for vigorous development. You'll be giving dyer's woad a head start in settling and thriving, making it an advantageous decision for a flourishing garden.
How Much Space Should You Leave Between Dyer's Woad Plants?
When placing your dyer's woad, remember it benefits from ample room! Ideally, each plant should have 2-3 feet (approximately 60-90 cm) of separation. This ensures adequate air circulation and space for expansion.
What is the Best Soil Mix for Dyer's Woad Transplanting?
Your dyer's woad will thrive in well-drained soil, ideally with a pH between 6.5 and 7.5. Prior to transplanting, enrich your soil with a balanced base fertilizer to supply the necessary nutrients for healthy growth.
Where Should You Relocate Your Dyer's Woad?
Considering its light requirements, a sunny or partially shaded spot will be perfect for your dyer's woad. They will appreciate 6-8 hours of natural light on most days, so keep this in mind.
What Equipments Should You Prepare Before Transplantation Dyer's Woad?
Trowel
To excavate the dyer's woad plant without harming its root system.
Gardening Gloves
To safeguard your hands while handling soil and the plant.
Bucket or pot
To temporarily hold the dyer's woad plant after its removal from its original spot.
Watering Can
To hydrate the dyer's woad plant before and after relocation.
Mulch
To cover the ground around the dyer's woad post-transplant, aiding in soil moisture retention.
Garden Shears
To trim any damaged or excess foliage during the relocation process.
How Do You Remove Dyer's Woad from the Soil?
How Do You Remove Dyer's Woad from the Soil?
From Ground: Begin by thoroughly watering the dyer's woad plant, which will facilitate its removal. Using your trowel, dig a neat trench at least 6 inches away from the plant's base, ensuring to go deep enough to encompass the entire root system. Carefully work your trowel beneath the plant's root ball and lift the plant from the ground. Place the plant into the prepared bucket or pot.From Pot: Fully water the dyer's woad plant before starting. Invert the pot while securely holding the plant at its base, gently wiggle it until the plant slides out, keeping the root ball intact.From Seedling Tray: Fill the tray compartments with water and allow it to moisten the soil. Gently grasp the plant at the base of its stem and lift. The entire plant, along with its root ball, should come out with minimal effort.
Step-by-Step Guide for Transplanting Dyer's Woad
Preparation
Begin by preparing the new planting location. The hole should be twice as wide and the same depth as the dyer's woad's root ball. Carefully remove any weeds and stones from the area.
Placing the Plant
Position your dyer's woad in the center of the hole. The top of the root ball should be level with the surrounding ground.
Filling the Hole
Backfill the hole around your dyer's woad with rich compost or a well-balanced garden soil, gently firming the soil around the root ball.
Watering
Once the dyer's woad is planted, thoroughly water the soil to help it settle.
Application of Mulch
After watering, apply a 2-3 inch layer of mulch around the plant's base, but avoid touching the stem. This helps maintain soil moisture and inhibits weed growth.
How Do You Care For Dyer's Woad After Transplanting?
Watering
Ensure you neither over-water nor under-water the dyer's woad. The soil should remain consistently moist.
Pruning
Remove any withered or dead leaves to allow the dyer's woad to allocate more energy to root and top growth.
Weather Protection
If cold weather or frost is predicted shortly after planting, cover the dyer's woad with a frost blanket.
Weeding
Keep the area around the dyer's woad free of weeds, as they compete for resources. Make sure to pull them out with their roots to prevent their return.
Inspection
Regularly examine the dyer's woad for any indications of disease or pests.
Troubleshooting Common Issues with Dyer's Woad Transplantation.
When is the best time to transplant dyer's woad?
The appropriate season for relocating dyer's woad is during the third to fifth seasonal period.
What's the ideal spacing between dyer's woad plants during transplantation?
For optimal development, dyer's woad plants should be positioned approximately 2-3 feet (60-90 cm) apart.
What should be the condition of the soil for transplanting dyer's woad?
Dyer's woad thrives best in soil that drains well. Ensure the soil pH is stable and slightly acidic.
How deep should dyer's woad be planted during transplanting?
The transplanting hole should be about twice the size of the dyer's woad's root ball. This provides ample space for roots to expand.
What's the best way to water the dyer's woad after transplanting?
Water dyer's woad thoroughly after transplanting. Apply water slowly and deeply to help settle the soil around the roots.
How to handle dyer's woad root ball during transplantation?
Handle the root ball with care, ensuring not to damage it. A healthy root ball leads to a healthy dyer's woad!
Any specific procedure to follow when removing dyer's woad from its current location?
Start by soaking the soil around dyer's woad with water, gently dig around the base, and lift it with the soil and root ball intact.
How to ensure dyer's woad survives in its new location post-transplantation?
Provide the correct conditions after transplanting: ample sunlight, proper watering, and quality soil. Regularly check on dyer's woad to ensure it's flourishing.
How much sunlight does transplanted dyer's woad need to survive?
Dyer's woad prefers full sun to partial shade. Ensure it receives at least six hours of sunlight daily for optimal growth.
What should be done if transplanted dyer's woad shows signs of wilting or dying?
Review the watering schedule, sunlight exposure, and soil condition. Too much or too little of any factor could stress dyer's woad. Adjust as needed and monitor.



