How to Transplant Yellow Star Grass?
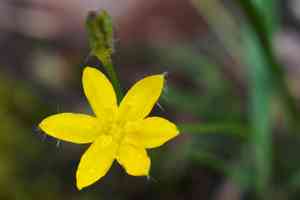
The ideal period for relocating yellow Star Grass is when the ground begins to warm, generally spanning from the close of late spring into the beginning of early summer. Select a brightly lit location with soil that drains effectively to provide these perennial plants with a new beginning. Careful handling is crucial to safeguard their fragile root systems.
What Preparations are Needed Before Transplanting Yellow Star Grass?
What is the Ideal Time for Transplanting Yellow Star Grass?
The optimal period for relocating yellow Star Grass is during the transition from late spring into the early summer months. This timing aligns with warmer soil temperatures, which are favorable for root development and vigorous pre-summer growth. Transplanting within this window maximizes yellow Star Grass's potential, as moderate temperatures and consistent daylight support root establishment, enhancing resilience before peak summer heat. Introducing yellow Star Grass to your garden during this season ensures a successful transplant and promises a lush, vibrant display.
How Much Space Should You Leave Between Yellow Star Grass Plants?
Hello, gardening enthusiast! For your beautiful yellow Star Grass, aim to provide them with adequate room by spacing them approximately 4-6 inches (10-15 cm) apart. This spacing allows each plant sufficient area to thrive and display its cheerful charm!
What is the Best Soil Mix for Yellow Star Grass Transplanting?
Let's prepare the perfect bed for your yellow Star Grass! Choose well-draining soil, enriched with organic matter. Before planting, incorporate a balanced, slow-release fertilizer to give your yellow Star Grass a healthy start. They will reward you with vigorous growth!
Where Should You Relocate Your Yellow Star Grass?
For a thriving yellow Star Grass, select a location in your garden that receives full sun to partial shade. These bright plants flourish with a combination of sunlight and gentle shade. Aim for a spot that gets pleasant morning sun with some protection in the afternoon!
What Equipments Should You Prepare Before Transplantation Yellow Star Grass?
Gardening Gloves
To safeguard your hands while handling soil and plants.
Hand Trowel
For excavating smaller holes and managing plants in containers or trays.
Shovel or Spade
For extracting the plant from the ground with minimal root disturbance.
Watering Can or Hose with Spray Attachment
For hydrating the plant before and after its relocation.
How Do You Remove Yellow Star Grass from the Soil?
How Do You Remove Yellow Star Grass from the Soil?
From Ground: First, moisten the yellow Star Grass plant to hydrate the soil. Use a shovel or spade to dig a wide perimeter around the plant, ensuring the root ball remains intact. Carefully work the tool beneath the root ball to lift the plant from its position without causing harm.From Pot: Water the soil in the container and allow it to absorb for a few minutes. Grasp the base of the yellow Star Grass plant and tilt the pot sideways, gently easing the plant out. If the plant is resistant, tap the pot's edges or slide a trowel along the interior to aid in its release.From Seedling Tray: Water the yellow Star Grass seedlings to keep the soil cohesive during the transfer. Use a hand trowel or dibber to carefully lift the seedlings from their cells, taking care not to damage the roots or shoots.
Step-by-Step Guide for Transplanting Yellow Star Grass
Preview Area
Examine the new planting site to confirm there are no obstacles or existing plants that might hinder the yellow Star Grass's development.
Dig Hole
Use a shovel or trowel to excavate a hole at the new location that is twice as wide and the same depth as the yellow Star Grass's root ball to provide ample space for root expansion.
Plant Positioning
Carefully place the yellow Star Grass in the center of the newly dug hole, adjusting it so the top of the root ball is level with the surrounding soil surface.
Backfilling
Gently refill the hole with soil. As you fill, periodically pat down the soil with your hand to eliminate air pockets without overly compacting the soil.
Watering In
Once the yellow Star Grass is situated, thoroughly water the plant to settle the soil and remove any remaining air gaps around the roots.
How Do You Care For Yellow Star Grass After Transplanting?
Regular Watering
Maintain a consistent watering schedule to keep the soil around the yellow Star Grass uniformly moist, promoting strong root establishment without over-saturation.
Mulching
Apply a layer of organic mulch around the base of the yellow Star Grass to conserve soil moisture, stabilize soil temperature, and suppress weed growth.
Support Structures
If necessary, provide support structures such as stakes for larger yellow Star Grass specimens to help them remain upright during establishment.
Monitoring
Observe the yellow Star Grass for any indications of stress or pests and address issues promptly to ensure successful adaptation to its new environment.
Troubleshooting Common Issues with Yellow Star Grass Transplantation.
What's the best time to transplant yellow Star Grass?
The optimal period for transplanting yellow Star Grass is from late spring to early summer, when weather conditions are mild.
How much space does yellow Star Grass require when transplanting?
Allow a generous spacing of 4-6 inches (10-15 cm) between each yellow Star Grass to ensure healthy development.
Should I water yellow Star Grass immediately after transplanting?
Absolutely! Thoroughly water yellow Star Grass post-transplantation to help settle the soil around its roots.
How deep should I plant yellow Star Grass when transplanting?
Plant yellow Star Grass so that its root ball is level with the soil surface, encouraging proper root establishment.
Why are my transplanted yellow Star Grass's leaves wilting?
Wilting after transplanting may be due to root shock. Ensure adequate hydration and initially avoid direct sunlight.
How do I choose the right spot for transplanting yellow Star Grass?
Select a location with well-drained soil and partial to full sunlight to meet yellow Star Grass's growth requirements.
Can I use fertilizer when transplanting yellow Star Grass?
Refrain from immediate fertilization; instead, wait a few weeks to allow yellow Star Grass to acclimate to its new surroundings.
How can I ensure yellow Star Grass survives the transplant shock?
Gradually introduce yellow Star Grass to its new location over several days and maintain consistent moisture levels.
Is it necessary to prune yellow Star Grass when transplanting?
Pruning is generally not required during transplant. Focus on preserving root integrity and proper planting depth.
What if yellow Star Grass shows no growth signs post-transplant?
Patience is crucial! Yellow Star Grass may take several weeks to exhibit growth as it establishes. Keep the soil moist and observe.



