How to Transplant Dotted beadfern?
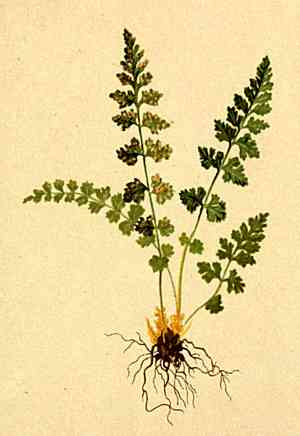
For dotted beadfern, the ideal period for relocation extends from the vigor of late spring's arrival to the height of mid-summer, and also from the peaceful beginning of mid-autumn through the close of late autumn. Choose a shaded spot with soil that drains effectively. Make certain the root mass remains undisturbed for a smooth transfer.
Essential Preparations Before Relocating Dotted Beadfern
When is the Best Time to Move Dotted Beadfern?
The ideal periods for relocating dotted beadfern span from the onset of late spring to the peak of mid-summer, or during the gentle transition from mid-fall to the chill of late fall. These intervals offer dotted beadfern mild temperatures and sufficient time for root establishment prior to extreme weather. Transplanting dotted beadfern during these times ensures its flourishing with nature's perfect balance of warmth and moisture, leveraging the growing season's momentum or settling in with autumn's nurturing touch.
What Spacing is Recommended Between Dotted Beadfern Plants?
Prior to moving your dotted beadfern, you'll want to provide each plant ample room to thrive. Position them approximately 18-24 inches (45-60 cm) apart. This allows for generous growth area and good air circulation, which is vital for their health and well-being!
What is the Optimal Soil Blend for Dotted Beadfern Relocation?
For your dotted beadfern, you'll require soil that drains effectively yet retains moisture, such as a loamy mixture. Incorporate a balanced, slow-release fertilizer to nourish your dotted beadfern as they adapt to their new environment. This prepares the soil to be perfectly suited for their requirements!
Where Should You Replant Your Dotted Beadfern?
Your dotted beadfern will flourish in a location that receives partial shade. They grow best when protected from direct afternoon sun. Therefore, select a spot that offers dappled sunlight or some light shade to ensure your dotted beadfern thrives!
Necessary Equipment for Dotted Beadfern Transplantation
Gardening Gloves
To safeguard your hands while handling soil and plants.
Shovel or Spade
For excavating the plant and preparing the new planting site.
Watering Can or Hose
To hydrate the plant before and after its relocation.
Gardening Trowel
For precise soil manipulation and plant handling.
Root Pruning Shears
To trim any damaged or excessively long roots.
Wheelbarrow or Garden Cart
For transporting the plant and soil materials.
Mulch
To aid in retaining soil moisture post-transplant.
How to Extract Dotted Beadfern from its Current Location?
How to Extract Dotted Beadfern from its Current Location?
From Ground: Thoroughly water the dotted beadfern to moisten the surrounding soil. Use a shovel or spade to dig a wide circle around the plant, taking care to keep the root ball intact. Gently lift the plant from the ground by carefully sliding the spade beneath the root ball.From Pot: Water the dotted beadfern to facilitate its removal. Turn the pot on its side and gently tap the edges to loosen the root ball. Carefully slide the plant out while supporting its base and stem.From Seedling Tray: Lightly water the seedlings to soften the soil. Use a gardening trowel or your fingers to loosen the soil around each dotted beadfern's root ball. Lift the seedling by its leaves rather than its delicate stem.
Detailed Steps for Transplanting Dotted Beadfern
Prepare New Site
Measure the width and depth of the dotted beadfern's root ball. Dig a hole in the ground that is twice as wide and equally as deep as the root ball. Break apart any soil clumps at the bottom of the hole.
Root Ball Examination
Inspect the dotted beadfern's root ball for any damaged or circling roots. Use root pruning shears to remove any unhealthy sections, being careful not to over-prune.
Plant Positioning
Place the dotted beadfern in the center of the hole, ensuring the top of the root ball is at or slightly above ground level. Adjust the hole's depth if needed before setting the plant.
Backfilling the Hole
Gently refill the hole with soil, carefully compacting it around the roots to eliminate air pockets. Water the soil to help it settle, and continue adding soil until the hole is filled.
Stability and Support
Ensure dotted beadfern is stable in its new spot. If necessary, add a stake for support, loosely tying the plant to it with soft plant ties.
Post-Transplant Care for Dotted Beadfern
Initial Watering
Thoroughly water the dotted beadfern immediately after transplanting to settle the soil around its roots and remove air pockets.
Mulching
Apply a layer of mulch around the base of dotted beadfern to help maintain soil moisture and shield its roots from temperature extremes.
Monitoring
Regularly check the plant for signs of distress, such as wilting or discolored foliage, and address any issues promptly with appropriate care.
Gradual Acclimatization
If dotted beadfern was previously in a significantly different environment, it may require time to adjust. Protect it from harsh conditions for a few days if necessary.
Pruning
Minimize pruning after transplant to allow the dotted beadfern to focus its energy on root establishment rather than new growth.
Resolving Common Dotted Beadfern Transplantation Issues
What's the best time to transplant dotted beadfern?
Optimal transplanting occurs from late spring to mid-summer or from early autumn to late autumn.
How far apart should I plant dotted beadfern?
Aim for a spacing of approximately 18-24 inches (45-60 cm) to ensure proper growth.
Why are my dotted beadfern seedlings wilting after transplant?
Wilting could be due to transplant shock. Keep the soil moist and avoid direct sunlight for a few days.
Can I transplant dotted beadfern on a hot day?
It's best to transplant on a cooler, overcast day to minimize stress and prevent dehydration.
What kind of soil should I use for transplanting dotted beadfern?
Use well-draining soil rich in organic matter to provide the best environment for dotted beadfern.
Should I water dotted beadfern immediately after transplanting?
Yes, water dotted beadfern thoroughly to settle the soil around the roots and aid in recovery.
How deep do I plant dotted beadfern when transplanting?
Transplant dotted beadfern so the root ball sits just below the surface, matching its previous depth.
My transplanted dotted beadfern looks droopy, what do I do?
Drooping can be a temporary response to transplanting. Ensure consistent moisture and it should recover.
Is it necessary to fertilize dotted beadfern after transplanting?
Wait a few weeks before fertilizing to allow dotted beadfern to settle in its new location.
How do I prepare the ground for transplanting dotted beadfern?
Loosen the soil and mix in compost for nutrients. Remove any weeds and debris from the area.



