How to Transplant Perfumed spiderlily?
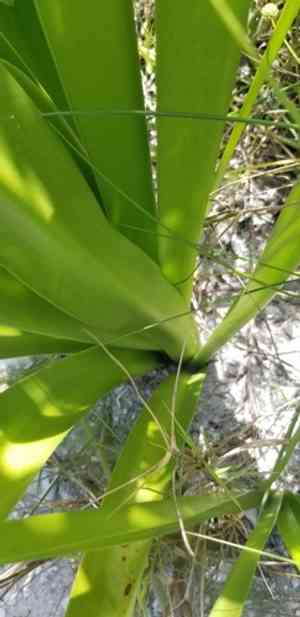
The ideal period for relocating perfumed spiderlily is during the initial to concluding phases of spring or throughout winter, while the plant is inactive, facilitating its adjustment. Select a bright location featuring soil that drains effectively for peak development. Exercise caution during transfer to lessen disruption to the roots.
What Preparations are Needed Before Transplanting Perfumed Spiderlily?
What is the Ideal Time for Transplanting Perfumed Spiderlily?
The prime window for relocating perfumed spiderlily, a perennial, extends from early to late spring or early to late winter. These seasons provide mild temperatures and sufficient moisture, aiding root establishment. Moving perfumed spiderlily during this time boosts survival rates and encourages robust development. Proper timing ensures the plant adapts well before summer's extreme heat or winter's freezes.
How Much Space Should You Leave Between Perfumed Spiderlily Plants?
When relocating perfumed spiderlily, ensure each plant is spaced 12-18 inches (30-45 cm) apart. This provides ample room for development and proper air circulation, which helps prevent diseases.
What is the Best Soil Mix for Perfumed Spiderlily Transplanting?
Prepare well-draining, sandy loam soil for perfumed spiderlily. Incorporate some organic compost and a balanced base fertilizer with an N-P-K ratio like 10-10-10 to enrich the soil prior to transplanting.
Where Should You Relocate Your Perfumed Spiderlily?
Select a site for perfumed spiderlily that receives full sun to partial shade, ensuring it gets at least 6 hours of sunlight daily. This helps the plant flourish and produce beautiful blooms.
What Equipments Should You Prepare Before Transplantation Perfumed Spiderlily?
Gardening Gloves
To safeguard your hands while handling soil and plants.
Hand Trowel
For excavating around the plant to extract it from its current spot.
Shovel or Spade
For digging the new planting hole and removing the plant from the ground.
Watering Can or Hose
To hydrate the plant before and after relocation.
Garden Fork
To loosen the soil around the roots if the plant is in the ground.
Bucket or Container
For transporting the plant if moving it a considerable distance.
How Do You Remove Perfumed Spiderlily from the Soil?
How Do You Remove Perfumed Spiderlily from the Soil?
From Ground: Hydrate the perfumed spiderlily to moisten the soil. Using a shovel or spade, excavate a wide trench around the plant. Gently work the spade beneath the root ball, ensuring it remains intact while lifting the plant.From Pot: Hydrate the perfumed spiderlily to dampen the soil. Carefully tilt the pot sideways and gently slide the plant out, supporting the base with your hand to prevent root damage.From Seedling Tray: Hydrate the perfumed spiderlily to facilitate removal. Gently press from the tray's bottom to lift the plant. Use a hand trowel to assist if necessary, ensuring you donât harm the delicate roots.
Step-by-Step Guide for Transplanting Perfumed Spiderlily
Prepare the New Site
Dig a hole at the new location that is twice the width and the same depth as the perfumed spiderlily's root ball. This allows the roots to spread out more easily.
Amend the Soil
Place a small amount of compost into the hole to provide nutrients for the perfumed spiderlily's roots.
Transplanting
Position the perfumed spiderlily in the center of the hole. Ensure it sits at the same depth as it was in its previous location. Backfill the hole with the removed soil, gently patting down to eliminate any air pockets.
Water Thoroughly
Water the perfumed spiderlily deeply immediately after planting to help settle the soil around the roots.
How Do You Care For Perfumed Spiderlily After Transplanting?
Watering
Keep the soil around the perfumed spiderlily consistently moist, but not waterlogged, for the first few weeks after transplanting to help establish strong roots.
Mulching
Apply a 2-inch layer of mulch around the base of the perfumed spiderlily to retain moisture and regulate soil temperature.
Observation
Monitor the perfumed spiderlily for any indications of transplant shock, such as drooping or yellowing leaves, and provide additional water if needed.
Protection
Shield the perfumed spiderlily from strong winds and direct sunlight for the initial few days, as it acclimates to its new environment.
Troubleshooting Common Issues with Perfumed Spiderlily Transplantation.
What's the best time to transplant perfumed spiderlily?
The optimal periods are early spring to late spring and early winter to late winter.
How much space should I leave between plants?
Leave a spacing of 12-18 inches (30-45 cm) between each perfumed spiderlily to allow for growth.
How do I prepare the soil for perfumed spiderlily?
Ensure the soil is well-draining, and enrich it with compost to provide essential nutrients.
What depth should I plant the perfumed spiderlily bulbs?
Plant the bulbs about 3 inches (7.5 cm) deep with the pointed end facing up.
How frequently should I water perfumed spiderlily after transplanting?
Water the plant thoroughly after transplanting, keeping the soil moist but not waterlogged.
What type of fertilizer is best for perfumed spiderlily?
Use a balanced, slow-release fertilizer to promote healthy growth and blooming.
Should I trim the leaves before transplanting perfumed spiderlily?
Trim any dead or damaged leaves to encourage new growth and reduce transplant stress.
What do I do if the leaves turn yellow after transplanting?
Ensure proper watering and check for drainage issues; yellowing can indicate water stress.
Can perfumed spiderlily be transplanted into containers?
Yes, perfumed spiderlily can thrive in containers. Use a pot with good drainage and quality potting mix.
How do I protect perfumed spiderlily from pests after transplanting?
Regularly inspect for pests and use organic insecticides or neem oil to manage infestations.



