How to Transplant Coastal sneezeweed?
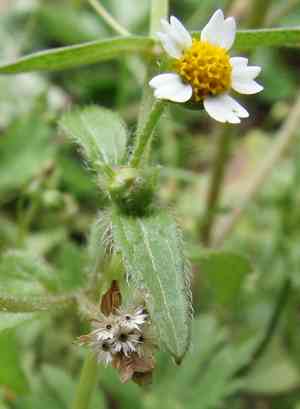
Coastal sneezeweed flourishes optimally when relocated in the initial to middle part of summer, guaranteeing warmth and steady development. Select a bright, adequately drained spot for prime cultivation. Regular irrigation after transplanting aids in establishing robust roots for a prosperous adaptation.
What Preparations are Needed Before Transplanting Coastal Sneezeweed?
What is the Ideal Time for Transplanting Coastal Sneezeweed?
The optimal period for relocating coastal sneezeweed is from late spring to early summer. During this timeframe, the ground is sufficiently warm to encourage root development, allowing the plant to benefit from the active growth season. Moving it in late spring to early summer helps coastal sneezeweed adapt more effectively, ensuring vigorous growth and flowering in subsequent months.
How Much Space Should You Leave Between Coastal Sneezeweed Plants?
Coastal sneezeweed requires a spacing of 18-24 inches (45-60 cm) to provide adequate room for development and air circulation. This spacing helps prevent overcrowding and the spread of disease.
What is the Best Soil Mix for Coastal Sneezeweed Transplanting?
Coastal sneezeweed thrives in soil that drains well. Prepare the soil by incorporating compost and a balanced fertilizer to enrich it with essential nutrients for healthy development.
Where Should You Relocate Your Coastal Sneezeweed?
Place coastal sneezeweed in a sunny spot that receives a minimum of 6 hours of direct sunlight daily. This ensures the plant gets sufficient light for optimal growth and blooming.
What Equipments Should You Prepare Before Transplantation Coastal Sneezeweed?
Gardening Gloves
To safeguard your hands while handling soil and plants.
Shovel or Spade
For excavating holes and trenches.
Trowel
Useful for more precise digging tasks or working with smaller soil areas.
Watering Can or Hose
To hydrate the plants before and after their relocation.
Pruning Shears
For trimming any damaged roots or foliage.
Garden Fork
To aerate the soil, especially if it's compacted.
Burlap or Old Cloth
To wrap the root ball during the transfer.
How Do You Remove Coastal Sneezeweed from the Soil?
How Do You Remove Coastal Sneezeweed from the Soil?
From Ground: First, moisten the soil around the coastal sneezeweed plant. Then, use a shovel or spade to dig a wide trench around the plant, ensuring the root ball remains intact. Carefully work the spade beneath the root ball to lift the plant from its original spot.From Pot: Gently water the coastal sneezeweed plant to dampen the soil. Turn the pot on its side and tap the bottom to loosen the plant. Carefully slide the plant out; if it's stuck, use a trowel to gently loosen the edges.From Seedling Tray: Lightly water the coastal sneezeweed plant, then gently squeeze the tray's sides to loosen the soil. Use a pencil or a dibber to push the seedling up from the bottom, being careful to keep the roots undamaged.
Step-by-Step Guide for Transplanting Coastal Sneezeweed
Site Selection
Choose a location with adequate sunlight and room for your coastal sneezeweed plant to reach its full size.
Prep the New Location
Dig a hole that is twice the width and the same depth as the coastal sneezeweed's root ball. Loosen the soil at the bottom and sides of the hole with a garden fork.
Remove the Dormant Foliage
Trim any damaged or excessively long roots using pruning shears.
Planting
Place the coastal sneezeweed in the hole, ensuring the top of the root ball is level with the surrounding soil. Fill the hole with soil, pressing gently to remove air pockets.
Watering
Water the plant thoroughly to help settle the soil around the roots.
How Do You Care For Coastal Sneezeweed After Transplanting?
Watering
Keep the soil around the coastal sneezeweed consistently moist, but not waterlogged, for the initial few weeks post-transplant to encourage strong root development.
Mulching
Apply a layer of mulch around the base of the coastal sneezeweed to help retain moisture and stabilize soil temperature.
Monitoring
Observe the plant closely for the first month after transplanting, looking for signs of stress such as wilting or yellowing leaves, and address any issues promptly.
Troubleshooting Common Issues with Coastal Sneezeweed Transplantation.
When is the best time to transplant coastal sneezeweed?
Relocate coastal sneezeweed in early to mid-summer for optimal growth and establishment.
What is the ideal spacing for coastal sneezeweed?
Space coastal sneezeweed 18-24 inches (45-60 cm) apart to provide ample room for growth.
How should I prepare the soil before transplanting coastal sneezeweed?
Ensure the soil drains well, is enriched with compost, and has a slightly acidic to neutral pH.
How often should I water coastal sneezeweed after transplanting?
Water regularly, keeping the soil consistently moist but not saturated for the first few weeks.
What is the best planting depth for coastal sneezeweed?
Plant coastal sneezeweed at the same depth it was growing in its previous location.
How can I minimize transplant shock for coastal sneezeweed?
Transplant on cloudy days, water thoroughly, and add mulch to retain moisture and provide stability.
What type of mulch is best for coastal sneezeweed?
Organic mulch like straw, wood chips, or compost helps retain moisture and regulate soil temperature.
Should I fertilize coastal sneezeweed after transplanting?
Apply a balanced, slow-release fertilizer a few weeks after transplanting to support growth.
How much sunlight does coastal sneezeweed need?
Coastal sneezeweed thrives in full sun, requiring at least 6 hours of direct sunlight daily.
What should I do if coastal sneezeweed shows signs of transplant shock?
Provide additional water, reduce exposure to direct sunlight, and use a diluted root stimulator.



