How to Transplant Club cholla?
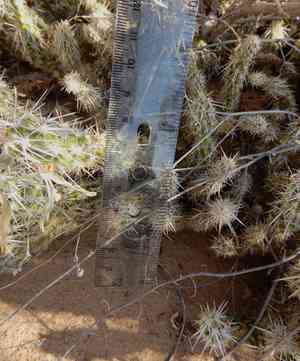
For optimal outcomes, Club cholla ought to be relocated in the pleasant conditions of late spring or early summer. Confirm its placement in a bright, adequately draining spot to flourish. Exercise caution during handling to prevent harm to its fragile root structure.
What Preparations are Needed Before Transplanting Club Cholla?
What is the Ideal Time for Transplanting Club Cholla?
The best time to move club cholla is from late spring to early summer. Warmer soil temperatures during this period encourage strong root development, maximizing the plant's growth potential, improving its resilience, and ensuring better adaptation to its new environment. This timing also coincides with favorable weather, reducing the risk of transplant shock.
How Much Space Should You Leave Between Club Cholla Plants?
Provide ample room for each club cholla plant. Aim for a spacing of 18-24 inches (45-60 cm) between individual plants to facilitate their growth and prevent overcrowding.
What is the Best Soil Mix for Club Cholla Transplanting?
Prepare a soil mixture that drains well for club cholla. They thrive in sandy or gravelly soil. Enhance the soil with a base fertilizer formulated for cacti and succulents to give your plants a robust start.
Where Should You Relocate Your Club Cholla?
Select a sunny location for club cholla. They require full sun exposure, so ensure they receive at least 6 hours of direct sunlight daily to maintain their health and vitality.
What Equipments Should You Prepare Before Transplantation Club Cholla?
Gardening Gloves
To safeguard your hands while handling soil and plants.
Shovel or Spade
For excavating around the plant and preparing the new planting site.
Trowel
Useful for minor adjustments and digging in confined areas.
Wheelbarrow or Bucket
To safely transport the plant to its new spot.
Pruning Shears
To trim any damaged or overgrown root structures.
Mulch
To aid in moisture retention and regulate soil temperature post-transplant.
Watering Can or Hose
To keep the soil hydrated before and after the transplanting process.
How Do You Remove Club Cholla from the Soil?
How Do You Remove Club Cholla from the Soil?
From Ground: First, moisten the soil around the club cholla by watering it. Then, use a shovel or spade to dig a wide trench around the plant, ensuring the root ball remains intact. Carefully work the spade beneath the root ball to lift the plant from its original position.From Pot: Water the club cholla and gently tap the pot's sides to loosen the soil. Tilt the pot and carefully slide the plant out, taking care not to harm the roots.From Seedling Tray: Water the seedlings thoroughly. Using a trowel, gently lift each seedling by scooping under the roots to prevent damage.
Step-by-Step Guide for Transplanting Club Cholla
Prepare the New Location
Select a site with adequate sunlight and space for your club cholla to reach its full size. Ensure the new planting hole is twice as wide and as deep as the plant's root ball.
Bed Soil Preparation
Amend the soil in the new location as needed, ensuring it drains well. Incorporate compost or other organic matter if necessary to enrich the soil.
Transplanting the club cholla
Position the club cholla in the center of the new hole, making sure the top of the root ball is level with or slightly above the surrounding soil. Backfill the hole with soil, gently tamping it down to remove air pockets.
Watering In
Thoroughly water the newly transplanted club cholla to settle the soil around its roots. Water generously but avoid saturating the soil.
Add Mulch
Spread a layer of mulch around the plant's base to help retain moisture and regulate soil temperature.
How Do You Care For Club Cholla After Transplanting?
Watering
Maintain consistent moisture around the club cholla, avoiding sogginess, for the initial weeks post-transplant to encourage strong root development.
Checking for Pests
Monitor for any indications of pests or diseases, as the club cholla may be more susceptible during its establishment phase.
Pruning as Necessary
Remove any dead or damaged sections to promote healthy growth and alleviate stress on the plant.
Support
If the club cholla exhibits a heavy or unbalanced structure, consider using stakes or other forms of support to help it firmly establish in its new location.
Troubleshooting Common Issues with Club Cholla Transplantation.
When is the best time to transplant club cholla?
Transplant club cholla ideally in late spring or early summer for optimal growth and recovery.
What spacing is recommended for club cholla when transplanting?
Ensure at least 18-24 inches (45-60 cm) between plants to allow adequate room for growth.
How should I prepare the soil for transplanting club cholla?
Use well-draining soil with a mix of sand and gravel to prevent waterlogging.
How deep should I plant club cholla when transplanting?
Plant club cholla at the same depth it was growing previously to avoid root stress.
How do I handle club cholla during transplanting?
Wear gloves and use tools to avoid direct contact with spines while handling club cholla.
Should I water club cholla immediately after transplanting?
Water lightly after transplanting to settle the soil but avoid overwatering to prevent root rot.
How often should I water club cholla after transplanting?
Water sparingly; allow the soil to dry out completely between watering sessions.
What temperature is ideal for transplanting club cholla?
Transplant club cholla when temperatures are consistently above 50°F (10°C) to ensure thriving growth.
How do I ensure club cholla thrives after transplanting?
Place club cholla in a sunny location and protect it from strong winds to help it acclimate.
Any tips to prevent transplant shock for club cholla?
Minimize root disturbance and water sparingly to help club cholla adjust smoothly to new surroundings.



