How to Transplant California gilia?
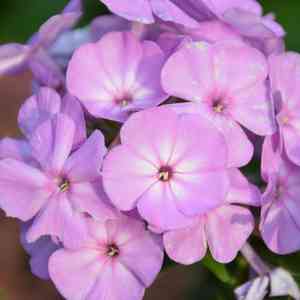
California gilia, an annual species, thrives when relocated during the revitalizing period of late winter. Select a bright area featuring soil that drains effectively; a site with ample air circulation is essential. Important: Handle the transplant with care to safeguard its fragile root system.
What Preparations are Needed Before Transplanting California Gilia?
What is the Ideal Time for Transplanting California Gilia?
California gilia thrives when moved in early spring, benefiting from moderate temperatures and ample moisture. This period supports root development and vigorous growth. Transplanting at this time maximizes nutrient uptake and prepares the plant for its flowering season.
How Much Space Should You Leave Between California Gilia Plants?
Allow approximately 6-12 inches (15-30 cm) between your california gilia plants to ensure sufficient room for their development and flourishing.
What is the Best Soil Mix for California Gilia Transplanting?
Prepare a well-draining, sandy or loamy soil blend, enriched with a balanced, all-purpose fertilizer. This provides your california gilia with the necessary nutrients for optimal health.
Where Should You Relocate Your California Gilia?
Select a sunny location for your california gilia. They require full sun exposure to flourish, meaning at least 6 hours of direct sunlight daily.
What Equipments Should You Prepare Before Transplantation California Gilia?
Gardening Gloves
To safeguard your hands while handling soil and plants.
Shovel/Spade
For excavating the planting hole and lifting the plant.
Trowel
To assist in carefully transferring the plant from a pot or seedling tray.
Watering Can or Hose
To hydrate the plant both before and after its relocation.
Mulch
To aid in retaining soil moisture and suppressing weeds.
Stakes and Plant Ties
For providing support to the plant if it is tall or has fragile stems.
Compost
To enrich the soil at the new planting site.
How Do You Remove California Gilia from the Soil?
How Do You Remove California Gilia from the Soil?
From Ground: First, moisten the california gilia's soil with water. Then, dig a wide trench around the plant using a shovel or spade, ensuring the root ball remains intact. Carefully work the spade beneath the root ball to lift the plant from its original spot.From Pot: Water the california gilia thoroughly to ensure the root ball is damp. Gently tap the pot's sides to loosen the soil and roots. Carefully slide the plant out while supporting the stem base and root ball.From Seedling Tray: Water the seedling tray to dampen the soil. Use a trowel or your fingers to gently lift the california gilia seedling by the stem's base, taking care not to harm the delicate roots.
Step-by-Step Guide for Transplanting California Gilia
Digging the Hole
Excavate a hole in the new spot that is twice as wide and as deep as the california gilia's root ball. This allows ample room for root expansion.
Conditioning the Soil
Incorporate compost into the soil removed from the hole to enrich it, creating a more favorable growing environment for the plant.
Placing the Plant
Position the california gilia in the center of the hole at the same depth it was previously growing. Ensure the root ball is level with the surrounding ground.
Filling the Hole
Backfill the hole with the soil and compost mixture, gently firming it around the roots to eliminate air pockets.
Watering
Thoroughly water the california gilia after planting to help settle the soil and hydrate the roots.
Mulching
Apply a layer of mulch around the base of the california gilia to conserve moisture and deter weeds.
Supporting (if necessary)
If your california gilia is tall or delicate, use stakes and plant ties to provide support until it develops strong roots.
How Do You Care For California Gilia After Transplanting?
Watering
Maintain consistent moisture in the soil around the california gilia, avoiding sogginess, for the initial weeks post-transplant to encourage robust root development.
Monitoring
Regularly inspect the california gilia for indications of stress, such as wilting or yellowing leaves, and adjust care as needed.
Weeding
Keep the area surrounding the california gilia free of weeds, which can compete for water and nutrients.
Protection
Consider using a light shade cloth if the california gilia exhibits signs of sunscald, gradually acclimating it to full sun conditions.
Troubleshooting Common Issues with California Gilia Transplantation.
When is the best time to transplant california gilia?
Early spring is optimal for transplanting california gilia, ensuring successful growth and establishment.
How should I prepare the soil before transplanting california gilia?
Loosen the soil and incorporate organic compost to improve drainage and nutrient availability.
What is the ideal spacing for transplanting california gilia?
Space california gilia seedlings 6-12 inches (15-30 cm) apart for proper growth and air circulation.
Why is my transplanted california gilia wilting?
Wilting may indicate transplant shock; ensure consistent watering and minimize root disturbance.
How deep should I plant california gilia seedlings?
Plant seedlings at the same depth they were in their original containers to prevent stress.
How often should I water newly transplanted california gilia?
Water daily for the first week, then transition to a regular watering schedule as required.
What type of light does california gilia need post-transplant?
Ensure california gilia receives full sun to partial shade for healthy development and flowering.
How can I protect california gilia from pests after transplanting?
Utilize natural pest deterrents like neem oil and ensure good air circulation around the plants.
Should I fertilize california gilia after transplanting?
Apply a balanced, slow-release fertilizer a few weeks after transplanting to encourage strong growth.
What temperatures are ideal for transplanting california gilia?
Transplant when daytime temperatures range from 60-70°F (15-21°C) for optimal results.



