How to Propagate California gilia?
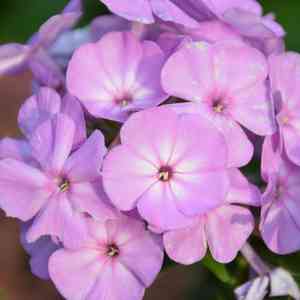
Gilia tricolor, an annual plant from the Phlox family, flourishes in sandy, well-draining substrates under direct sunlight. To achieve robust development, begin by readying a thoroughly aerated area for sowing. Disperse the seeds directly onto the surface, gently cover them with a shallow layer of earth, and maintain dampness until sprouts appear. Consistent irrigation and limited disruption are vital during the initial phases of growth. Consulting established horticultural references confirms the efficacy of these recommendations.
Optimal Time for California Gilia Propagation
Propagation Method
Seeding
Propagation Period
Spring
Tools for California Gilia Propagation
Seed Trays
Seed trays are vital for germinating california gilia seeds, offering a controlled setting for initial development. Confirm they have proper drainage to avoid water accumulation.
Seed Starting Mix
A specialized seed starting medium, lighter and finer than standard potting soil, improves germination by providing good air circulation and moisture retention.
Label Markers
Label markers assist in tracking sown seeds, ensuring correct identification and organization, which is essential for monitoring and care.
Humidity Dome
A humidity dome maintains moisture and warmth, creating ideal conditions for california gilia seed germination. It prevents seedlings from drying out.
Mister Bottle
A mister bottle offers a gentle method to water california gilia seeds and seedlings without disturbing the soil or dislodging the seeds, maintaining consistent moisture levels.
Heating Mat
A heating mat placed beneath seed trays can enhance germination rates by providing consistent bottom warmth, particularly useful in cooler climates or seasons.
Pricking Out Tools
Pricking out tools are utilized to transplant seedlings from seed trays to individual pots without harming delicate roots, promoting healthy growth.
Grow Lights
Grow lights are crucial for supplying sufficient illumination when natural sunlight is scarce, ensuring that california gilia seedlings develop strong and healthy.
pH Meter
A pH meter helps monitor the soil's acidity, ensuring it is within the optimal range for california gilia, which is vital for nutrient absorption and overall health.
How to Propagate California Gilia?
Propagation Type
Simple
Caring for Newly Propagated California Gilia
Caring for Newly Propagated California Gilia
Post-transplantation, ensure california gilia receives ample sunlight and water moderately, allowing the soil to dry between waterings. Apply mulch around plants to conserve moisture and deter weeds, and regularly inspect for pests or diseases. Prune spent blooms to encourage further flowering and maintain plant vigor.
Common Errors to Avoid When Propagating California Gilia
Overwatering
Excessive watering can lead to root rot, which is particularly damaging for california gilia as it prefers well-drained soil.
Poor soil choice
Using dense or poorly draining soil can cause waterlogging and inadequate root development, negatively impacting california gilia's growth.
Improper light conditions
Placing california gilia in too much shade can result in leggy growth and a lack of blooms, as it thrives in full sun to partial shade.
Crowded planting
Planting california gilia too close together can restrict air circulation and light penetration, encouraging fungal diseases and hindering growth.
Tips For Propagating California Gilia
Soil selection
Utilize well-draining, sandy soil to mimic california gilia's natural environment, ensuring optimal root health and development.
Watering
Maintain a moderate watering schedule, ensuring the soil is moist but not waterlogged to prevent root rot.
Light exposure
Position california gilia in an area with full sun to partial shade to encourage vigorous growth and abundant flowering.
Spacing
Plant california gilia with adequate spacing to ensure good airflow and light distribution, reducing disease risk and promoting healthy growth.



