How to Transplant Shining cranesbill?
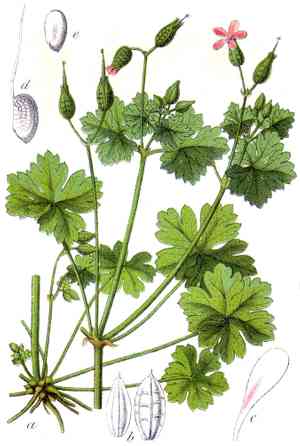
For Geranium lucidum, the ideal period for transplanting is in the brightness of early summer, which guarantees vigorous development. Select locations that receive full sun to dappled light. Bear in mind that careful management of the root system during relocation facilitates a smooth adjustment.
What Preparations are Needed Before Transplanting Shining Cranesbill?
What is the Ideal Time for Transplanting Shining Cranesbill?
The perfect time to relocate shining cranesbill is from the gentle warmth of late spring to the early part of mid-summer. This period aligns with the plant's natural growth cycle, providing an optimal mix of extended daylight and moderate temperatures, crucial for a successful move. Moving shining cranesbill during this window allows it to establish roots in its new spot with minimal stress, promoting better growth and vigor. It's like catching the ideal moment for shining cranesbill, precisely when it's ready to flourish!
How Much Space Should You Leave Between Shining Cranesbill Plants?
When moving your shining cranesbill, ensure each plant is spaced approximately 1-2 feet (30-60 cm) apart. This spacing provides ample room for them to expand and develop. It's a simple yet crucial step for the plant's overall health.
What is the Best Soil Mix for Shining Cranesbill Transplanting?
Your shining cranesbill will flourish in soil that drains well. To prepare the ground, incorporate a balanced base fertilizer before planting. This will give your plant a strong start and maintain essential nutrient levels in the soil. It's an easy task, but your shining cranesbill will appreciate it!
Where Should You Relocate Your Shining Cranesbill?
Find a location in your garden where your shining cranesbill will receive partial to full sunlight throughout the day. These plants thrive in sunshine, and placing them correctly is vital for their development. It might seem minor, but selecting the right spot makes a significant impact!
What Equipments Should You Prepare Before Transplantation Shining Cranesbill?
Gardening Gloves
To safeguard your hands from harm while working with soil and the plant.
Trowel
This will be useful for digging small holes for your shining cranesbill plant.
Shovel
A larger implement for creating the main planting hole, or for extracting the plant from its previous spot.
Watering Can
Needed to hydrate the plant both before and after transplantation.
Pruners
To remove any dead or damaged foliage from the shining cranesbill following transplantation.
Wheelbarrow or Bucket
Ideal for transporting the plant from one place to another.
How Do You Remove Shining Cranesbill from the Soil?
How Do You Remove Shining Cranesbill from the Soil?
From Ground: Begin by watering the shining cranesbill plant to moisten the soil. Next, dig a wide trench around the plant using a shovel, being careful not to harm the plant's root ball. Gently pry the spade beneath the root ball to carefully lift the plant from its location.From Pot: Water the shining cranesbill plant and carefully invert the pot, holding onto the plant's stem. If the plant doesn't slide out easily, tap the pot's edges to loosen the soil.From Seedling Tray: Water the seedling tray, then carefully push the seedling shining cranesbill from the bottom or use a spoon or similar tool to scoop them out without damaging the roots.
Step-by-Step Guide for Transplanting Shining Cranesbill
Digging
Excavate a hole twice the width of the shining cranesbill's root ball and equal to its depth. This provides ample room for the roots to spread and grow.
Placing the Plant
Position your shining cranesbill in the hole. The top of the root ball should be level with the surrounding soil.
Backfilling
Refill the hole with the same soil that was removed. Gently press the soil around the base of the shining cranesbill.
Watering
Water the shining cranesbill generously immediately after transplanting. This helps settle the soil around the roots and minimizes transplant shock.
How Do You Care For Shining Cranesbill After Transplanting?
Watering
For the initial few weeks after transplanting, ensure the soil around your shining cranesbill remains moist but not waterlogged. This aids the plant in establishing strong roots in its new spot.
Pruning
Remove any wilting or yellowing leaves to encourage fresh growth.
Weed Control
Keep the area surrounding your shining cranesbill free of weeds. Weeds compete with your plant for essential nutrients and water.
Check for Pests/Diseases
Regularly inspect your shining cranesbill for indications of pests or diseases. Early detection and treatment can save your plant.
Troubleshooting Common Issues with Shining Cranesbill Transplantation.
When's the best time to transplant shining cranesbill?
Shining cranesbill thrives best when transplanted from late summer to early fall (S3-S5). This period offers the most favorable conditions for growth.
What is the ideal space between each shining cranesbill during transplantation?
Each shining cranesbill requires sufficient space for optimal development. Maintain a distance of 1-2 feet (30-60 cm) between each plant.
Why does my shining cranesbill wilt after transplanting?
Shining cranesbill may wilt post-transplant due to transplant shock, often caused by insufficient watering, unsuitable weather, or improper transplantation techniques.
How can I avoid the yellowing leaves in my transplanted shining cranesbill?
Yellow leaves can indicate overwatering or a lack of nutrients. Ensure proper watering, and nourish your shining cranesbill with an all-purpose plant food to maintain its health.
How much sun does a transplanted shining cranesbill need?
Shining cranesbill enjoys both sun and partial shade. Placing it in an area with moderate sunlight will promote healthier growth.
Can shining cranesbill be transplanted indoors?
Absolutely! Shining cranesbill can adapt well to indoor environments. Ensure adequate light, sufficient humidity, and remember to water it regularly.
How often should shining cranesbill be watered post-transplant?
For the first few weeks after transplant, ensure shining cranesbill is well-watered. Once established, it can tolerate slightly dry conditions but may require regular watering during hot months.
Should I prune shining cranesbill after transplanting?
No need to rush. Allow your shining cranesbill to acclimate to its new surroundings first. Later, light pruning can help it recover faster and maintain a tidy appearance.
Why are my shining cranesbill's leaves curling after transplanting?
This could be due to extreme temperatures, excessive light, or over/under watering. Provide a stable environment and consistent care for your shining cranesbill to flourish.
Can shining cranesbill survive if its roots got damaged while transplanting?
Don't worry! Shining cranesbill can indeed recover from root damage, though it might slow their initial growth after transplanting. So, handle it gently.



