How to Prune Shining cranesbill?
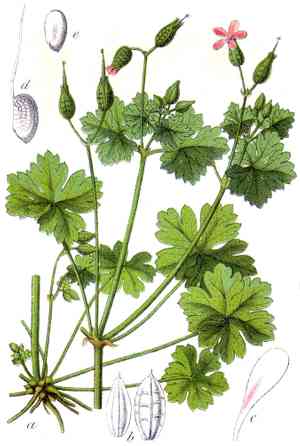
Featuring lustrous, rounded foliage and bell-shaped pink blooms, shining cranesbill provides continuous aesthetic value throughout the year. Trimming is recommended in spring, summer, or autumn to stimulate robust development and preserve a dense form. Removing faded flowers encourages additional blossoming and inhibits self-propagation. Eliminating aged, unproductive stalks improves air movement, consequently lowering the chance of illness. Trimming can be accomplished with sanitized, keen scissors, making certain incisions are positioned directly above fresh growth or leaf junctions.
What Are the Benefits of Pruning Shining Cranesbill?
What Are the Benefits of Pruning Shining Cranesbill?
Trimming shining cranesbill promotes robust development while maintaining its desired form. By cutting back overgrown branches, gardeners foster a denser, healthier plant that is visually appealing and thrives in its environment.
What Is the Best Time for Pruning Shining Cranesbill?
What Is the Best Time for Pruning Shining Cranesbill?
Spring pruning is optimal for shining cranesbill as it prepares the plant for the active growth period, removing dead or damaged sections after winter, and stimulating vigorous new growth. Early Summer trimming ensures the removal of spent flowers and can encourage a second bloom in the same season. Fall pruning focuses on upkeep and readying shining cranesbill for dormancy by eliminating any diseased or overgrown parts, improving air circulation and preventing potential issues during the colder months.
What Tools Do I Need to Prune Shining Cranesbill?
Hand Pruners
Hand pruners are the essential tool for shining cranesbill, which is typically a small and delicate plant. Bypass pruners are recommended for making clean cuts on the plant's thin stems without crushing plant tissue.
Gardening Scissors
For precise adjustments and shaping shining cranesbill, gardening scissors are ideal. They allow for accuracy in trimming small leaves and stems, as well as deadheading spent flowers.
Pruning Shears
Pruning shears are useful for shining cranesbill when dealing with older or woodier stems that might be too tough for gardening scissors. Anvil-style shears could be beneficial for tougher cuts, provided they are kept sharp to prevent unnecessary damage to the plant.
Gloves
Wearing gloves while pruning shining cranesbill can protect the gardener's hands from potential irritants on the plant or in the soil, and also from any sharp edges on the pruning tools.
How to Prune Shining Cranesbill
Clean Tools
Sanitize pruning tools with a solution of one part bleach to nine parts water to prevent the spread of disease.
Remove Dead Stems
Cut back dead stems at the base using sharp, clean pruning shears. Make the cut at a slight angle to promote healing and discourage water accumulation.
Trim Overgrown Shoots
Identify and trim overgrown shoots to maintain the desired shape of shining cranesbill. Cut just above a leaf node or lateral branch.
Dispose Clippings
Discard pruned stems and shoots in a compost bin or as advised by local garden waste regulations to prevent any potential re-growth or disease spread.
Post Pruning Care
Water shining cranesbill lightly after pruning to relieve stress and encourage new growth. Monitor the plant for signs of recovery and growth over the following weeks.
Common Pruning Mistakes with Shining Cranesbill
Over-Pruning
Removing too much growth at once can stress shining cranesbill, potentially leading to reduced vigor and fewer blooms.
Using Dull Tools
Pruning with dull or unclean equipment can damage the stems of shining cranesbill, leaving ragged cuts that are more susceptible to disease.
Improper Cut Location
Cutting too far from a node or bud may result in dead stubs, while cutting too close can damage the burgeoning growth points of shining cranesbill.
Neglecting Diseased Material
Failing to remove and dispose of diseased or pest-infested parts can allow the problem to spread throughout shining cranesbill.
Pruning At The Wrong Angle
Cuts made at an improper angle can prevent water runoff, possibly causing rot or fungal infections on the cut surfaces of shining cranesbill.
Ignoring Plant Shape
Pruning without considering the natural shape of shining cranesbill can result in an unbalanced appearance and may inhibit its natural growth pattern.
Common Pruning Tips for Shining Cranesbill
Sanitized Tools
Use sanitized, sharp secateurs to make clean cuts, which will help prevent diseases in shining cranesbill and promote quicker healing.
Angled Cuts
Make cuts at a 45-degree angle about 1/4 inch above a bud or branching point to encourage water runoff and new growth on shining cranesbill.
Selective Pruning
Prune selectively, focusing on removing dead or damaged growth and thinning congested areas to improve air circulation for shining cranesbill.
Maintain Shape
Trim shining cranesbill to maintain its natural shape, which will provide structural balance and aesthetic appeal.
Stepwise Pruning
For a more substantial pruning, adopt a stepwise approach over several seasons to avoid overwhelming shining cranesbill.
Post-Pruning Care
After pruning shining cranesbill, provide adequate water and possibly a balanced fertilizer to support recovery and new growth.



