How to Transplant Walking-stick orchid?
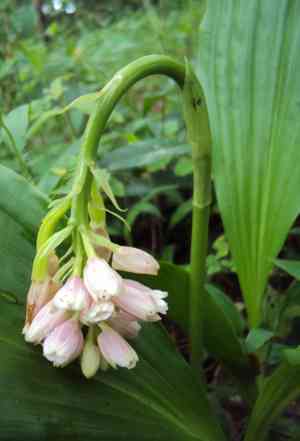
The ideal period for transplanting walking-stick orchid spans from early spring's awakening to the threshold of summer, as temperate conditions facilitate root integration. A location offering partial shade, replicating walking-stick orchid's native environment, optimizes the success of the transfer. Handle the procedure with care to safeguard its fragile root system.
What Preparations are Needed Before Transplanting Walking-stick Orchid?
What is the Ideal Time for Transplanting Walking-stick Orchid?
The optimal period for relocating walking-stick orchid is during the vigor of late spring. This timing allows the plant to establish itself prior to the intense summer heat. Moving walking-stick orchid then enables it to benefit from mild temperatures and increasing daylight, providing a mix of growth-promoting conditions without the strain of midsummer warmth. This action ensures walking-stick orchid develops a strong root system for subsequent seasons, perfectly aligning with nature's renewal cycle.
How Much Space Should You Leave Between Walking-stick Orchid Plants?
Embark on your gardening journey with walking-stick orchid! To provide ample room for your plants to thrive, aim for a spacing of approximately 8-12 inches (20-30 cm) between them. This will guarantee sufficient space for growth and prevent competition for resources.
What is the Best Soil Mix for Walking-stick Orchid Transplanting?
Your walking-stick orchid will flourish in a comfortable environment of well-draining soil enriched with organic matter. Choose a loamy or sandy soil type and gently incorporate a balanced, slow-release fertilizer to give your plants a nutritional head start!
Where Should You Relocate Your Walking-stick Orchid?
Finding the perfect spot for your walking-stick orchid is like selecting a sunny corner in your home. Opt for a location that provides bright, yet indirect light, shielding them from the harshest midday sun to foster their vibrant health.
What Equipments Should You Prepare Before Transplantation Walking-stick Orchid?
Gardening Gloves
To safeguard your hands while handling soil and plants.
Shovel or Spade
For carefully excavating the plant without damaging its roots.
Watering Can or Hose
To pre-moisten the plant and the new site, ensuring the soil is damp.
Wheelbarrow or Plant Tray
To safely move the walking-stick orchid from one spot to another.
Pruning Shears
For trimming any dead or superfluous parts of the plant.
Trowel
For minor adjustments to the soil and planting hole.
Mulch
To help retain soil moisture and reduce weed growth around the new location.
How Do You Remove Walking-stick Orchid from the Soil?
How Do You Remove Walking-stick Orchid from the Soil?
From Ground: Pre-water the walking-stick orchid to moisten the soil. Carefully dig a wide circle around the plant with a shovel or spade to preserve the root ball. Slide the tool underneath and gently lift the plant, keeping as much of the root system intact as possible.From Pot: Gently tip the pot sideways and tap the bottom to help loosen the walking-stick orchid. Hold the plant at its base and carefully ease it out, being sure to support the root ball.From Seedling Tray: Water the tray to make the soil pliable. Use a trowel or your fingers to lift the walking-stick orchid from the tray, ensuring minimal disturbance to the roots.
Step-by-Step Guide for Transplanting Walking-stick Orchid
Preparation
Before extracting the walking-stick orchid from its current spot, ensure all necessary tools are at hand and the new location is prepared.
Root Ball Care
Carefully remove the walking-stick orchid from the ground or container, striving to keep the root ball as undisturbed as possible.
Transport
Place the walking-stick orchid in a wheelbarrow or on a plant tray to move it to the new location without excessive jostling.
Planting Hole
At the new site, dig a hole twice as wide as the root ball and equally deep, to easily accommodate the roots.
Placement
Gently position the walking-stick orchid in the hole. Ensure it stands upright and at the same depth it was previously growing.
Filling In
Gently backfill the hole around the root ball with the excavated soil, making sure there are no air pockets.
Watering
Lightly water the walking-stick orchid to help settle the soil and provide essential hydration.
Support
If necessary, stake the walking-stick orchid for additional support and to ensure it grows straight.
Mulching
Apply a layer of mulch around the base of the walking-stick orchid to help conserve moisture and suppress weeds.
How Do You Care For Walking-stick Orchid After Transplanting?
Stabilization
Provide support to the walking-stick orchid with stakes if it appears unstable or exposed to strong winds.
Regular Watering
Maintain consistent moisture levels by irrigating when the top layer of soil feels dry to the touch.
Observation
Monitor the walking-stick orchid for indications of stress, such as wilting or discolored foliage, and address them promptly.
Pruning
Trim away any dead or damaged sections with pruning shears to direct energy towards healthy growth.
Troubleshooting Common Issues with Walking-stick Orchid Transplantation.
Why is my walking-stick orchid not thriving after transplant?
Ensure you transplanted during the optimal season, from mid to late spring. Verify the spacing, allowing 8-12 inches (20-30 cm) between each plant for proper growth.
How do I choose the right location for transplanting walking-stick orchid?
Select a spot with partial shade and good drainage. Walking-stick orchid prefers indirect sunlight and moist, fertile soil to flourish.
What is the ideal depth when transplanting walking-stick orchid?
Transplant walking-stick orchid so the top of the root ball is level with the soil surface. Too deep or shallow can impede growth.
Can I transplant walking-stick orchid in containers?
Absolutely! Ensure the container is sufficiently large for the roots to spread and has drainage holes. Use a well-draining orchid potting mix.
How often should I water walking-stick orchid after transplanting?
Water generously immediately after transplanting, then maintain consistent moisture without waterlogging. Allow the top inch of soil to dry between waterings.
What signs indicate transplant shock in walking-stick orchid?
Drooping, discolored leaves or a lack of new growth may signal stress. Keep the roots moist and protect from strong sunlight to aid recovery.
How can I prevent root damage when transplanting walking-stick orchid?
Gently untangle matted roots and trim any damaged ones before transplanting. Minimally disturbing the root ball prevents shock and promotes quicker recovery.
What should I feed walking-stick orchid after transplanting?
Wait a few weeks before fertilizing. Then, use a balanced, slow-release fertilizer suitable for orchids to encourage healthy growth.
Can I transplant walking-stick orchid when it's in bloom?
It's best to wait until blooms fade before transplanting. Moving during flowering can stress the plant and cause bud drop.
What soil conditions does walking-stick orchid prefer after transplanting?
Use a rich, well-composted soil mix that retains moisture yet drains well. Walking-stick orchid doesn't tolerate standing water or overly dry conditions.



