How to Transplant Greater fringed gentian?
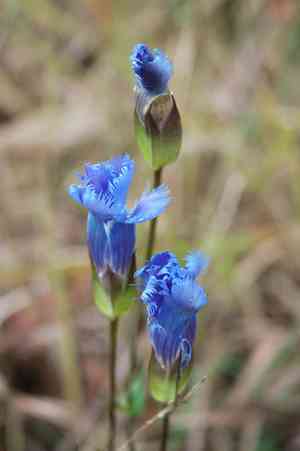
The optimal window for relocating greater fringed gentian is at the transition from spring to summer, as climatic conditions become consistent. This timeframe facilitates root development in a bright, adequately draining location. Exercise caution during handling to safeguard the fragile root system.
What Preparations are Needed Before Transplanting Greater Fringed Gentian?
What is the Ideal Time for Transplanting Greater Fringed Gentian?
Moving your greater fringed gentian as late spring transitions into early summer is crucial for success. This timeframe provides an optimal mix of extended daylight and moderate temperatures, promoting robust root development without the stress of intense mid-summer heat. The mild conditions during this period allow greater fringed gentian to acclimate smoothly to its new location, ensuring vigorous blooming. By selecting this transplanting window, you give greater fringed gentian the best possible start, promising magnificent flowers later on.
How Much Space Should You Leave Between Greater Fringed Gentian Plants?
When relocating greater fringed gentian, ensure adequate room for growth. A good guideline is to position each plant 1-2 feet (30-60 cm) apart. This provides ample space for them to thrive without becoming overcrowded.
What is the Best Soil Mix for Greater Fringed Gentian Transplanting?
The perfect soil for greater fringed gentian should drain well and be rich in organic material. Incorporate a generous amount of compost or a balanced all-purpose fertilizer before planting to give your greater fringed gentian a healthy beginning.
Where Should You Relocate Your Greater Fringed Gentian?
Greater fringed gentian thrives in sunlight, so select a spot that receives full to partial sun exposure. This could be a section of your yard that gets the most sun throughout the day. However, it can also tolerate some shade.
What Equipments Should You Prepare Before Transplantation Greater Fringed Gentian?
Gardening Gloves
To safeguard your hands while handling soil and sharp implements.
Garden Trowel
To carefully extract the greater fringed gentian plant from its original spot or container without harming its roots.
Spade or Shovel
Useful for excavating the transplant hole in the garden.
Hand Rake
Assists in preparing the planting area and loosening the soil.
Watering Can or Hose
Needed for hydrating the greater fringed gentian before and after its relocation.
Mulch
Utilized to shield the greater fringed gentian from disease-causing pests and harsh weather conditions.
Organic Compost
To enhance nutrient levels in the new planting site.
How Do You Remove Greater Fringed Gentian from the Soil?
How Do You Remove Greater Fringed Gentian from the Soil?
From Ground: Lightly water the greater fringed gentian plant to moisten the soil around its roots, but avoid saturation. Carefully dig a wide trench around the plant using a spade, taking care not to damage the root ball. Gently work the spade beneath the root ball to lift the plant. Remember to handle the greater fringed gentian delicately to prevent root injury.From Pot: For potted greater fringed gentian, water the plant an hour before transplanting. Tilt the pot sideways and tap gently to loosen the soil and plant. Grasp the plant at its base and carefully pull it out.From Seedling Tray: If the greater fringed gentian is a seedling, water the tray thoroughly before transplanting. Then, gently push the seedling from the bottom, lifting it out, while being extremely cautious not to harm the delicate young root system.
Step-by-Step Guide for Transplanting Greater Fringed Gentian
Preparation
Ensure to water the greater fringed gentian prior to beginning the transplanting process. The soil should be moist, which will help keep the root ball intact and reduce stress on the plant.
Digging
Use a shovel or spade to excavate an appropriate hole at the new location; the hole's width should be twice the size of the greater fringed gentian root ball and similar in depth, considering the plant's anticipated growth.
Placement
Carefully position the greater fringed gentian in the excavated hole, making sure the top of the root ball is level with the ground surface.
Backfilling
Refill the hole, covering the greater fringed gentian's root ball with soil. Gently press down the soil to eliminate air pockets.
Watering
Thoroughly water your greater fringed gentian after transplanting. The water will help settle the soil and minimize transplant shock.
Mulching
Apply a layer of mulch around the plant's base to retain moisture and suppress weed growth.
How Do You Care For Greater Fringed Gentian After Transplanting?
Initial Care
It is crucial to water the greater fringed gentian thoroughly immediately after transplanting. This aids the plant in adapting to its new surroundings and encourages root expansion.
Monitoring Growth
Regularly observe the greater fringed gentian for any indications of transplant shock, such as wilting or yellowing leaves. Should these appear, promptly provide sufficient water and shield the plant from intense direct sunlight.
Pests & Disease Control
Be vigilant for common pests and signs of illness. If detected, employ organic pest control methods for early stages. For severe conditions, consult a local garden center or extension service for specific treatments.
Seasonal Care
Understand the requirements of your greater fringed gentian during different seasons. In winter, a protective layer of mulch might be necessary to safeguard the roots.
Troubleshooting Common Issues with Greater Fringed Gentian Transplantation.
When is the best time to transplant the greater fringed gentian?
The optimal period to transplant greater fringed gentian is during autumn or early winter (S3-S4). These seasons offer the most favorable conditions for root establishment.
What is the ideal distance between the greater fringed gentian when transplanting?
Allow a spacing of approximately 1-2 feet (30-60 cm) between each greater fringed gentian plant. This provides ample room for growth and nutrient access for each plant.
What should I do if the greater fringed gentian isn't thriving after transplant?
Re-evaluate the planting conditions. Greater fringed gentian prefers full sun to partial shade. Ensure the soil is moist but drains well. Too much or too little water can impede growth.
Why are the leaves of my transplanted greater fringed gentian turning yellow?
Yellowing leaves may signal over-watering or inadequate drainage. Adjust your watering schedule accordingly and confirm the soil is not waterlogged.
What is the right depth to transplant greater fringed gentian?
Greater fringed gentian should be planted with the top of its root ball level with the soil surface. Planting too deep can suffocate the plant, while too shallow can expose its roots.
How can I maintain the greater fringed gentian after transplanting?
Water greater fringed gentian regularly but avoid overwatering, provide adequate light, and protect the plant from harsh weather conditions when necessary.
Should I prune greater fringed gentian after transplantation?
Generally, greater fringed gentian does not require immediate pruning after transplanting. Pruning can cause additional stress. However, remove any damaged or diseased parts to prevent the spread of infection.
How do I prepare the ground for transplanting greater fringed gentian?
Prepare the ground by loosening the soil and incorporating organic matter if needed. Greater fringed gentian thrives in areas with good drainage and slightly acidic soil.
What should I do if pests are attacking after transplantation?
Utilize an organic pesticide or a homemade solution like a soap water spray. An infestation might indicate the plant is stressed, so re-evaluate its care requirements.
How long does it take for greater fringed gentian to establish after transplantation?
Greater fringed gentian typically takes about 2-4 weeks to establish. Provide extra care during this period and ensure optimal plant conditions for flourishing.



