How to Transplant Whitish gentian?
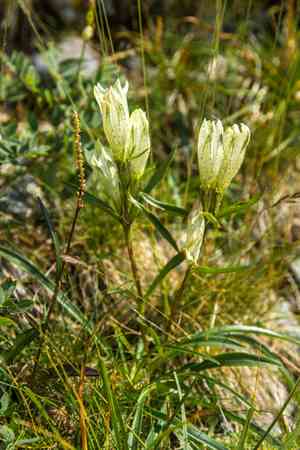
Whitish gentian flourishes most effectively when relocated between the beginning and end of spring, since this timeframe enables the plant to develop its root system prior to increasing temperatures. Select a site receiving full sun or partial shade, featuring soil that drains efficiently, to guarantee peak development.
What Preparations are Needed Before Transplanting Whitish Gentian?
What is the Ideal Time for Transplanting Whitish Gentian?
The best time to move whitish gentian is from early spring through late spring, when the ground is soft and temperatures are mild. Relocating whitish gentian during this period encourages root development before the summer heat. It maximizes growth potential and lessens transplant shock, ensuring a healthier start for the perennial plant.
How Much Space Should You Leave Between Whitish Gentian Plants?
For whitish gentian, ensure each plant has sufficient room to develop by placing them 6-12 inches (15-30 cm) apart. This will help them flourish without competing for space.
What is the Best Soil Mix for Whitish Gentian Transplanting?
Prepare well-draining soil enriched with organic compost. Incorporate a balanced base fertilizer to give whitish gentian a strong start, such as a 10-10-10 (N-P-K) blend.
Where Should You Relocate Your Whitish Gentian?
Select a site that receives full sun to light shade. Whitish gentian thrives in environments where it can get ample bright, direct sunlight for at least half the day.
What Equipments Should You Prepare Before Transplantation Whitish Gentian?
Gardening Gloves
To shield your hands while handling soil and plants.
Trowel
To excavate and extract the plant from its initial spot.
Shovel or Spade
For digging a perimeter around the plant and the new planting hole.
Pruners
To trim any damaged roots or foliage prior to transplanting.
Watering Can or Hose
To hydrate the plant before and after its relocation.
Compost or Mulch
To enrich the soil at the new planting site.
How Do You Remove Whitish Gentian from the Soil?
How Do You Remove Whitish Gentian from the Soil?
From Ground: First, moisten the whitish gentian plant to dampen the soil. Then, dig a wide trench around the plant using a shovel or spade, ensuring the plant's root ball remains intact. Carefully work the spade beneath the root ball to lift the plant from its original location.From Pot: Gently tilt the pot on its side and tap the bottom to loosen the soil and roots. Carefully slide the whitish gentian plant out while supporting the base to prevent damaging the root system.From Seedling Tray: Use a trowel or your hands to gently lift the whitish gentian plant from the seedling tray, being careful not to disturb the young roots too much.
Step-by-Step Guide for Transplanting Whitish Gentian
Preparation
Before beginning, gather all necessary tools and materials. Water the whitish gentian plant thoroughly in its original spot to facilitate removal.
Digging the New Hole
Choose the new location for the whitish gentian plant. Dig a hole that is twice as wide and the same depth as the plantâs root ball to comfortably accommodate the roots.
Removing the Plant
Follow the specified removal procedure based on the original location. Ensure that the root ball is kept intact to prevent root damage.
Transplanting
Place the whitish gentian plant into the new hole, ensuring it sits at the same level it was in its original location. Fill the hole with soil, gently pressing down to eliminate air pockets.
Watering
Immediately water the whitish gentian plant thoroughly to help settle the soil around the roots.
Mulching
Apply a layer of compost or mulch around the base of the plant to retain moisture and regulate temperature.
How Do You Care For Whitish Gentian After Transplanting?
Watering
Keep the soil around the whitish gentian consistently moist but not waterlogged for the first few weeks to help establish strong roots.
Monitoring
Check the plant daily for any signs of stress, such as wilting or yellowing leaves, and ensure it receives adequate water.
Pruning
Trim any damaged leaves or stems to help the plant focus energy on developing roots.
Mulching
Add more mulch if needed to maintain soil moisture and protect the plantâs roots.
Troubleshooting Common Issues with Whitish Gentian Transplantation.
When is the best time to transplant whitish gentian?
Relocate whitish gentian from early spring to late spring for optimal growth and establishment.
How should I prepare the soil before transplanting whitish gentian?
Ensure the soil drains well, is enriched with compost, and has a neutral to slightly acidic pH.
What is the recommended spacing for whitish gentian?
Space the plants 6-12 inches (15-30 cm) apart to allow for sufficient growth and airflow.
How do I minimize transplant shock for whitish gentian?
Water the plants thoroughly before and after transplanting, and transplant on a cloudy day to reduce stress.
What depth should I plant whitish gentian at?
Plant whitish gentian at the same depth it was growing in its previous container or location.
Is it necessary to prune whitish gentian before transplanting?
Pruning is not essential but trimming damaged or overgrown parts can help the plant focus on new growth.
How should I water whitish gentian after transplanting?
Water whitish gentian deeply immediately after transplanting and keep the soil consistently moist, but not waterlogged.
What kind of mulch is best for whitish gentian?
Use organic mulch like straw or bark to retain moisture, regulate soil temperature, and reduce weeds.
How can I protect whitish gentian from pests after transplanting?
Regularly inspect for pests and use natural deterrents or insecticidal soap if necessary to protect whitish gentian.
How much sun does whitish gentian need in its new location?
Whitish gentian prefers full sun but can tolerate partial shade, ensuring at least 6 hours of sunlight daily.



