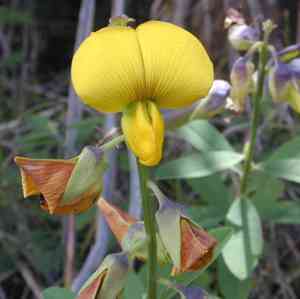
How to Transplant Mt. etna broom?
Mt. etna broom flourishes when relocated between late spring and mid-summer, facilitating peak development. Select a bright, adequately drained spot for superior outcomes. Verify the soil pH is mildly acidic to neutral. If needed, irrigate sparingly to aid rapid establishment.
What Preparations are Needed Before Transplanting Mt. Etna Broom?
What is the Ideal Time for Transplanting Mt. Etna Broom?
Transplanting mt. etna broom is most effective from late spring through mid-summer, when the ground is warm and conducive to new root development. This period benefits from ample sunlight and favorable temperatures, promoting faster acclimation and strong establishment. Essential groundwork includes ensuring proper drainage and consistent soil moisture to aid successful transplantation.
How Much Space Should You Leave Between Mt. Etna Broom Plants?
Prior to transplanting mt. etna broom, ensure adequate spacing for each plant. Position them 24-36 inches (60-90 cm) apart to facilitate proper development and air circulation.
What is the Best Soil Mix for Mt. Etna Broom Transplanting?
For mt. etna broom, prepare soil that drains well, with a pH ranging from mildly acidic to neutral (6.0-7.5). Incorporate a balanced fertilizer containing nitrogen, phosphorus, and potassium to support healthy growth.
Where Should You Relocate Your Mt. Etna Broom?
Select a location that receives full sunlight for your mt. etna broom. This perennial flourishes best in areas exposed to at least 6-8 hours of direct sun daily.
What Equipments Should You Prepare Before Transplantation Mt. Etna Broom?
Gardening Gloves
To safeguard your hands while handling soil and plants.
Trowel
For digging in confined areas, especially useful for managing the root ball.
Shovel
Crucial for excavating larger holes and trenches.
Pruning Shears
To trim any damaged roots or stems during the transplanting process.
Watering Can or Hose
To hydrate the plant before and after relocation.
Garden Fork
To gently loosen the soil surrounding the root ball.
Wheelbarrow
To move the plant if its size prevents manual carrying.
Stake and Ties
For providing support to the plant if needed post-transplant.
How Do You Remove Mt. Etna Broom from the Soil?
How Do You Remove Mt. Etna Broom from the Soil?
From Ground: First, moisten the mt. etna broom plant to soften the soil. Next, dig a wide trench around the plant using a shovel or spade, ensuring the root ball remains intact. Carefully work the spade beneath the root ball to lift the plant from its original spot.From Pot: Thoroughly water the mt. etna broom plant to loosen the soil. Gently tilt the pot on its side and slide the plant out, taking care not to harm the roots. If the plant is stuck, tap the sides and bottom of the pot to release it.From Seedling Tray: Water the mt. etna broom plant and surrounding soil to facilitate removal. Gently push up from the tray's bottom to loosen the seedling. Carefully lift the seedling by its base, avoiding its delicate stem.
Step-by-Step Guide for Transplanting Mt. Etna Broom
Site Preparation
Select and prepare a location with sufficient sunlight suitable for mt. etna broom. Ensure the soil is loosened and a hole is dug twice the root ball's width.
Transporting the Plant
If the plant is large, use a wheelbarrow to move it to its new spot. For smaller plants, carrying by hand will suffice.
Planting the mt. etna broom
Place the plant in the prepared hole, making sure the top of the root ball is level with the surrounding soil. Backfill the hole with soil, gently firming it down to eliminate air pockets.
Watering
Thoroughly water the newly transplanted plant to settle the soil around the roots and provide essential moisture.
Staking
If the plant is tall or in a windy area, provide support using a stake and soft ties, ensuring the plant is securely fastened without damaging the stem.
How Do You Care For Mt. Etna Broom After Transplanting?
Watering
Keep the soil around the mt. etna broom consistently moist, but not waterlogged, for the initial weeks post-transplant to aid strong root establishment.
Mulching
Apply a layer of mulch around the plant's base to retain moisture and regulate soil temperature.
Monitoring
Observe the plant for signs of stress like wilting or yellowing leaves, and adjust care as needed.
Protection
If necessary, shield the transplanted plant from harsh weather using shading nets or frost cloths.
Pruning
Remove any damaged or dead stems to direct the plant's energy towards new growth and overall vitality.
Troubleshooting Common Issues with Mt. Etna Broom Transplantation.
When is the best time to transplant mt. etna broom?
The optimal period for transplanting mt. etna broom is from late spring to mid-summer.
How much spacing should I leave between plants?
Position mt. etna broom plants 24-36 inches (60-90 cm) apart for ideal growth.
How should I prepare the soil for transplanting mt. etna broom?
Ensure well-drained soil enriched with organic matter before transplanting mt. etna broom.
How do I minimize transplant shock for mt. etna broom?
Water mt. etna broom thoroughly before and after transplanting to lessen transplant shock.
What is the recommended depth for planting mt. etna broom?
Plant mt. etna broom at the same depth it was previously growing to ensure stability.
How can I ensure successful root development after transplant?
Maintain consistent soil moisture for the first few weeks post-transplant.
How do I handle mt. etna broom roots during transplant?
Be gentle with mt. etna broom's roots; avoid breaking or disturbing them excessively.
Should I prune mt. etna broom before or after transplant?
Prune lightly before transplant to reduce stress and encourage bushier growth.
What sunlight conditions does mt. etna broom need after transplanting?
Mt. etna broom thrives in full sun, requiring at least 6 hours of daily sunlight.
How often should I water mt. etna broom after transplanting?
Water mt. etna broom deeply once a week, more frequently in hot, dry conditions.


