How to Transplant Common freesia?
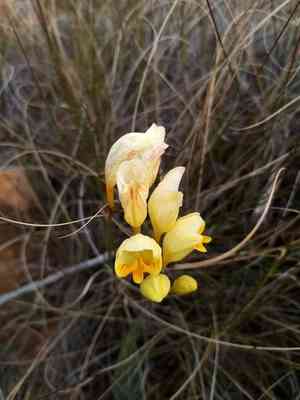
The most suitable period for relocating common freesia is in the colder part of late fall through early winter, enabling the root system to settle prior to spring development. Choose a bright, adequately drained spot for optimal outcomes.
What Preparations are Needed Before Transplanting Common Freesia?
What is the Ideal Time for Transplanting Common Freesia?
Common freesia, a Perennial plant, is best moved in late autumn to early winter. This period allows the plant to establish its root system in cooler temperatures, avoiding summer heat stress. Transplanting at this time promotes maximum root development and strengthens the plant for vigorous spring blooms, ultimately enhancing its overall health and resilience.
How Much Space Should You Leave Between Common Freesia Plants?
When preparing to relocate common freesia, ensure each plant is spaced approximately 3-4 inches (7.5-10 cm) apart. This provides ample room for growth and guarantees good air circulation, which helps prevent potential diseases.
What is the Best Soil Mix for Common Freesia Transplanting?
Prepare a well-drained soil enriched with organic compost. Common freesia thrives in sandy or loamy soil with good fertility. Incorporate a balanced fertilizer, such as a 10-10-10 (N-P-K) blend, to supply essential nutrients for root development and overall growth.
Where Should You Relocate Your Common Freesia?
Choose a bright location for common freesia that receives full sun to partial shade. Ideally, aim for at least 6 hours of daily sunlight so these beautiful plants can flower profusely.
What Equipments Should You Prepare Before Transplantation Common Freesia?
Gardening Gloves
To safeguard your hands while handling soil and plants.
Shovel or Spade
To excavate the plant from its original spot and prepare the new planting hole.
Garden Trowel
For precise digging and moving soil around the plant.
Watering Can or Hose
To hydrate the plant before and after its relocation.
Wheelbarrow or Bucket
To move the plant if necessary.
Pruning Shears
To trim any damaged roots and leaves.
How Do You Remove Common Freesia from the Soil?
How Do You Remove Common Freesia from the Soil?
From Ground: First, moisten the common freesia plant to dampen the soil. Next, dig a wide trench around the plant using a shovel or spade, ensuring the plant's root ball remains intact. Carefully work the spade beneath the root ball to lift the plant from its initial location.From Pot: Gently tap the sides and bottom of the pot to loosen the soil. Hold the common freesia plant's base near the soil line and tilt the pot to slide the plant out, making sure to keep the root ball intact.From Seedling Tray: Dampen the tray to facilitate removal. Use your fingers or a small tool to gently lift each common freesia seedling, taking care not to harm the delicate roots.
Step-by-Step Guide for Transplanting Common Freesia
Plant Removal
Carefully extract the common freesia plant from its initial spot using the appropriate method (ground, pot, or seedling tray) to ensure its root ball stays intact.
Hole Preparation
Excavate a hole twice as wide and as deep as the common freesia's root ball in the new location.
Soil Adjustment
Amend the soil in the hole with compost to supply nutrients and enhance drainage. Ensure the new hole is thoroughly moistened before planting.
Placing the Plant
Position the common freesia in the center of the hole, making sure the top of the root ball is level with the surrounding soil.
Soil Replacement
Backfill the hole with soil, gently firming it around the root ball to eliminate air pockets.
Watering In
Water the common freesia thoroughly after transplanting to help settle the soil around the roots.
Mulching
Apply a layer of mulch around the base of the common freesia to retain moisture and suppress weeds.
How Do You Care For Common Freesia After Transplanting?
Watering
Keep the soil around the common freesia consistently moist, but not waterlogged, for the first few weeks after transplanting to help establish strong roots.
Monitoring
Regularly inspect the common freesia for signs of stress such as wilting or yellowing leaves and address any issues promptly.
Pruning
Trim any damaged leaves or stems to encourage new growth and reduce transplant shock.
Fertilizing
After a few weeks, you can apply a balanced liquid fertilizer to encourage healthy growth.
Troubleshooting Common Issues with Common Freesia Transplantation.
When is the best time to transplant common freesia?
The ideal season to relocate common freesia is late fall or early winter for growth support.
How should I prepare the transplant site for common freesia?
Loosen the soil and ensure proper drainage. Maintain spacing of 3-4 inches (7.6-10.2 cm).
What soil type is best for transplanting common freesia?
Well-drained, slightly acidic to neutral soil is ideal for relocating common freesia.
How deep should I plant common freesia bulbs?
Plant the bulbs 2-3 inches (5-7.6 cm) deep, with their pointed ends facing up.
What should I do if common freesia leaves wilt after transplanting?
Ensure adequate watering and partial shade to help them recover from transplant shock.
How can I minimize transplant shock in common freesia?
Water thoroughly before and after transplanting, and avoid disturbing the roots too much.
Can I transplant common freesia if it's flowering?
It's best to wait until late fall or early winter when not flowering.
How much sunlight does common freesia need after transplanting?
Common freesia prefers full sun to partial shade for optimal growth. Too much shade can hinder blooming.
Should I fertilize common freesia immediately after transplanting?
Wait a few weeks after transplanting before fertilizing to avoid stressing the plant.
What type of mulch is best for transplanted common freesia?
Use organic mulch like bark or compost to retain moisture and protect the roots.



