How to Transplant Rukam?
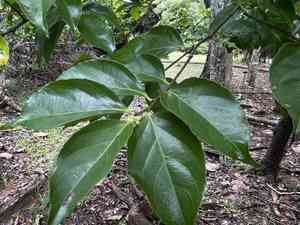
For rukam, the onset of spring presents an ideal period for relocation, facilitating a seamless adjustment during its vigorous development. Select locations bathed in sunlight featuring soil that drains effectively. Should it be necessary, enrich the ground with organic material to achieve optimal outcomes.
Essential Preparations Before Relocating Rukam?
Optimal Period for Rukam Relocation?
Relocate rukam during early spring's embrace, once frost has departed, to encourage robust development. This timing aligns with rukam's active growth phase, ensuring a smooth transition from container to ground. Placing rukam in the earth during this fertile season provides them with spring's warmth and increasing daylight, fostering root growth and confident establishment. By selecting this natural awakening period, you position rukam within nature's ideal cycle, strengthening them for the coming year.
Required Spacing Between Rukam Plants?
When preparing to transplant rukam, allow ample room for each seedling to mature. For optimal spacing, aim for 8-10 feet (2.4-3 meters) between plants. This promotes healthy development and simplifies maintenance.
Ideal Soil Blend for Rukam Relocation?
For rukam, soil conditions are paramount. Select loamy or sandy soil to ensure proper drainage. Enhance it with a base fertilizer prior to planting. This will supply the necessary nutrients for your plant's survival and growth.
Optimal Placement for Your Rukam?
When selecting a site for your rukam, choose an area that receives full sunlight for most of the day. Rukam flourishes best with abundant sunlight. This will aid in its strong and lush development!
Necessary Equipment for Rukam Transplantation?
Spade or Shovel
A garden spade or shovel is the implement needed to extract the rukam from its original spot and to excavate the new planting hole. The spade should be sharp and well-made to allow digging without harming the root ball.
Gardening Gloves
Wearing gloves will safeguard your hands while handling the plant and soil, and may also improve your grip on the plant during relocation.
Wheelbarrow
A wheelbarrow can be utilized to move a rukam from its initial position to the new site, especially if the root ball is heavy and your garden is extensive.
Watering Can
A watering can is crucial for moistening the soil before removing the rukam, and also for saturating the new hole before and after planting.
Mulch
Mulching materials, such as straw or wood chips, help safeguard the plant's root system by maintaining soil moisture levels and temperature.
Method for Extracting Rukam from the Soil?
Method for Extracting Rukam from the Soil?
From Ground rukam: Begin by watering the rukam to dampen the soil, but avoid creating a muddy environment. Once the soil is damp, use your spade to dig a wide circle around the plant, ensuring the root ball remains intact. After circling the plant, dig deeper, carefully moving the spade beneath the root ball without cutting through the roots. Finally, gently lift the rukam from its original location.From Pot rukam: Water the rukam's soil until it is moist but not saturated. Gradually turn the pot sideways, tap the edges to loosen the soil, and carefully pull the plant out. Be sure not to tug on the stems or leaves, as this could damage the plant.From Seedling Tray rukam: Lightly water the soil in the tray, then carefully separate the rukam seedlings, taking care not to harm the roots. Hold the seedling by its leaves rather than its stem during the transplant.
Step-by-Step Guide for Relocating Rukam
Preparation
Before commencing the relocation of the rukam, prepare the new site. Dig a hole that is twice the width of the root ball and as deep as the root system's height.
Planting
Carefully position the rukam in the hole, ensuring the top of the root ball is level with the soil surface. Backfill the hole with the excavated soil and gently firm it around the plant's base.
Watering
Thoroughly water the rukam immediately after transplanting. This will help the soil settle and minimize transplant shock.
Mulching
Apply a layer of mulch around the base of the rukam, leaving a small gap around the stem. This assists in moisture retention and moderating soil temperature.
Post-Transplant Care for Rukam?
Monitoring
Regularly inspect the rukam after relocation. Ensure it has properly settled in its new spot and exhibits signs of healthy development.
Watering
Maintaining an appropriate watering schedule for the rukam after transplanting is vital. The soil should remain moist, but avoid overwatering as it could lead to root rot.
Fertilizing
Wait at least four to six weeks before applying fertilizer to the rukam to prevent root burn.
Pruning
You may need to prune the rukam to reduce water loss after transplanting. This will also stimulate new growth.
Addressing Common Rukam Transplantation Issues.
When is the optimal time to transplant rukam?
Transplant rukam ideally during the S1 season when the plant has the best chance for survival.
What spacing should I use for my rukam when transplanting?
Allow your rukam ample room to grow. The ideal spacing is 8-10 feet (2.4-3 meters).
What if my rukam's leaves turn yellow after transplant?
Yellow leaves can indicate stress or dehydration. Ensure your rukam receives sufficient water and check for signs of disease or pests.
How do I prevent root damage during rukam transplant?
Be gentle when removing rukam from its current container. Minimize root exposure to air, and replant promptly to prevent drying out.
What's the best watering method for rukam after transplanting?
Water the rukam thoroughly after transplanting. Allow the water to penetrate the soil, but avoid overwatering which can cause root rot.
How much sunlight does my newly transplanted rukam require?
Rukam prefers full sun but can tolerate partial shade. Avoid direct harsh sunlight immediately after transplanting to prevent leaf burn.
What depth should the hole be when transplanting the rukam?
An ideal hole for transplanting rukam should be two times the width of the pot and equally deep, ensuring roots are not cramped.
What soil type is best when transplanting rukam?
Rukam thrives in well-draining soil. You can enrich it with organic compost to promote healthy root growth.
What if my rukam's growth appears stunted after transplanting?
Transplants often require time to adjust. Ensure it receives proper care - adequate sunlight, correct watering, and nutrient-rich soil. If issues persist, consult a horticultural expert.
Why are my rukamâs leaves wilting after transplanting?
Wilting can indicate transplant shock. Donât panic, continue caring for the plant as usual. Ensure it's watered and protected from extreme temperatures.



