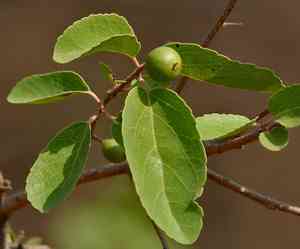
How to Transplant Governor's plum?
The ideal period to relocate governor's plum is once the mildness of spring has arrived, providing moderate temperatures that stimulate root development. Select a brightly lit location with soil that drains effectively, and during the transfer, guarantee minimal disruption to the roots for the best establishment.
What Preparations are Needed Before Relocating Governor's Plum?
What is the Ideal Time for Relocating Governor's Plum?
Move governor's plum once the danger of frost has passed and the ground begins to warm, typically from the onset of early growth until the garden flourishes with new vitality. Shifting governor's plum during this period of mild sun and moderate temperatures aids root establishment without the strain of intense summer heat. This timing encourages vigorous development, ensuring governor's plum thrives in its new spot with nature's gentle care. A friendly reminder: robust roots lead to a happier governor's plum!
How Much Space Should You Leave Between Governor's Plum Plants?
Hello there, gardening enthusiast! Before introducing governor's plum to its new home, ensure it has ample room to flourish. Aim for approximately 15-20 feet (4.5-6 meters) between each plant. This spacing guarantees their well-being and healthy development!
What is the Best Soil Mix for Governor's Plum Relocation?
For your governor's plum, you'll want to perfect the soil composition! Select a site with good drainage and incorporate rich compost to provide an excellent start. Prior to transplanting, mix in a balanced, slow-release fertilizer to nourish your governor's plum during its growth journey!
Where Should You Relocate Your Governor's Plum?
Sunlight is crucial for your governor's plum! Choose a location where it will receive full sun for optimal growth. This means at least 6-8 hours of direct sunlight daily. Your governor's plum will absorb the rays and reward you with lush foliage and delicious fruit!
What Equipment Should You Prepare Before Relocating Governor's Plum?
Gardening Gloves
To safeguard your hands while handling soil and plants.
Shovel or Spade
For excavating the plant and preparing the new planting site.
Hand Trowel
Useful for delicate work around roots and smaller planting holes.
Watering Can or Hose
To hydrate the plant before and after its move.
Pruning Shears
To trim any damaged roots or branches prior to relocation.
Wheelbarrow
For transporting the governor's plum if it's large, or for moving soil and mulch.
Garden Fork
To loosen the soil surrounding the plant's roots during removal.
How Do You Remove Governor's Plum from the Soil?
How Do You Remove Governor's Plum from the Soil?
From Ground: First, thoroughly water the governor's plum to moisten the soil. Next, dig a wide trench around the plant using a shovel or spade, being careful not to harm the root ball. Gently work the tool beneath the root ball to lift the governor's plum from its current spot.From Pot: Begin by watering the governor's plum well. Turn the pot on its side and gently tap the edges to loosen the soil. If the plant doesn't slide out easily, run a hand trowel along the pot's inner rim. Carefully tip the pot over and ease the governor's plum out while supporting the plant at its base.From Seedling Tray: Water the seedlings to make the soil damp. Use a hand trowel or spoon to carefully dig around the edges of the individual governor's plum seedling you are relocating. Gently separate the seedling, ensuring as much soil as possible remains around the roots.
Step-by-Step Guide for Relocating Governor's Plum
Preparation
Water your governor's plum thoroughly before starting the relocation process to ensure the root ball is moist and intact.
Digging the hole
At the new site, excavate a hole that is twice as wide and the same depth as the root ball of your governor's plum to allow ample room for root expansion.
Plant positioning
Place the governor's plum into the hole so that the top of the root ball is level with the surrounding soil surface. Orient the plant in your desired direction before backfilling the hole.
Refilling the hole
Backfill the hole with the excavated soil. Gently firm the soil around the root ball to eliminate air pockets, taking care not to compact the soil excessively.
Stabilization
If the governor's plum is tall or situated in a windy area, use stakes to stabilize the plant. Insert stakes into the ground and loosely secure the plant to them with soft plant ties.
Final watering
Water the governor's plum thoroughly immediately after relocation to help settle the soil and hydrate the roots.
How Do You Care For Governor's Plum After Relocation?
Monitoring
Inspect the governor's plum daily for signs of stress like wilting or discolored leaves, and adjust care as needed.
Staking
If your governor's plum shows signs of leaning or instability, reinforce support by adjusting stakes and ties.
Pruning
Trim any broken or damaged branches to help the governor's plum direct its energy towards establishing new roots.
Mulching
Apply a layer of organic mulch around the base of the governor's plum, keeping it a few inches away from the trunk to help retain soil moisture and regulate temperature.
Protection
Use a protective barrier, such as a garden fence, to prevent animals from disturbing your newly relocated governor's plum.
Troubleshooting Common Issues with Governor's Plum Relocation.
What's the best time to relocate governor's plum for optimal growth?
For successful relocation, aim for mid to late spring, when temperatures are mild and favorable for root development.
How far apart should I space governor's plum when relocating?
Ensure sufficient space for growth by maintaining a distance of 15-20 feet (4.5-6 meters) between each governor's plum.
Why are my governor's plum's leaves wilting after relocation?
Wilting after relocation may indicate shock. Ensure adequate watering, avoid direct sunlight for a few days, and mulch the base.
Can I relocate governor's plum in summer or fall?
It's best to relocate governor's plum in cooler springtime to prevent stress and dehydration, unlike summer or fall.
What soil type is best for relocating governor's plum?
Relocate governor's plum in well-draining soil rich in organic matter to promote healthy root establishment and growth.
How often should I water governor's plum after relocating?
Initially water governor's plum thoroughly every few days to maintain moist soil, then gradually reduce as the plant establishes.
Why isn't my governor's plum growing after relocating?
Governor's plum may struggle if it's planted too deep or too shallow. Adjust to the original growing depth and water appropriately.
How do I protect the newly relocated governor's plum from pests?
Monitor for pests regularly. Use appropriate, non-harmful treatments while the governor's plum is establishing its root system.
Should I fertilize governor's plum right after relocating?
Wait a few weeks before fertilizing to avoid overwhelming the governor's plum. A gentle, balanced fertilizer can encourage growth thereafter.
How deep should the hole be for relocating governor's plum?
Dig a hole twice as wide and just as deep as the root ball to give governor's plum's roots room to expand.


