How to Transplant Forked aster?
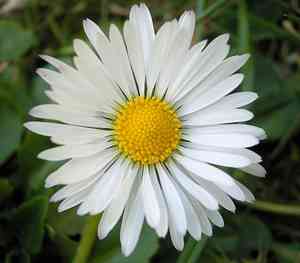
Forked aster flourishes when relocated from the beginning to the end of spring, taking advantage of the mild climate. Choose a spot with partial to complete shade and soil that drains effectively. Verify the soil is damp yet not oversaturated, facilitating robust root development.
What Preparations are Needed Before Transplanting Forked Aster?
What is the Ideal Time for Transplanting Forked Aster?
The best time for relocating forked aster is from early to late spring, as this period offers mild temperatures and increased soil moisture, which aid root establishment and lessen transplant shock. By moving forked aster during this window, you ensure vigorous growth and a flourishing perennial garden.
How Much Space Should You Leave Between Forked Aster Plants?
For forked aster, aim for a separation of 12-18 inches (30-45 cm) between each plant. This will provide ample room for them to develop and thrive without overcrowding.
What is the Best Soil Mix for Forked Aster Transplanting?
Prepare well-draining soil, ideally sandy or loamy, for forked aster. Before transplanting, enrich the soil with a balanced base fertilizer, such as a 10-10-10 (N-P-K) blend, to ensure the young plants get a healthy start.
Where Should You Relocate Your Forked Aster?
Select a spot for forked aster that receives full sun to partial shade. This means at least 4-6 hours of direct sunlight daily. Sufficient sunlight is vital for healthy development and blooming.
What Equipments Should You Prepare Before Transplantation Forked Aster?
Gardening Gloves
To shield your hands while handling soil and plants.
Shovel or Spade
For digging and lifting the plant from its original spot.
Trowel
To create the planting hole in the ground.
Watering Can or Hose
To hydrate the plant before and after relocation.
Mulch
To help retain moisture around the newly transplanted forked aster.
Compost or Organic Matter
To enrich the soil in the new planting area.
How Do You Remove Forked Aster from the Soil?
How Do You Remove Forked Aster from the Soil?
From Ground: Water the forked aster plant to moisten the soil. Then, dig a wide trench around the plant using a shovel or spade, ensuring the plant's root ball stays intact. Carefully work the spade beneath the root ball to lift the plant from its original location.From Pot: Gently tap the pot to loosen the soil around the plantâs roots. Invert the pot while supporting the plant with your other hand, and slide the forked aster out.From Seedling Tray: Water the seedling tray to dampen the soil. Use a small trowel to carefully lift the forked aster out of the tray, ensuring the root system remains as undisturbed as possible.
Step-by-Step Guide for Transplanting Forked Aster
Site Preparation
Choose a location with adequate sunlight and room for your forked aster plant to reach its full size. Ensure the soil is enriched with compost or organic matter to provide nutrients.
Digging the Hole
Use a trowel to create a hole that is twice as wide and just as deep as the forked aster's root ball. Ensure the holeâs sides are loose to encourage root growth.
Placing the Plant
Gently place the forked aster into the hole, ensuring it sits at the same depth as it was in its previous location. The top of the root ball should be level with the surrounding soil.
Backfilling
Fill the hole with the excavated soil, firmly but gently pressing down to remove air pockets. Avoid compacting the soil too much, as this can hinder root growth.
Watering
Thoroughly water the transplanted forked aster to settle the soil around the roots. This helps establish good root-to-soil contact.
Mulching
Apply a layer of mulch around the base of the forked aster to retain moisture and regulate soil temperature. Keep the mulch a few inches away from the stem to prevent rot.
How Do You Care For Forked Aster After Transplanting?
Watering
Keep the soil around the forked aster consistently moist, but not waterlogged, for the first few weeks after transplanting to help establish strong roots.
Monitoring
Regularly check the forked aster for signs of stress or wilting and adjust watering as necessary. Consider staking if the plant shows signs of toppling due to wind or other factors.
Mulch Maintenance
Replenish mulch as needed to maintain consistent moisture levels around the forked aster.
Fertilization
Avoid fertilizing immediately after transplanting to prevent root burn. Begin fertilizing with a balanced, slow-release fertilizer a few weeks after transplanting when the plant shows new growth.
Troubleshooting Common Issues with Forked Aster Transplantation.
When is the best time to transplant forked aster?
The optimal period to relocate forked aster is from early spring to late spring for best growth.
What spacing should I use when transplanting forked aster?
Ensure a distance of 12-18 inches (30-45 cm) between plants for healthy development.
How do I prepare the soil for transplanting forked aster?
Loosen the soil about 8-10 inches (20-25 cm) deep and mix in compost for nutrients.
What should I do if the leaves of transplanted forked aster wilt?
Water the plant thoroughly and provide shade until it recovers from transplant shock.
How deep should I plant forked aster during transplanting?
Plant forked aster at the same depth as it was in its original container to avoid stress.
What type of soil is best for transplanting forked aster?
A well-draining soil enriched with compost ensures the healthy growth of transplanted forked aster.
How can I reduce transplant shock for forked aster?
Water thoroughly before and after transplanting, and avoid damaging roots during the process.
How often should I water forked aster after transplanting?
Water forked aster regularly, keeping the soil consistently moist but not waterlogged, for the first few weeks.
Can I transplant forked aster under full sun?
Yes, forked aster thrives best in full sun, but can tolerate partial shade if necessary.
Should I prune forked aster after transplanting?
Pruning isnât necessary right after transplanting but remove any damaged or dead foliage.



