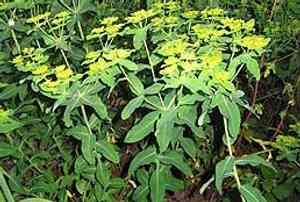
How to Transplant Eggleaf Spurge?
The optimal window for relocating eggleaf Spurge is in the revitalizing phase of early to mid-spring, providing an ideal setting for root development. Choose a location that receives full sun to partial shade and possesses soil with good drainage. Reduce disruption to the root system to facilitate a smooth acclimation.
What Preparations are Needed Before Transplanting Eggleaf Spurge?
What is the Ideal Time for Transplanting Eggleaf Spurge?
The optimal period to relocate eggleaf Spurge is during spring's onset, typically early to mid-season. This timeframe offers mild temperatures and increasing daylight, promoting root development before summer's heat. Moving eggleaf Spurge then allows the plant to benefit from the entire growing season, encouraging vigorous growth and ensuring a magnificent display of foliage and form. By selecting this window for transplantation, you're giving eggleaf Spurge a head start to flourish, enhancing your garden's appeal with its vibrant presence.
How Much Space Should You Leave Between Eggleaf Spurge Plants?
When relocating your eggleaf Spurge, ensure each plant has approximately 2-3 feet (60-90 cm) of space. This will provide ample room for each plant to develop and thrive, leading to a robust and healthy garden.
What is the Best Soil Mix for Eggleaf Spurge Transplanting?
Prepare a thriving environment for your eggleaf Spurge using well-draining soil. Begin with a base fertilizer rich in organic matter. Its nutrients will significantly boost your plant's development.
Where Should You Relocate Your Eggleaf Spurge?
Choose a spot for your eggleaf Spurge that receives abundant sunlight! These bright areas in your garden will help your eggleaf Spurge develop vibrant leaves and flowers.
What Equipments Should You Prepare Before Transplantation Eggleaf Spurge?
Gardening Gloves
To keep your hands clean and offer protection when handling soil and plants.
Shovel or Hand Trowel
These tools will be useful for excavating the hole where the eggleaf Spurge will be moved.
Garden Hose or Watering Can
To hydrate the eggleaf Spurge before and after its relocation.
Pruning Shears
Essential for trimming off damaged or dead parts of the eggleaf Spurge during the transplanting process.
Gardening Fork
To carefully lift the eggleaf Spurge from its original spot without harming its root system.
Wheelbarrow or Large Bucket
Convenient for moving the eggleaf Spurge from one location to another.
How Do You Remove Eggleaf Spurge from the Soil?
How Do You Remove Eggleaf Spurge from the Soil?
From Ground: Start by saturating the soil around the eggleaf Spurge using your garden hose or watering can. This will make the soil easier to manage. Use your gardening fork to carefully dig around the plant, being cautious not to damage the roots. Lift the plant from the ground and transfer it to your wheelbarrow or bucket.From Pot: Water the eggleaf Spurge to moisten the soil. Gently tilt the pot to the side and carefully slide the plant out while supporting its base. Ensure the root ball remains intact.From Seedling Tray: Water the seedlings and allow them to absorb for a few minutes. Using a spoon or small trowel, scoop out each seedling, trying to include as many roots and as much soil as possible.
Step-by-Step Guide for Transplanting Eggleaf Spurge
Preparation
First, prepare the eggleaf Spurge for relocation by carefully removing it from its initial spot as described above. Remove any dead or damaged parts of the plant with your pruning shears.
Digging the Hole
Using your shovel or hand trowel, excavate a hole in the new location. It should be wide and deep enough to accommodate the root system of the eggleaf Spurge.
Placing the Plant
Gently position the eggleaf Spurge in the hole. The top of the root ball should be level with the ground surface or slightly elevated.
Backfilling
Refill the hole with the original soil. Gently firm the soil around the base of the eggleaf Spurge to provide support.
Watering
Thoroughly water the relocated eggleaf Spurge using a gentle spray from your hose or watering can. This will help settle the soil around the roots and minimize transplant shock.
Checkup
Monitor the eggleaf Spurge closely for the next several days, especially if the weather is warm or windy.
How Do You Care For Eggleaf Spurge After Transplanting?
Monitoring
Observe the eggleaf Spurge's growth and condition carefully in the days and weeks following its relocation. Some wilting is normal, but prolonged wilting might indicate an issue.
Re-watering
When the top inch of soil becomes dry, thoroughly water the plant. Excessive watering can lead to rot and other problems, so allow the soil to dry out slightly between waterings.
Pruning
If the eggleaf Spurge becomes leggy or weak, consider trimming it back to encourage new growth. Always prune just above a leaf joint or bud.
Feeding
While the eggleaf Spurge is establishing itself, avoid using high-nitrogen fertilizers, which can promote excessive leafy growth at the expense of root development.
Troubleshooting Common Issues with Eggleaf Spurge Transplantation.
When is the best time to transplant eggleaf Spurge?
The optimal time to relocate eggleaf Spurge is typically during the early seasons of the year, specifically between late winter and early spring.
How should I prepare the soil before transplanting eggleaf Spurge?
Start by loosening the soil to a depth of about 12 inches (approximately 30 cm). Incorporate compost or dry organic matter; these will help eggleaf Spurge thrive.
What's the ideal space requirement for eggleaf Spurge?
Allow ample room around eggleaf Spurge, ideally 2-3 feet (60cm-90cm). This enables the plant to spread out and grow healthily.
How deep should I plant the eggleaf Spurge while transplanting?
Dig a hole that is as deep as the root ball and twice its width. The eggleaf Spurge should be at the same soil level as it was previously.
Should I water eggleaf Spurge immediately after transplanting?
Absolutely! Watering eggleaf Spurge post-transplanting helps settle the soil around the plant's roots, ensuring better contact with the soil.
Is it necessary to add fertilizer while transplanting eggleaf Spurge?
While not strictly essential, adding a slow-release organic fertilizer during planting can provide eggleaf Spurge with vital nutrients.
Why are the leaves of my transplanted eggleaf Spurge turning yellow?
This could indicate watering problems or a nutrient deficiency. Check if it's receiving too much water or try adding fertilizer, preferably organic.
Is it possible to transplant eggleaf Spurge in pots?
Certainly! Eggleaf Spurge can be relocated into pots. However, ensure the pot offers sufficient room for growth and has good drainage.
Can I prune eggleaf Spurge after transplanting?
Yes. Light pruning can encourage eggleaf Spurge to grow bushier. Just ensure you don't remove more than a third of the plant.
How often should I water eggleaf Spurge after transplanting?
Initially, eggleaf Spurge should be watered deeply, and then you can reduce the watering as eggleaf Spurge begins to establish. Always check the soil's moisture before watering.


