How to Transplant Arizona spurge?
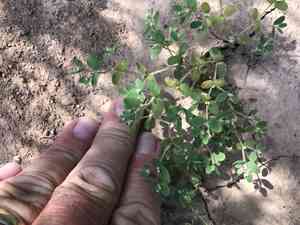
Arizona spurge flourishes when relocated between early and late spring, benefiting from moderate temperatures and ideal soil hydration. Provide a bright, adequately draining spot to foster robust development. Diligent attention under these circumstances reduces strain and encourages firm root anchoring.
What Preparations are Needed Before Transplanting Arizona Spurge?
What is the Ideal Time for Transplanting Arizona Spurge?
The best time to move arizona spurge is from early to late spring. During this period, conditions like mild temperatures and increased rainfall support strong root development. Transplanting in spring minimizes stress on arizona spurge, encouraging healthy growth and vigorous development throughout the growing season.
How Much Space Should You Leave Between Arizona Spurge Plants?
Position your arizona spurge plants 12 inches (30 cm) apart. This provides ample room for growth and prevents competition for resources, fostering healthy development.
What is the Best Soil Mix for Arizona Spurge Transplanting?
Prepare soil that drains well and contains added organic matter. A sandy or loamy mixture works perfectly. Enrich the soil with a balanced base fertilizer to give your arizona spurge plants a strong start.
Where Should You Relocate Your Arizona Spurge?
Select a spot where your arizona spurge plants can receive at least 6 hours of direct sunlight daily. This will help them flourish and produce vibrant foliage.
What Equipments Should You Prepare Before Transplantation Arizona Spurge?
Gardening Gloves
To shield your hands while handling soil and plants.
Shovel or Spade
To dig around the plant and lift it from its original spot.
Trowel
For more precise digging and planting tasks.
Wheelbarrow
To move the plant from its initial location to the new site.
Watering Can or Hose
To hydrate the plant before and after relocation.
Mulch
To help maintain soil moisture and temperature around the plant.
How Do You Remove Arizona Spurge from the Soil?
How Do You Remove Arizona Spurge from the Soil?
From Ground: First, moisten the arizona spurge plant's soil. Then, dig a wide trench around the plant with a shovel or spade, ensuring the root ball stays intact. Carefully work the spade beneath the root ball to lift the plant from its original spot.From Pot: Water the arizona spurge plant thoroughly. Tilt the pot sideways and gently tap the bottom to loosen the plant. Hold the base of the plant and carefully slide it out of the pot while supporting the root ball.From Seedling Tray: Water the arizona spurge seedlings to ensure the soil is damp. Use a trowel to gently lift each seedling from the tray, taking care to keep the root ball intact.
Step-by-Step Guide for Transplanting Arizona Spurge
Preparation
Prepare the new planting site by digging a hole that is twice as wide and as deep as the arizona spurge plant's root ball.
Transplanting
Place the arizona spurge plant in the hole, ensuring the top of the root ball is level with the ground. Backfill the hole with soil, gently pressing it down around the plant's base to remove air pockets.
Watering
Water the arizona spurge plant thoroughly after transplanting to help the soil settle around the roots.
Mulching
Apply a layer of mulch around the base of the arizona spurge plant to retain moisture and regulate soil temperature.
Support
If necessary, provide support for the arizona spurge plant with stakes to help it stay upright until its roots establish.
How Do You Care For Arizona Spurge After Transplanting?
Watering
Keep the soil around the arizona spurge consistently moist, but not waterlogged, for the initial weeks after transplanting to help establish strong roots.
Monitoring
Regularly inspect the arizona spurge plant for signs of stress or transplant shock, such as wilting or yellowing leaves.
Weeding
Keep the area around the arizona spurge plant free of weeds to reduce competition for nutrients and water.
Mulch Maintenance
Ensure the mulch remains in place and replenish as needed to maintain its effectiveness.
Troubleshooting Common Issues with Arizona Spurge Transplantation.
When is the best season to transplant arizona spurge?
The ideal season to transplant arizona spurge is from early spring to late spring.
How deep should I dig for transplanting arizona spurge?
Dig a hole approximately 6 inches (15 cm) deep to accommodate the root ball.
What is the ideal spacing for transplanting arizona spurge?
Space each arizona spurge plant about 12 inches (30 cm) apart to ensure proper growth.
How to prepare the soil for transplanting arizona spurge?
Ensure well-drained soil and mix in compost to enrich the soil before planting.
Should arizona spurge be watered immediately after transplanting?
Arizona spurge should be watered thoroughly immediately after transplanting to help settle the soil.
What type of sunlight is ideal for arizona spurge after transplanting?
Arizona spurge thrives best in full sun to partial shade, so pick a sunny location.
How to minimize transplant shock in arizona spurge?
Water the plant well, avoid disturbing roots, and transplant during a cool part of the day.
Do I need to fertilize arizona spurge after transplanting?
Adding a balanced fertilizer can help arizona spurge establish well, but it's not strictly necessary.
When can I expect arizona spurge to start thriving after transplanting?
Arizona spurge typically starts to establish itself within a few weeks after transplanting.
How to handle the roots when transplanting arizona spurge?
Handle the roots gently and avoid excessive disturbance to prevent transplant shock.



