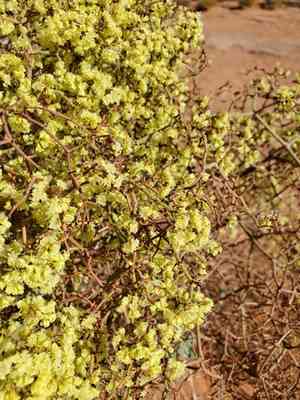
How to Transplant Crispleaf buckwheat?
Crispleaf buckwheat flourishes most effectively when transplanted during the initial to middle spring months, enabling it to develop a robust root system prior to the summer warmth. Select locations that receive ample sunlight and possess soil with good drainage. Aim to minimize disruption to the root ball during the move to facilitate seamless acclimation.
What Preparations are Needed Before Transplanting Crispleaf Buckwheat?
What is the Ideal Time for Transplanting Crispleaf Buckwheat?
Crispleaf buckwheat should ideally be moved in early to mid-spring. During this period, the ground begins to warm, fostering root development before summer's heat. Transplanting at this time ensures prime growth conditions, lessens transplant shock, and allows the plant to utilize the entire growing season.
How Much Space Should You Leave Between Crispleaf Buckwheat Plants?
When relocating your crispleaf buckwheat, ensure they are spaced 18-24 inches (45-60 cm) apart. This provides ample room for each plant to grow and flourish without competing for resources.
What is the Best Soil Mix for Crispleaf Buckwheat Transplanting?
For crispleaf buckwheat, prepare well-draining soil with a blend of sandy and loamy textures. Incorporating compost or a phosphorus-rich base fertilizer can boost initial growth. Steer clear of heavy clay soils as they can impede root development.
Where Should You Relocate Your Crispleaf Buckwheat?
Move your crispleaf buckwheat to a spot that receives full sunlight for at least 6-8 hours daily. This aids the plant in developing robust stems and healthy foliage, maximizing its growth potential.
What Equipments Should You Prepare Before Transplantation Crispleaf Buckwheat?
Gardening Gloves
To shield your hands while handling soil and plants.
Trowel
For digging small holes and gently removing the plant from its original container or ground.
Shovel or Spade
For excavating larger holes and trenches if the plant is being moved from the ground.
Watering Can
To keep the plant's roots hydrated during the relocation process.
Pruners
To trim any damaged or overly long roots during the transplanting process.
Bucket
To transport excavated soil or to temporarily hold the crispleaf buckwheat plant if necessary.
How Do You Remove Crispleaf Buckwheat from the Soil?
How Do You Remove Crispleaf Buckwheat from the Soil?
From Ground: First, water the crispleaf buckwheat plant to moisten the soil. Then, dig a wide trench around the plant using a shovel or spade, ensuring the plant's root ball remains intact. Carefully work the spade beneath the root ball to lift the plant from its original spot.From Pot: Water the plant thoroughly a few hours prior to transplanting. Gently tap the sides of the pot to loosen the soil. Carefully invert the pot, supporting the plant's base with your hand, and slide the plant out. If the plant is stuck, use a trowel to gently loosen the soil around the edges.From Seedling Tray: Water the seedlings some hours before transplanting. Use a small trowel or similar tool to ease each plant out by lifting it from the bottom. Handle the seedlings by their leaves to avoid damaging the stems.
Step-by-Step Guide for Transplanting Crispleaf Buckwheat
Prepare the Planting Hole
Dig a hole in the ground that is slightly larger than the root ball of the crispleaf buckwheat plant. Ensure the hole has adequate depth and width for the plant's roots to spread comfortably.
Add Soil Amendments if Needed
If required, you can incorporate compost or other soil enhancers into the bottom of the hole to improve soil quality.
Transfer the Plant
Gently lower the crispleaf buckwheat plant into the hole, making sure the top of the root ball is level with or slightly above the ground surface. Fill in around the plant with soil, pressing it gently to remove air pockets.
Water Thoroughly
Immediately after planting, water the crispleaf buckwheat plant generously to help settle the soil around the root ball.
Mulch the Area
Apply a layer of mulch around the base of the plant to help retain soil moisture and regulate temperature.
How Do You Care For Crispleaf Buckwheat After Transplanting?
Watering
Keep the soil around the crispleaf buckwheat consistently moist, but not waterlogged, for the initial weeks post-transplant to aid in establishing strong roots.
Monitoring
Regularly inspect the plant for signs of distress, such as wilting or yellowing leaves, and adjust water levels accordingly.
Protection
Shield the crispleaf buckwheat plant from harsh weather conditions, like strong winds or intense sunlight, during the first few weeks after transplanting.
Troubleshooting Common Issues with Crispleaf Buckwheat Transplantation.
When is the best time to transplant crispleaf buckwheat?
The optimal seasons for relocating crispleaf buckwheat are early spring and mid-spring for best outcomes.
What should be the spacing between transplanted crispleaf buckwheat plants?
Ensure sufficient spacing of 18-24 inches (45-60 cm) between each crispleaf buckwheat plant to encourage healthy growth.
How do I prepare the soil for crispleaf buckwheat transplanting?
Utilize well-draining soil enriched with organic matter to create ideal conditions for transplanting crispleaf buckwheat.
What common issue might I face with transplanted crispleaf buckwheat?
Transplanted crispleaf buckwheat often experiences transplant shock, appearing wilted or stressed initially. Proper care can lessen this.
How deep should I plant crispleaf buckwheat during transplanting?
Relocate crispleaf buckwheat at the same depth it was growing in its original spot for optimal establishment.
What is a key watering tip after transplanting crispleaf buckwheat?
Water crispleaf buckwheat thoroughly right after transplanting and keep the soil consistently moist but not saturated.
Should I prune crispleaf buckwheat before transplanting?
Lightly trim any damaged or long roots and stems of crispleaf buckwheat to promote quicker establishment.
How can I minimize transplant shock for crispleaf buckwheat?
Transplant crispleaf buckwheat on a cool, overcast day and water well to reduce transplant shock.
Can I fertilize crispleaf buckwheat after transplanting?
Avoid immediate fertilization; wait several weeks until crispleaf buckwheat has recovered from transplanting stress.
What should I do if crispleaf buckwheat shows signs of stress after transplanting?
Provide shade, consistent watering, and avoid disturbing the soil to help crispleaf buckwheat recover from stress.


