How to Transplant Hairy cupgrass?
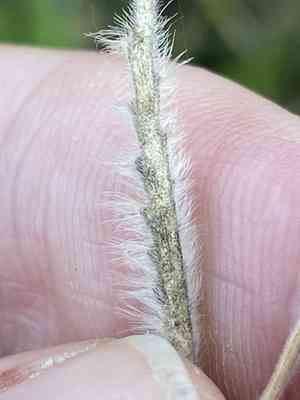
For hairy cupgrass, the ideal period for relocation is in the revitalizing phase of mid to late spring, guaranteeing vigorous development. Choose a brightly lit area with soil that drains effectively for optimal rooting.
What Preparations are Needed Before Transplanting Hairy Cupgrass?
What is the Ideal Time for Transplanting Hairy Cupgrass?
Choose the pleasant days of late spring! This period allows the soil to be sufficiently warm for hairy cupgrass's root establishment, yet avoids the intense summer heat. Moving hairy cupgrass during these mild spring weeks promotes better acclimation and development, setting it up for success throughout the growing season.
How Much Space Should You Leave Between Hairy Cupgrass Plants?
For hairy cupgrass, you'll want to provide each plant ample room to flourish. Position them approximately 6-12 inches (15-30 cm) apart. This will give each plant the necessary space for proper growth and air circulation.
What is the Best Soil Mix for Hairy Cupgrass Transplanting?
Before planting hairy cupgrass, prepare the soil by ensuring it is fertile and drains well. Mix in organic compost as a foundational fertilizer to supply vital nutrients. A loamy soil with a hint of sand is ideal for helping hairy cupgrass thrive.
Where Should You Relocate Your Hairy Cupgrass?
Select a sunny spot for your hairy cupgrass as they love bright conditions. A location with full sun exposure, meaning at least 6-8 hours of direct sunlight daily, will aid their strong and healthy development.
What Equipments Should You Prepare Before Transplantation Hairy Cupgrass?
Gardening Gloves
To safeguard your hands while handling soil and plants.
Spade or Shovel
To excavate around and beneath the plant for proper extraction.
Hand Trowel
For more precise tasks or minor adjustments during digging.
Watering Can or Hose
To hydrate the plant before and after relocation to minimize shock.
Wheelbarrow or Plant Cart
To move the plant without harm if it's too large or heavy to carry.
Pruning Shears
To trim any damaged or excessively long roots or foliage prior to transplanting.
Mulch
To help maintain soil moisture around the hairy cupgrass plant after its move.
How Do You Remove Hairy Cupgrass from the Soil?
How Do You Remove Hairy Cupgrass from the Soil?
From Ground: First, water the hairy cupgrass plant to moisten the soil. Then, dig a wide trench around the plant using a shovel or spade, ensuring the plant's root ball remains intact. Carefully work the spade under the root ball to lift the plant from its original location.From Pot: Start by watering the hairy cupgrass thoroughly. Tilt the pot to the side and gently tap or squeeze sides to loosen. Gradually slide the plant out, avoiding pulling on the stem. Support the root ball with your hand as it comes out of the pot.From Seedling Tray: Water the seedlings well. Use a hand trowel or spoon to gently lift the individual hairy cupgrass seedlings out of the tray, ensuring you bring along the roots and surrounding soil.
Step-by-Step Guide for Transplanting Hairy Cupgrass
Plant Handling
Handle the hairy cupgrass with care, supporting the root ball to prevent damage to the roots when transporting to the new location.
Preparation
Dig a hole at the transplant site that is twice the width of the hairy cupgrass's root ball and of the same depth to ensure roots have enough room to establish.
Positioning
Place the hairy cupgrass carefully into the hole, making sure it is upright and centered. The top of the root ball should be level with the surrounding ground.
Backfilling
Gently backfill the hole with soil, firming it around the root ball to eliminate air pockets without overly compacting the soil, which can hinder root growth.
Watering
Thoroughly water the hairy cupgrass immediately after planting to help settle the soil and provide hydration for the roots.
Mulching
Apply a layer of mulch around the base of the hairy cupgrass, keeping it a few inches away from the stem. This will help retain moisture and reduce weed competition.
How Do You Care For Hairy Cupgrass After Transplanting?
Monitoring
Regularly check the soil moisture around the hairy cupgrass and water as needed to maintain even moisture, especially during dry spells.
Support
If the hairy cupgrass is tall or appears unstable, use stakes or plant supports to prevent it from falling over while the roots are stabilizing.
Pruning
Trim any dead or damaged foliage to encourage new growth and reduce stress on the hairy cupgrass.
Troubleshooting Common Issues with Hairy Cupgrass Transplantation.
What's the best window for transplanting hairy cupgrass?
Aim to transplant hairy cupgrass from mid to late spring, when the soil warms adequately.
How should hairy cupgrass seedlings be spaced for optimal growth?
Space hairy cupgrass seedlings between 6-12 inches (15-30 cm) apart to ensure proper air circulation and growth.
Why is my hairy cupgrass not thriving after transplanting?
Check for adequate soil moisture, sunlight, and verify if the roots were not overly disturbed during transplanting.
Can I transplant hairy cupgrass in summer or fall?
It's best to transplant hairy cupgrass in spring. Transplanting outside this period might stress the plant.
What should I do if the hairy cupgrass shows transplant shock?
Keep the soil evenly moist and protect the plant from extreme sun or winds until it recovers.
How deep should I plant hairy cupgrass seedlings?
Plant hairy cupgrass at the same depth they were growing in their previous container to avoid stem rot.
How much sunlight does hairy cupgrass need post-transplant?
Hairy cupgrass enjoys full sunlight. Ensure the new location receives plenty of sun throughout the day.
What soil type is best when transplanting hairy cupgrass?
Use well-draining soil rich in organic matter to promote healthy root development for hairy cupgrass.
How do I ensure hairy cupgrass doesn't get rootbound while transplanting?
Gently tease apart roots and trim if necessary to encourage outward growth in their new space.
When should I water hairy cupgrass after transplanting?
Water hairy cupgrass immediately after transplanting to help settle the soil around the roots and reduce stress.



