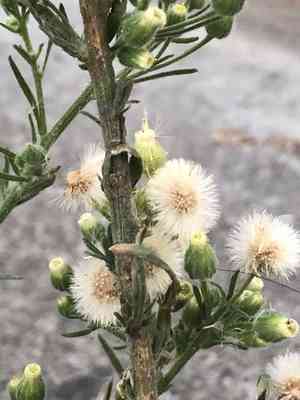
How to Transplant Hairy fleabane?
Hairy fleabane thrives when relocated from the beginning to the end of spring, or from the middle to the end of autumn. Select a bright, adequately drained spot. Exercise caution during transplantation to preserve root structure and facilitate proper adjustment.
What Preparations are Needed Before Transplanting Hairy Fleabane?
What is the Ideal Time for Transplanting Hairy Fleabane?
Moving hairy fleabane, a perennial, in early to late spring or mid to late autumn yields the best outcomes. This timing provides mild temperatures and consistent moisture, aiding root establishment. Additionally, these periods allow for vigorous growth before or after extreme summer and winter conditions, boosting plant survival and vitality.
How Much Space Should You Leave Between Hairy Fleabane Plants?
When relocating hairy fleabane, ensure a spacing of 12-24 inches (30-60 cm) between plants. This provides ample room for their growth and comfortable spread.
What is the Best Soil Mix for Hairy Fleabane Transplanting?
For hairy fleabane, well-draining soil is essential. Incorporating compost or a balanced slow-release fertilizer can enrich the soil. Ensure the soil is loose and fertile for optimal results.
Where Should You Relocate Your Hairy Fleabane?
Select a sunny spot for hairy fleabane. They require at least 6 hours of full sunlight daily to flourish. Avoid shaded areas to promote healthy development.
What Equipments Should You Prepare Before Transplantation Hairy Fleabane?
Gardening Gloves
To safeguard your hands while handling soil and plants.
Shovel or Spade
For excavating around the plant and creating a new planting site.
Watering Can or Hose
Used for hydrating the plant both before and after its relocation.
Wheelbarrow
To move the plant if its new position is distant from its original spot.
Pruning Shears
To trim any damaged or excess roots or foliage.
Garden Trowel
For more precise tasks, such as transplanting young plants.
How Do You Remove Hairy Fleabane from the Soil?
How Do You Remove Hairy Fleabane from the Soil?
From Ground: First, moisten the soil around the hairy fleabane plant. Then, dig a wide trench around the plant with a shovel or spade, keeping the root ball intact. Carefully work the spade beneath the root ball to lift the plant from its original spot.From Pot: Gently water the hairy fleabane plant, then invert the pot while supporting the stem. Tap the pot's base to release the plant. If it doesn't come out easily, you might need to gently squeeze the pot's sides or use a trowel to loosen the soil around the edges.From Seedling Tray: Water the seedlings thoroughly before transplanting. Use a garden trowel or your fingers to carefully lift the seedlings, avoiding root damage. Hold seedlings by their leaves, not their delicate stems.
Step-by-Step Guide for Transplanting Hairy Fleabane
Site Preparation
Ensure the new location is prepared before extracting the hairy fleabane plant. The hole should be sufficiently wide and deep to accommodate the root ball.
Digging the Hole
Using a shovel or spade, excavate a hole in the new spot. The hole should be twice as wide but only as deep as the hairy fleabane plant's root ball.
Lifting the Plant
Carefully raise the hairy fleabane plant from its initial position, retaining as much soil as possible around its roots.
Placing the Plant
Position the hairy fleabane plant into the new hole. Ensure it sits at the same depth as it was previously. Backfill around the root ball with soil, gently pressing to remove air pockets.
Watering
Thoroughly water the hairy fleabane plant once it's in its new location. This aids in settling the soil and reducing transplant shock.
How Do You Care For Hairy Fleabane After Transplanting?
Watering
Keep the soil around the hairy fleabane consistently damp, but not waterlogged, for the initial weeks post-transplant to encourage strong root development.
Mulching
Apply a layer of mulch around the base of the hairy fleabane to help retain moisture and regulate soil temperature.
Monitoring
Observe the hairy fleabane for any indications of transplant shock, such as wilting or yellowing leaves. Address any issues promptly by adjusting watering or providing shade if necessary.
Feeding
Avoid immediate fertilization after transplanting; allow the hairy fleabane time to establish itself in its new spot first. After a few weeks, you can begin a regular feeding regimen.
Troubleshooting Common Issues with Hairy Fleabane Transplantation.
When is the best time to transplant hairy fleabane?
Early to late spring, mid to late fall, and early winter are the optimal periods.
How far apart should I plant hairy fleabane?
Space hairy fleabane plants 12-24 inches (30-60 cm) apart for proper growth.
What kind of soil does hairy fleabane prefer?
Hairy fleabane thrives in well-draining, moderately fertile soil with a pH between 6.0 and 7.5.
How should I prepare the soil for transplanting hairy fleabane?
Improve the soil with compost, ensuring good drainage to help hairy fleabane establish roots quickly.
How deep should I plant hairy fleabane?
Plant hairy fleabane so its root ball is level with the ground surface.
How should I water hairy fleabane after transplanting?
Water hairy fleabane thoroughly after transplanting and maintain consistently moist, but not waterlogged, soil.
What should I do if hairy fleabane shows transplant shock?
Maintain soil moisture, offer shade, and apply a balanced fertilizer to aid hairy fleabane's recovery.
Can I transplant hairy fleabane during summer?
Transplanting hairy fleabane during summer is not ideal due to potential stress from high temperatures.
How can I protect hairy fleabane from pests after transplanting?
Regularly inspect and use natural insecticides or physical barriers to safeguard hairy fleabane from pests.
Why are the leaves of hairy fleabane wilting after transplanting?
Wilting may indicate transplant shock; ensure adequate watering and initially avoid direct sunlight.


