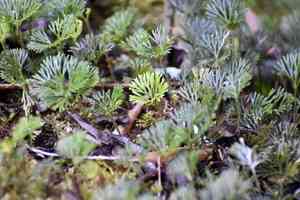
How to Transplant Peltate tonguefern?
Peltate tonguefern flourishes when relocated in the mild temperatures of late spring through early summer. Provide a dim, moist environment for peak development. Attentive nurturing during this period aids robust root anchoring and vibrant foliage.
Essential Preparations Before Relocating Peltate Tonguefern?
Optimal Timing for Relocating Peltate Tonguefern?
Moving peltate tonguefern between mid-spring and early summer guarantees prime conditions for development. During this period, ground temperatures are ideal, and natural moisture is abundant. This timing allows peltate tonguefern to establish robust roots prior to the intense summer heat. This seasonal window boosts the plant's resilience and overall vitality.
Recommended Spacing Between Peltate Tonguefern Specimens?
When relocating peltate tonguefern, ensure a separation of approximately 12-18 inches (30-45 cm) between plants. This spacing prevents competition for nutrients and promotes adequate air circulation, which helps deter disease.
Ideal Soil Blend for Peltate Tonguefern Relocation?
Prepare a well-draining, nutrient-rich organic soil for peltate tonguefern. Incorporate compost or a balanced slow-release fertilizer to enhance soil fertility and support vigorous growth. Steer clear of heavy clay soils, as they tend to retain excessive moisture.
Optimal New Location for Your Peltate Tonguefern?
Select a site for peltate tonguefern that receives filtered sunlight or partial shade. Excessive direct sun can scorch its leaves, while insufficient light can impede growth. A location with morning sun and afternoon shade is most suitable.
Tools Required Before Relocating Peltate Tonguefern?
Gardening Gloves
To safeguard your hands while handling soil and the plant.
Spade or Shovel
For excavating a trench around the plant's root ball or preparing a hole in the new spot.
Trowel
Useful for extracting small plants or working in confined areas.
Watering Can or Hose
To hydrate the plant before and after its relocation.
Pruners or Scissors
For trimming any damaged roots or foliage.
Wheelbarrow
To move the plant if necessary.
Method for Extracting Peltate Tonguefern from the Ground?
Method for Extracting Peltate Tonguefern from the Ground?
From Ground: First, moisten the soil around the peltate tonguefern plant. Then, use a shovel or spade to dig a wide trench around the plant, ensuring the root ball remains intact. Carefully maneuver the spade beneath the root ball to lift the plant from its original position.From Pot: Thoroughly water the peltate tonguefern plant. Gently tap the pot's sides to loosen the soil and roots. Hold the plant's base and carefully pull it out, aiming to keep the root ball whole. If the plant is stuck, use a trowel to gently loosen the edges.From Seedling Tray: Water the seedlings to make the soil more pliable. Use a trowel or your fingers to carefully lift each seedling from its tray, ensuring roots and some soil remain attached. Exercise caution to avoid root damage during removal.
Step-by-Step Guide for Relocating Peltate Tonguefern
Site Preparation
Ensure the new spot for your peltate tonguefern is ready. Dig a hole twice as wide and the same depth as the plant's root ball.
Soil Preparation
While backfilling the hole, blend the soil with compost or organic matter to aid moisture retention and supply nutrients.
Plant Placement
Position the peltate tonguefern in the center of the hole. Make sure the top of the root ball is level with the surrounding ground.
Backfilling
Gently refill the hole with soil, lightly compacting it around the root ball to eliminate air pockets.
Watering
Thoroughly water the peltate tonguefern after planting to help settle the soil and roots. Ensure the water penetrates deeply to support the root system.
Mulching
Apply a layer of mulch around the plant's base to conserve moisture and regulate soil temperature.
Post-Relocation Care for Peltate Tonguefern?
Watering
Keep the soil around the peltate tonguefern consistently damp, but not waterlogged, for the initial weeks after relocation to aid in root establishment.
Monitoring
Regularly inspect the peltate tonguefern for indications of stress such as wilting, yellowing leaves, or stunted growth, and adjust care as necessary.
Pruning
Trim away any damaged or diseased portions of the plant to encourage healthy development.
Support
If the peltate tonguefern plant has tall foliage, consider providing stakes for support during its initial establishment phase.
Resolving Common Issues with Peltate Tonguefern Relocation.
When is the best time to relocate peltate tonguefern?
Mid to late spring and early summer are the optimal periods for relocating peltate tonguefern.
What spacing should I provide when relocating peltate tonguefern?
Ensure a separation of 12-18 inches (30-45 cm) between each plant for ideal growth.
What type of soil is ideal for peltate tonguefern?
Peltate tonguefern thrives in rich, well-draining soil abundant in organic matter.
How should I prepare the soil before relocating peltate tonguefern?
Loosen the soil to a depth of 10 inches (25 cm) and incorporate compost or organic material.
How do I prevent transplant shock for peltate tonguefern?
Water thoroughly before and after relocating peltate tonguefern, and minimize root disturbance.
How much sun does peltate tonguefern need after relocating?
Peltate tonguefern prefers partial to full shade; excessive sun can cause plant stress.
How to manage overgrown roots during peltate tonguefern relocation?
Trim any excessively long roots to promote healthy new root growth after relocation.
Should I fertilize peltate tonguefern immediately after relocating?
Wait a few weeks after relocation before fertilizing to allow plants to acclimate.
What is the best watering practice for newly relocated peltate tonguefern?
Water peltate tonguefern deeply and consistently, keeping the soil moist but not saturated.
How can I tell if peltate tonguefern is stressed after relocating?
Look for wilting, yellowing leaves, and stunted growth as indicators of relocation stress.


