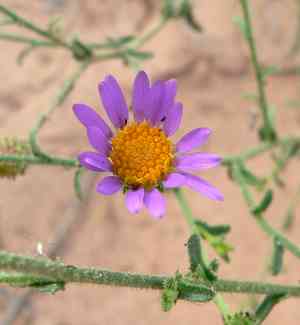
How to Transplant Sand aster?
The ideal period for relocating sand aster spans from the onset of early spring through the peak of mid-spring. Select a location that receives abundant sunlight and possesses soil with good drainage to foster vigorous development. Careful manipulation is crucial to safeguard the fragile root structure throughout this procedure.
Essential Preparations Before Relocating Sand Aster
Optimal Period for Transplanting Sand Aster
The ideal time to move sand aster is during the refreshing period of early to mid-spring. This timing allows sand aster to benefit from mild temperatures and increasing daylight, crucial for root development before summer's heat. Choosing this window provides sand aster with preferred gentle weather for robust growth, ensuring a smooth transition and stronger development throughout the season.
Recommended Spacing Between Sand Aster Plants
Hello gardener! For your sand aster plants, aim for a distance of 12-18 inches (30-45 cm) between them to allow ample room for growth. They appreciate companionship but also value their individual space!
Best Soil Mixture for Sand Aster Transplanting
Your sand aster will flourish in soil that drains well, so incorporate compost or aged manure before planting. A balanced slow-release fertilizer offers the perfect welcome. Aim for nutrient-rich but not overly dense soil!
Optimal Location for Relocating Your Sand Aster
Place your sand aster in a sunny spot where it can receive at least 6 hours of sunlight daily. They are sun-lovers, so more light generally means happier plants. Be cautious of intense midday sun in very hot climates!
Equipment Needed Before Transplanting Sand Aster
Gardening Gloves
To safeguard your hands while handling soil and plants.
Shovel or Spade
For excavating and preparing new planting sites.
Watering Can or Hose
To hydrate the plant before and after its relocation.
Pruning Shears
To trim any damaged roots or foliage.
Wheelbarrow or Garden Cart
For moving the plant and soil efficiently.
Garden Trowel
For refining the planting hole and shifting small amounts of soil.
Root Ball Cloth or Burlap
To secure and protect the root ball during transit (if necessary).
Mulch
To maintain soil moisture and regulate temperature post-planting.
Method for Removing Sand Aster from Soil
Method for Removing Sand Aster from Soil
From Ground: First, moisten the soil around the sand aster plant. Then, use a shovel or spade to dig a wide trench around the plant, ensuring the root ball remains intact. Carefully work the spade beneath the root ball to lift the plant from its original spot.From Pot: Start by watering the sand aster plant to facilitate the root ball's removal. Tilt the pot sideways and gently tap to loosen the plant. Grasp the plant's base and carefully slide the root ball out, supporting the top with your other hand.From Seedling Tray: Water the seedlings to moisten the soil, which helps prevent root damage. Use a garden trowel or spoon to carefully extract each seedling, ensuring a soil clump remains with the roots to minimize disturbance.
Detailed Guide for Transplanting Sand Aster
Preparation
Gently water the sand aster plant the day prior to transplanting to ensure the root ball is moist, making removal easier and reducing plant stress.
Digging the New Hole
Excavate a hole in the ground that is twice the width of the root ball and equal in depth, allowing roots ample space to spread.
Root Ball Inspection
Carefully remove the sand aster from its initial location and examine the root ball. Trim any broken or damaged roots with pruning shears to promote new growth.
Planting
Position the sand aster into the new hole, ensuring it sits at the same soil depth as before, and gently spread its roots. Begin refilling the hole with soil, firming it around the plant to eliminate air pockets.
Watering
Thoroughly water the sand aster after transplanting to settle the soil around the roots and aid in recovery from transplant shock.
Provide Support
Stake the sand aster if needed, to offer stability while the roots establish themselves in the new environment.
Applying Mulch
Spread a layer of mulch around the base of the sand aster to conserve moisture, keep roots warm, and suppress weed growth.
Post-Transplant Care for Sand Aster
Watering
Maintain consistent soil moisture for sand aster during its first growing season to aid establishment. Avoid allowing the soil to dry out completely or become waterlogged.
Staking
Periodically check and adjust any supports as sand aster grows to ensure effectiveness and prevent damage.
Pruning
Remove any damaged or diseased stems from sand aster to encourage healthy development and proper plant shape.
Mulch Observation
Monitor the mulch layer to maintain an appropriate depth, typically 2-3 inches, and pull it back if it gets too close to the plant stems.
Resolving Common Issues with Sand Aster Transplantation
Why is my sand aster wilting after transplanting?
Wilting can be a sign of transplant shock. Ensure thorough watering after transplanting, but avoid overwatering. A temporary shade cover can help reduce stress.
When is the optimal time to transplant sand aster?
The best time is when the soil warms, typically in early to mid-spring. This allows sand aster to establish before hot weather arrives.
What spacing should I use for my sand aster plants?
Aim for approximately 12-18 inches (30-45 cm) between each sand aster to provide adequate space for growth and access to light and nutrients.
What soil conditions does sand aster prefer for transplantation?
For best results, transplant sand aster into well-draining, fertile soil with a neutral to slightly alkaline pH.
How deep should I plant sand aster's roots?
The roots of sand aster should be planted at the same depth as they were in their previous container or location. Planting too deep or shallow can stress the plant.
Should I fertilize sand aster after transplanting?
Wait 2-4 weeks before fertilizing sand aster to prevent damage to tender roots. Use a balanced, slow-release fertilizer to promote growth.
What indicates successful sand aster transplantation?
New growth is a clear indicator of successful transplantation. Look for sand aster producing fresh leaves or developing new roots.
How much sunlight does sand aster need after transplanting?
Post-transplant, sand aster requires full sun to partial shade. Insufficient light can lead to weak foliage, while excessive sun can dehydrate the plant.
Can transplanting sand aster in clay soil cause problems?
Yes, clay soil may retain too much moisture and drain poorly. If necessary, amend the soil with organic material to improve drainage before transplanting.
Why are the leaves of my sand aster turning yellow?
Yellow leaves may suggest overwatering or poor drainage. Check the soil's moisture level and adjust watering as needed. Also, ensure the planting area drains well.


