How to Prune Sand aster?
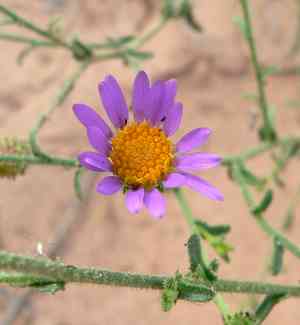
Sand aster, a perennial wildflower, is distinguished by its downy foliage and violet blossoms. To stimulate continuous flowering and sustain plant vitality, routinely remove spent blooms. The most effective time for trimming is in spring and summer, after each flowering period. In early spring, trim back mature growth to foster robust new stems. Refrain from extensive pruning; instead, selectively remove congested stalks. Advantages of pruning encompass better air circulation, decreased susceptibility to disease, and heightened aesthetic quality.
Advantages of Trimming Sand Aster
Advantages of Trimming Sand Aster
Trimming sand aster promotes strong development and maintains its desired shape. This prevents it from overrunning garden areas, while enhancing its overall vitality and visual appeal.
Optimal Period for Trimming Sand Aster
Optimal Period for Trimming Sand Aster
Trimming sand aster in spring or early summer is ideal because this is when the plant enters its active growth phase, enabling it to recover quickly from cuts and minimize stress or disease risk. Spring trimming stimulates new growth, maintains plant form, and removes any dead or damaged stems from winter. Early summer trimming encourages robust flowering, as sand aster blooms in late summer and fall. Avoid late summer or fall trimming, as this can stimulate new growth that may not harden off before winter, making the plant vulnerable to cold damage.
Tools Required for Trimming Sand Aster
Bypass Pruners
For accurate cuts and to prevent harm to the remaining stems of sand aster, bypass pruners are perfect. They operate like scissors with two curved blades passing each other to provide a clean cut, crucial for fostering healthy growth in sand aster.
Gardening Shears
For shaping and trimming the foliage of sand aster without harming the plant, gardening shears are useful. They allow for quick and easy snipping of the plant's many small stems and can also handle thin woody material.
Pruning Saw
For larger stems that may appear on more mature sand aster specimens, a pruning saw can be practical. It enables the removal of stems too thick for pruners or shears to handle without undue strain on the tool or damage to the plant.
How to Trim Sand Aster
Identify and Remove Diseased Parts
Examine sand aster thoroughly for any disease signs on leaves and stems. Carefully remove diseased leaves and stems using clean, sharp pruning shears to prevent infection spread.
Trim Withered Leaves
Locate withered or dead leaves on sand aster that no longer contribute to the plantâs growth or appearance. Snip these leaves off at their base, ensuring minimal harm to surrounding foliage.
Clean Cut Diseased Stems
Make clean cuts on diseased stems of sand aster just above a healthy leaf node or bud to encourage new growth. Ensure cuts are made at a 45-degree angle to facilitate water runoff and prevent disease re-entry.
Dispose of Infected Material
Collect all removed parts, such as diseased leaves and stems. Dispose of them properly, away from healthy plants, to prevent potential disease spread.
Sanitize Tools
Sanitize pruning tools after each use to eliminate the risk of spreading pathogens to other parts of sand aster or to other garden plants. Use a solution of 1 part bleach to 9 parts water for effective disinfection.
Common Trimming Errors with Sand Aster
Excessive Trimming
Removing too much foliage from sand aster at once can stress the plant, hindering its growth and flower production. This error can lead to poor plant health and fewer blooms.
Neglecting Deadheading
Sand aster benefits from removing spent flowers, but a common mistake is not deadheading, which can result in less vigorous blooming the next season as the plant may prioritize seed production.
Incorrect Cuts
Making cuts too close to the main stem or with dirty tools can invite disease and damage sand aster. Sloppy trimming techniques can lead to jagged cuts that may not heal properly.
Lack of Tool Maintenance
Using dull or dirty trimming tools on sand aster can cause tearing or disease spread, instead of clean cuts that heal quickly.
Ignoring Plant Shape
Random or thoughtless cutting without considering sand aster's natural shape can result in a less aesthetically pleasing form and may disrupt the plant's natural growth pattern.
General Trimming Advice for Sand Aster
Sharp Tools
Always use sharp, clean pruners or scissors for precise cuts. This prevents damage to sand aster and ensures quick healing of trimmed areas.
Angled Cuts
Make cuts at a 45-degree angle just above a leaf node or branching point to promote healthy regrowth in sand aster. This angle allows for water runoff and reduces disease risk.
Gradual Trimming
For sand aster, trim gradually throughout the growing season instead of all at once. This approach allows the plant to maintain its energy and encourages continuous blooming.
Deadheading
Regularly remove dead or faded flowers from sand aster to encourage new blooms and prevent the plant from expending energy on seed production unless seed collection is desired.
Monitor Growth
Keep an eye on sand aster's growth to determine its trimming needs. This ensures that trimming promotes healthy growth and that any specific attention to its form or flowering can be managed effectively.


