How to Transplant Spurge-olive?
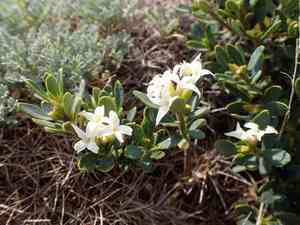
For Spurge-olive, the most favorable period for relocation spans from the beginning to the end of spring, and also during the cooler months from late autumn to early winter. Choose a location that receives ample sunlight and possesses soil that drains effectively to encourage robust development and facilitate a smooth transition.
What Preparations are Needed Before Transplanting Spurge-olive?
What is the Ideal Time for Transplanting Spurge-olive?
The best period for relocating spurge-olive, a perennial, spans from early to late spring or from late autumn to early winter. These times offer mild temperatures and ample soil moisture, aiding root establishment. Moving the plant during these windows reduces stress and encourages healthier development before harsh weather arrives.
How Much Space Should You Leave Between Spurge-olive Plants?
For optimal development, spurge-olive should be replanted 2-3 feet (0.6-0.9 meters) apart. This spacing provides each plant sufficient room to thrive without competing for resources.
What is the Best Soil Mix for Spurge-olive Transplanting?
Prior to moving spurge-olive, select soil that drains well and enrich it with a balanced, all-purpose fertilizer to supply essential nutrients.
Where Should You Relocate Your Spurge-olive?
Choose a site that receives full sun to partial shade, ensuring spurge-olive gets ample light for peak growth.
What Equipments Should You Prepare Before Transplantation Spurge-olive?
Gardening Gloves
To safeguard your hands while handling soil and plants.
Shovel or Spade
For excavating and extracting the plant from the ground.
Trowel
Useful for working in confined areas, such as pots or seedling containers.
Pruning Shears
To trim any damaged or overly long roots.
Watering Can
To hydrate the plant before and after its relocation.
Wheelbarrow
To move the plant if it is particularly large or heavy.
Mulch
To assist in retaining soil moisture after planting.
How Do You Remove Spurge-olive from the Soil?
How Do You Remove Spurge-olive from the Soil?
From Ground: First, moisten the spurge-olive plant's soil. Then, dig a wide trench around the plant with a shovel or spade, ensuring the root ball remains intact. Carefully work the spade beneath the root ball to lift the plant from its original spot.From Pot: Begin by gently watering the spurge-olive plant to loosen the soil. Turn the pot sideways and tap the base to slide the plant out. If it resists, use a trowel to carefully loosen the soil around the edges.From Seedling Tray: Water the spurge-olive seedlings to dampen the soil. Using a trowel, gently lift the seedlings from below, taking care not to harm the delicate roots.
Step-by-Step Guide for Transplanting Spurge-olive
Prepare the Site
Ensure the new location is ready with a hole approximately twice the size of the plant's root ball.
Remove the Plant
Using the extraction methods described above, carefully take out the spurge-olive plant from its initial spot.
Trim the Roots
Use pruning shears to cut off any damaged or excessively long roots. This aids the plant in establishing itself more easily.
Transplant the Plant
Place the spurge-olive plant into the prepared hole, ensuring it sits at the same depth as it was previously. Fill the hole with soil and gently press down to eliminate air pockets.
Water the Plant
Thoroughly water the plant immediately after transplanting to settle the soil around its roots.
Add Mulch
Spread a layer of mulch around the plant's base to help retain moisture.
How Do You Care For Spurge-olive After Transplanting?
Watering
Keep the soil around the spurge-olive consistently damp, but not waterlogged, for the initial weeks post-transplant to encourage strong root development.
Monitoring
Regularly inspect the plant for signs of transplant shock, such as wilting or yellowing leaves, and address issues as needed.
Mulching
Ensure the mulch layer is maintained to preserve soil moisture and regulate soil temperature.
Protection
If transplanting during hot weather, consider providing temporary shade for the first few days to prevent sunburn.
Troubleshooting Common Issues with Spurge-olive Transplantation.
What is the best season for transplanting spurge-olive?
Early to late spring, and late fall to early winter are the ideal times for relocating spurge-olive.
How far apart should spurge-olive be spaced?
Position your spurge-olive plants 2-3 feet (60-90 cm) apart to allow sufficient room for growth.
How to prepare soil for transplanting spurge-olive?
Ensure well-draining soil, enriched with organic matter, and adjust pH to slightly acidic for spurge-olive.
What are the watering needs after transplanting spurge-olive?
Water spurge-olive thoroughly right after transplanting and keep soil consistently moist but not waterlogged.
How to minimize transplant shock for spurge-olive?
Transplant spurge-olive during cooler parts of the day and avoid disturbing roots excessively.
What sunlight conditions does spurge-olive need after transplant?
After transplanting, ensure spurge-olive receives full sun to partial shade for optimal growth.
Should I fertilize spurge-olive immediately after transplanting?
Wait a few weeks after relocating spurge-olive before applying a balanced, slow-release fertilizer.
How deep should spurge-olive be planted?
Plant spurge-olive at the same depth it was originally growing, ensuring the root ball is covered.
What type of mulch is best for spurge-olive post-transplant?
Use organic mulch like bark or compost around spurge-olive to retain moisture and regulate soil temperature.
When to prune spurge-olive after transplanting?
Prune spurge-olive minimally right after transplant; wait until it establishes to perform major pruning.



