How to Transplant Cytisus decumbens?
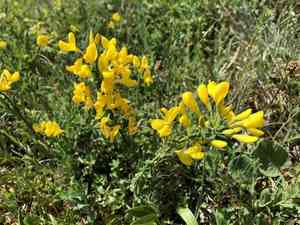
Relocating cytisus decumbens is most effective between the beginning and end of spring, owing to advantageous growing circumstances. Select a bright, adequately draining spot for peak performance. Verify that the soil is fertile and prevent disrupting the roots to ensure successful integration.
What Preparations are Needed Before Transplanting Cytisus Decumbens?
What is the Ideal Time for Transplanting Cytisus Decumbens?
The best time to move cytisus decumbens is from early to late spring. During this period, the ground has warmed, making root establishment easier. Transplanting in this season ensures the perennial gets enough rain, which helps root growth and lessens transplant shock. Also, mild temperatures encourage growth, leading to a strong, healthy plant.
How Much Space Should You Leave Between Cytisus Decumbens Plants?
When relocating cytisus decumbens, position each plant 24-36 inches (60-90 cm) apart. This provides them with sufficient room to grow and thrive without competing for resources.
What is the Best Soil Mix for Cytisus Decumbens Transplanting?
For cytisus decumbens, utilize well-draining soil combined with a balanced base fertilizer. A blend of sandy loam and organic compost works best to supply the necessary nutrients.
Where Should You Relocate Your Cytisus Decumbens?
Place cytisus decumbens in a spot that receives full sun. They flourish with 6-8 hours of direct sunlight daily, which promotes robust and healthy growth.
What Equipments Should You Prepare Before Transplantation Cytisus Decumbens?
Spade or Shovel
For digging around and beneath the plant.
Gardening Gloves
To protect your hands while working with the soil and plant.
Watering Can or Hose
To water the plant before and after transplanting.
Garden Fork
For loosening the soil, especially in compacted ground.
Trowel
Useful for working in smaller spaces or making precise digs.
Mulch
For helping to retain soil moisture after transplanting.
Pruners
To trim any damaged or dead parts of the plant.
How Do You Remove Cytisus Decumbens from the Soil?
How Do You Remove Cytisus Decumbens from the Soil?
From Ground: First, water the cytisus decumbens plant to dampen the soil. Then, dig a wide trench around the plant using a shovel or spade, ensuring the plant's root ball remains intact. Carefully work the spade under the root ball to lift the plant from its original location.From Pot: Water the cytisus decumbens plant thoroughly. Gently tap the sides of the pot to loosen the soil. Carefully slide the plant out, supporting the root ball with your hand to avoid any damage.From Seedling Tray: Water the seedlings well. Use a small trowel or spoon to carefully lift each seedling out, ensuring you keep as much of the soil around the roots as possible.
Step-by-Step Guide for Transplanting Cytisus Decumbens
Prepare Planting Hole
Dig a hole that is slightly larger than the root ball of the cytisus decumbens. Ensure the hole is deep enough so that the plant will sit at the same depth as it was in its original location.
Amend the Soil
If needed, add some compost or organic matter to the soil to provide a nutrient-rich environment for cytisus decumbens.
Set the Plant
Place the cytisus decumbens into the hole, ensuring it is upright and at the correct depth. Spread out the roots if necessary.
Backfill the Hole
Gently fill the hole with soil, pressing lightly to remove air pockets. Make sure the plant is stable and upright.
Water the Plant
Give the cytisus decumbens a good watering to help settle the soil and integrate the plant into its new location.
Apply Mulch
Add a layer of mulch around the base of the cytisus decumbens to help retain moisture and control weeds.
How Do You Care For Cytisus Decumbens After Transplanting?
Watering
Keep the soil around the cytisus decumbens consistently moist, but not soggy, for the first few weeks after transplanting to help establish strong roots.
Pruning
Remove any damaged or dead leaves or branches to encourage healthy growth.
Monitoring
Regularly check for signs of stress such as wilting or yellowing leaves and adjust care as necessary.
Troubleshooting Common Issues with Cytisus Decumbens Transplantation.
When is it best to transplant cytisus decumbens?
Transplant cytisus decumbens from early to late spring for optimal growth and establishment.
How far apart should I plant cytisus decumbens?
Space cytisus decumbens plants 24-36 inches (60-90 cm) apart for healthy growth.
What soil type does cytisus decumbens prefer?
Cytisus decumbens thrives in well-drained, slightly acidic to neutral soil.
How do I prepare cytisus decumbens for transplanting?
Water cytisus decumbens thoroughly the day before to ease removal and reduce stress.
How deep should I plant cytisus decumbens?
Plant cytisus decumbens at the same depth as its original container to avoid root stress.
What should I do if cytisus decumbens's leaves yellow after transplanting?
Ensure adequate water and check for soil drainage issues. Yellowing often indicates transplant shock.
How often should I water cytisus decumbens after transplanting?
Water cytisus decumbens regularly for the first few weeks to establish a strong root system.
How can I improve cytisus decumbens's transplant success?
Add organic compost to the transplant hole to enrich the soil and support root development.
Can cytisus decumbens handle full sun?
Yes, cytisus decumbens prefers full sun for at least 6 hours a day.
Cytisus decumbens's roots seem damaged, what can I do?
Prune damaged roots slightly and place cytisus decumbens in a sheltered location with indirect sunlight until it recovers.



