How to Transplant Reeves' bladderfern?
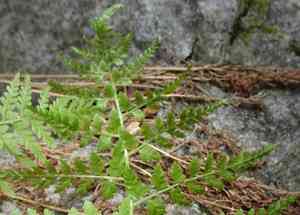
Reeves' bladderfern is best relocated from early to mid-spring, enabling it to settle prior to the summer season. Select a dim, adequately drained spot featuring consistently damp earth. Guarantee minimal disruption to its root system for peak development.
What Preparations are Needed Before Relocating Reeves' Bladderfern?
What is the Ideal Time for Relocating Reeves' Bladderfern?
Move reeves' bladderfern from early to late spring, when ground temperatures encourage root development. This timing allows the plant to adapt before summer's heat or winter's cold, improving survival rates and growth. The mild weather and increased rainfall in spring offer prime conditions for successful relocation.
How Much Space Should You Leave Between Reeves' Bladderfern Plants?
When relocating reeves' bladderfern, ensure adequate spacing between each plant, ideally 12-18 inches (30-45 cm) apart. This promotes healthy growth without overcrowding.
What is the Best Soil Mix for Reeves' Bladderfern Relocation?
Prepare well-draining soil enriched with compost for reeves' bladderfern. A pH range of 6.0-7.5 is optimal. Incorporating a balanced fertilizer like 10-10-10 (N-P-K) will give them a strong start.
Where Should You Relocate Your Reeves' Bladderfern?
Select a site for reeves' bladderfern that provides partial to full shade. Excessive sun exposure can damage the foliage, making a shaded or semi-shaded spot perfect.
What Equipment Should You Prepare Before Relocating Reeves' Bladderfern?
Gardening Gloves
To safeguard your hands while handling soil and the plant.
Shovel or Spade
To excavate the plant and prepare the new planting site.
Trowel
For more precise digging and adjusting soil around the plant's roots.
Watering Can or Hose
To hydrate the plant before and after its move.
Mulch
To aid in retaining soil moisture and regulating temperature.
Organic Compost
To enrich the soil at the new location.
How Do You Extract Reeves' Bladderfern from the Soil?
How Do You Extract Reeves' Bladderfern from the Soil?
From Ground: First, hydrate the reeves' bladderfern plant to moisten the soil. Next, dig a wide trench around the plant using a shovel or spade, ensuring the plant's root ball remains intact. Carefully work the spade beneath the root ball to lift the plant from its original spot.From Pot: Gently tap the pot's sides to loosen the soil. Invert the pot while supporting the plant with your hand and carefully slide it out. If roots are matted or circling, gently untangle them.From Seedling Tray: Water seedlings thoroughly before removal. Use a trowel or your hand to gently lift each seedling, taking care not to excessively disturb the roots. Handle seedlings by their leaves, not stems, to prevent harm.
Step-by-Step Guide for Relocating Reeves' Bladderfern
Site Preparation
Choose a suitable location that meets the previously mentioned requirements. Loosen the soil in the planting area and mix in organic compost to enhance fertility and drainage.
Digging the New Hole
Excavate a hole that is twice as wide and as deep as the root ball of the reeves' bladderfern plant. This provides ample room for root expansion.
Placing the Plant
Position the reeves' bladderfern plant in the hole, ensuring it sits at the same depth as it was in its previous spot. Backfill the hole with soil, gently firming it around the roots.
Watering
Thoroughly water the plant after planting to settle the soil around the roots and eliminate air pockets.
Applying Mulch
Apply mulch around the plant's base to help retain moisture and protect the roots. Ensure the mulch is kept a few inches away from the stem to prevent rot.
How Do You Care For Reeves' Bladderfern After Relocation?
Watering
Keep the soil around the reeves' bladderfern consistently moist, but not waterlogged, for the initial weeks post-relocation to aid in strong root establishment.
Monitoring
Watch for any indications of relocation shock such as wilting or yellowing foliage. Regular checks will allow for prompt action if issues arise.
Weeding
Regularly remove any competing weeds that might vie with your reeves' bladderfern for water and nutrients.
Fertilizing
After the first few weeks, consider applying a balanced fertilizer to encourage healthy growth. Follow the fertilizer packaging instructions for optimal results.
Troubleshooting Common Issues with Reeves' Bladderfern Relocation.
When is the best time to relocate reeves' bladderfern?
Early to late spring, late autumn, or winter months are ideal for moving reeves' bladderfern.
How much space should I leave between reeves' bladderfern plants?
Allow 12-18 inches (30-45 cm) between each reeves' bladderfern for proper development.
What type of soil is best for relocating reeves' bladderfern?
Reeves' bladderfern thrives in well-draining, fertile soil with a slightly acidic to neutral pH.
How do I prepare the soil for relocating reeves' bladderfern?
Loosen the soil to a depth of 10 inches (25 cm) and incorporate organic compost.
How should I water reeves' bladderfern after relocating?
Water thoroughly immediately after relocation and maintain consistently moist soil without waterlogging.
Should I fertilize reeves' bladderfern when relocating?
It's best to mix organic compost into the soil; avoid excessive fertilization to prevent root burn.
How do I handle reeves' bladderfern roots during relocation?
Handle reeves' bladderfern roots gently, ensuring minimal damage, and avoid excessively disturbing the root ball.
What are the immediate post-relocation care tips for reeves' bladderfern?
Provide shade for a few days, ensure moderate watering, and monitor for signs of relocation shock.
How can I prevent relocation shock for reeves' bladderfern?
Relocate reeves' bladderfern in cooler months and ensure consistent watering and initial shading to reduce shock.
Can I relocate reeves' bladderfern in the peak summer?
Avoid relocating reeves' bladderfern in peak summer; extreme heat can cause stress and damage the plant.



