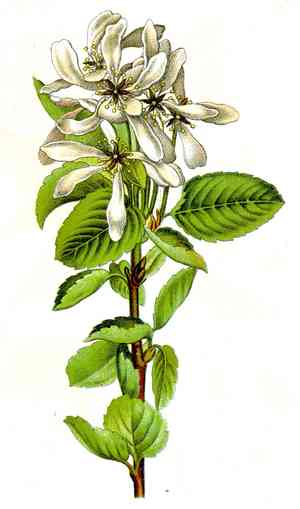
How to Transplant Small-leaved cotoneaster?
The optimal period for transplanting small-leaved cotoneaster is from late spring to early summer, a time of vigorous growth when their root systems recuperate quickly. Select a location that receives ample sunlight to partial shade, featuring soil that drains effectively, to guarantee a successful establishment. Exercise caution during the transfer to safeguard fragile root structures.
What Preparations are Needed Before Transplanting Small-leaved Cotoneaster?
What is the Ideal Time for Transplanting Small-leaved Cotoneaster?
The optimal period for relocating small-leaved cotoneaster spans from the peak of mid-spring to the gentle start of early summer. This timing facilitates root establishment prior to the onset of harsh temperatures, providing small-leaved cotoneaster with a critical developmental advantage. By transplanting during this season, small-leaved cotoneaster benefits from moderate weather, which is perfect for root growth without the stress of extreme heat or cold. This strategic scheduling ensures a strong beginning for small-leaved cotoneaster, promoting vigorous development.
How Much Space Should You Leave Between Small-leaved Cotoneaster Plants?
When planting your small-leaved cotoneaster, allow ample room for expansion. Ideally, position them 3-4 feet (0.9-1.2 meters) apart. This spacing guarantees sufficient air circulation and light for them to flourish. Happy planting!
What is the Best Soil Mix for Small-leaved Cotoneaster Transplanting?
For small-leaved cotoneaster, a rich, well-draining soil is most suitable. Avoid heavy clay soil. Regarding base fertilizer, a slow-release option enriched with organic matter would be perfect. This will nourish your plant and maintain its health!
Where Should You Relocate Your Small-leaved Cotoneaster?
Consider choosing a site that receives full sun to partial shade for your small-leaved cotoneaster. They appreciate sunlight but also benefit from some afternoon shade. Discovering that ideal spot can be an enjoyable task, Good luck!
What Equipments Should You Prepare Before Transplantation Small-leaved Cotoneaster?
Gardening Gloves
For hand protection when working with soil and the plant.
Shovel or Spade
Used for digging and moving earth during removal and replanting.
Pruning Shears
To trim any unhealthy or excessively large branches of small-leaved cotoneaster.
Bucket or pot
To temporarily hold the small-leaved cotoneaster plant after its removal from its original spot.
Wheelbarrow
For transporting the plant and potting medium.
Watering Can
To adequately water the small-leaved cotoneaster post-planting and during its initial establishment phase.
How Do You Remove Small-leaved Cotoneaster from the Soil?
How Do You Remove Small-leaved Cotoneaster from the Soil?
From Ground: Ensure you water the small-leaved cotoneaster plant the day prior to transplanting, as this facilitates easier removal. Dig a wide trench around the plant using a spade or shovel, keeping the root ball intact. Once the soil is loosened, insert your shovel beneath the root ball and lift the plant from the ground. Place it in a bucket or pot for transport.From Pot: Water the small-leaved cotoneaster plant a day before to simplify the extraction process. Turn the pot on its side and gently ease the plant out, ensuring the root ball remains intact. If the plant resists, you might need to tap the pot's bottom to loosen it.From Seedling Tray: Water the small-leaved cotoneaster seedlings thoroughly before transplanting. Gently grasp the plant's stem between your thumb and forefinger and carefully remove it from the tray, keeping the roots and attached soil undisturbed.
Step-by-Step Guide for Transplanting Small-leaved Cotoneaster
Preparation
Ensure the new planting location is ready before extracting the small-leaved cotoneaster by digging a hole twice as wide and as deep as the root ball. Loosely spread soil at the bottom of the hole.
Transplanting
Place the root ball of the small-leaved cotoneaster into the planting hole. Make sure the top of the root ball is level with the soil surface. Backfill around the plant with soil, and gently firm it.
Watering
Use a watering can to thoroughly water the small-leaved cotoneaster immediately after planting. This will help settle the soil around the roots.
Pruning
Trim any damaged or excessively large branches of the small-leaved cotoneaster with pruning shears. This will help the plant prioritize root establishment.
How Do You Care For Small-leaved Cotoneaster After Transplanting?
Watering
Maintain an appropriate watering regimen for the small-leaved cotoneaster. The soil should be kept consistently moist, but not waterlogged. Deep watering once a week is usually sufficient, though this may vary based on your climate.
Inspection
Regularly check the small-leaved cotoneaster for any indications of disease or pest infestation. Early detection is vital in preventing the spread and worsening of any potential issue.
Mulching
Apply a layer of organic mulch around the base of the small-leaved cotoneaster. This can help to retain soil moisture and suppress weeds.
Staking
If the small-leaved cotoneaster plant is tall or unstable, stakes can be used to provide support and keep the plant upright during windy conditions or as the plant becomes established.
Troubleshooting Common Issues with Small-leaved Cotoneaster Transplantation.
What's the best time of year to transplant small-leaved cotoneaster?
The optimal period for transplanting small-leaved cotoneaster is from late spring to early fall.
How much space or distance should I keep between small-leaved cotoneaster while transplanting?
You should maintain a distance of 3-4 feet (90-120 cm) between each small-leaved cotoneaster during transplantation. This allows for optimal growth space.
Is there a specific depth I should dig when transplanting small-leaved cotoneaster?
Yes, the hole should be twice the width and the same depth as the root ball of small-leaved cotoneaster. You want to provide ample room for growth.
Which type of soil works best for small-leaved cotoneaster?
Small-leaved cotoneaster thrives in well-drained, moist soil. It can tolerate various soil types, but adding compost can boost soil fertility.
How often should I water small-leaved cotoneaster after transplanting?
Water small-leaved cotoneaster thoroughly immediately after transplanting. Afterward, water it regularly but moderately, ensuring the soil does not become waterlogged.
Do I need to prune small-leaved cotoneaster after transplanting?
Pruning is not necessary right after transplanting. Allow small-leaved cotoneaster to establish itself first. However, pruning for shape maintenance can be done in late winter or early spring.
Does small-leaved cotoneaster need full sun or partial shade after transplanting?
Small-leaved cotoneaster can tolerate both full sun and partial shade. However, it might prefer a partially shaded location after transplanting to minimize transplant shock.
What should I do if the leaves of small-leaved cotoneaster start to wilt after transplanting?
Wilting could indicate transplant shock. Ensure small-leaved cotoneaster is adequately watered and placed in a partially shaded area. It should recover within a few days.
How to prepare small-leaved cotoneaster for transplanting?
Water small-leaved cotoneaster a day before you plan to transplant; this will facilitate easier removal. Also, prune any unhealthy branches or leaves to reduce stress on the plant.
What to do if small-leaved cotoneaster doesn't show new growth after transplanting?
Be patient, small-leaved cotoneaster may take time to establish and exhibit new growth. Ensure it receives sufficient water and sunlight. If still no signs, consider a soil test for potential nutrient deficiencies.


