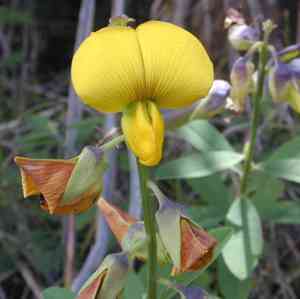
How to Transplant Bladder-senna?
Spring's arrival invigorates gardens, establishing it as an ideal period for establishing bladder-senna in its new environment. Select a bright location featuring adequately draining soilâan inviting base for its root system. Reduce transplant shock through careful manipulation and gradual soil acclimation.
What Preparations are Needed Before Transplanting Bladder-senna?
What is the Ideal Time for Transplanting Bladder-senna?
The optimal period for relocating bladder-senna is during the spring awakening, right after the last frost departs. This season offers milder weather and damp soil, promoting easier root establishment and vigorous development. Moving bladder-senna at this time leverages nature's rejuvenation, giving your plants a head start to thrive, bolstered by ample rainfall and gentle sunlight. Helpful hint: This timing perfectly aligns with bladder-senna's growth cycle, ensuring a smooth transition to their new home. Remember, early action yields the best results, and in gardening, the most beautiful blooms!
How Much Space Should You Leave Between Bladder-senna Plants?
Beginning with layout, spacing is crucial! Provide ample room for bladder-senna. The recommended distance between each plant should be approximately 6-8 feet (about 1.8-2.4 meters). This ensures they have sufficient area to grow and spread, contributing to their overall vitality.
What is the Best Soil Mix for Bladder-senna Transplanting?
Let's not overlook the soil, it's vital! Bladder-senna thrives in well-drained soil enriched with organic matter. A foundational fertilizer, such as a 10-10-10 blend, will greatly benefit once incorporated. Remember, healthy soil leads to a thriving plant!
Where Should You Relocate Your Bladder-senna?
Selecting the correct location is essential. For bladder-senna, aim for a spot that receives full sun to partial shade. This means an area that gets an average of 4-6 hours of direct sunlight daily. The appropriate light will make a significant difference!
What Equipments Should You Prepare Before Transplantation Bladder-senna?
Gardening Gloves
To safeguard your hands from soil and potential injuries while handling the plant and its root system.
Spade or Shovel
These will be indispensable for digging the new planting hole and extracting the plant from its original spot.
Bucket or Wheelbarrow
You will require something to move the bladder-senna plant from its initial location to the new one.
Pruners
For trimming any dead or diseased branches prior to transplanting.
Watering Can or Hose
Necessary for hydrating the plant after transplantation.
Mulch
Needed to cover the surrounding area post-transplant to help maintain soil moisture.
Plant Stake
It can offer support to the bladder-senna plant if it becomes top-heavy following the transplant process.
How Do You Remove Bladder-senna from the Soil?
How Do You Remove Bladder-senna from the Soil?
From Ground: Start by watering the bladder-senna plant the day before removal. This will moisten the soil, making excavation easier. Wearing gloves, use a spade or shovel to dig a wide and deep enough circle around the bladder-senna plant, ensuring you avoid the root ball. Carefully, use the spade to get under the root ball and gently lift the plant. For larger plants, you might need assistance.From Pot: If the bladder-senna plant is in a pot, water it an hour before transferring. This will help loosen the soil. Turn the pot sideways, gently hold the plant by its base, and ease it out. If it's stuck, tap the sides or bottom of the pot to free it.From Seedling Tray: Water the tray, then gently hold each bladder-senna plant by the leaves, not the stem, and pull it from the soil. Carefully shake off excess soil from the roots without causing damage.
Step-by-Step Guide for Transplanting Bladder-senna
Preparation
Once you've chosen the correct site and prepared it accordingly, ensure the hole is twice as wide and the same depth as the bladder-senna plant's root ball.
Placing the Plant
Carefully position the bladder-senna plant into the hole, making sure the top of the root ball is level with the surrounding soil. Fill in the hole around the root ball gently but firmly.
Watering
Thoroughly water the bladder-senna plant after transplanting, ensuring the water penetrates to the root zone. This will aid the roots in establishing and growing in their new home.
Mulching
After the area is saturated, apply a layer of mulch around the transplanted area to help retain moisture and suppress weeds. Leave a small, mulch-free zone around the plant's base for air circulation.
Securing the Plant
Use the plant stake for support if the bladder-senna plant is top-heavy after the transplant process.
How Do You Care For Bladder-senna After Transplanting?
Watering
For the initial few weeks post-transplant, keep the soil slightly damp, checking it every couple of days. It's crucial not to overwater, as this can lead to root rot.
Pruning
Keep an eye on the bladder-senna plant for any dying or dead branches, and trim them off when necessary. This helps direct the plant's energy towards new growth.
Monitoring
Regularly observe the bladder-senna plant for signs of stress or disease. This includes wilted, discolored, or fallen leaves and slow growth. Take appropriate action to treat these symptoms or seek advice from a local nursery if uncertain.
Troubleshooting Common Issues with Bladder-senna Transplantation.
When is the ideal time to transplant bladder-senna?
The optimal time to transplant bladder-senna is between the first and third seasons (S1-S3). Planting at this time allows the plant to mature before colder weather arrives.
What is the ideal space required for transplanting bladder-senna?
You should space your bladder-senna between 6-8 feet (1.83-2.44 meters), which provides each plant ample room to grow and flourish.
Do I need to prune bladder-senna before transplanting?
Yes, it's beneficial to prune bladder-senna before transplanting. Removing a third of the plantâs leaves reduces stress and enables the plant to focus its energy on establishing in the new location.
What should I do if the bladder-senna leaves turn yellow after transplanting?
Yellow leaves might indicate watering problems. Ensure the bladder-senna isn't waterlogged or excessively dry. The soil should be moist, but not soggy.
Why isnât my bladder-senna growing after Iâve transplanted it?
Transplant shock could be the reason. Keep the soil moist and avoid disturbing the plant as much as possible. Also, confirm that the plant is receiving sufficient sunlight and the soil quality is good.
What type of soil does bladder-senna prefer?
Bladder-senna thrives best in well-drained soil. Although it can tolerate various soil types, loamy or sandy soils that maintain good drainage conditions are ideal.
My bladder-senna seem droopy after transplanting, is this normal?
Slight wilting post-transplant is quite common as the plant adapts to its new environment. Maintain appropriate water levels and prevent overcrowding as it may impede growth.
How do I prepare the hole for bladder-senna transplantation?
Dig a hole that's twice as wide and just as deep as the root ball of bladder-senna. Loosening the soil at the bottom of the hole helps the roots to penetrate easily.
How long does it take for bladder-senna to get established after transplanting?
Typically, bladder-senna might take a few weeks to recover from transplant shock and begin new growth. During this period, ensure consistent watering and protect from harsh weather conditions.
How deep should I plant bladder-senna during transplantation?
The bladder-senna should be planted at the same depth it was growing in its previous location. Planting too deep might cause root rot, while planting too shallow might dry out the roots.


